Category: fabrication

  • Making an Iris mechanism

    Making an Iris mechanism

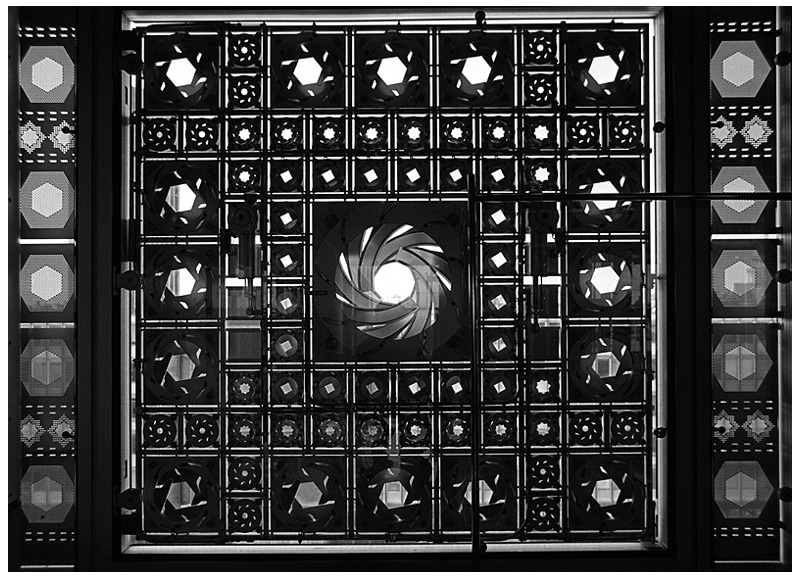
    This is a project in which I attempted to create an iris mechanism. I chose it because, besides the aesthetic quality of it, I find its applications very relevant to me. An iris mechanism can be used as an architectural element (as with the mechanical windows at Nouvel’s Arab Institute in Paris shown below), as well as in the context of installations where light and line of sight need to be manipulated somehow.

    nouvel

    First Prototype

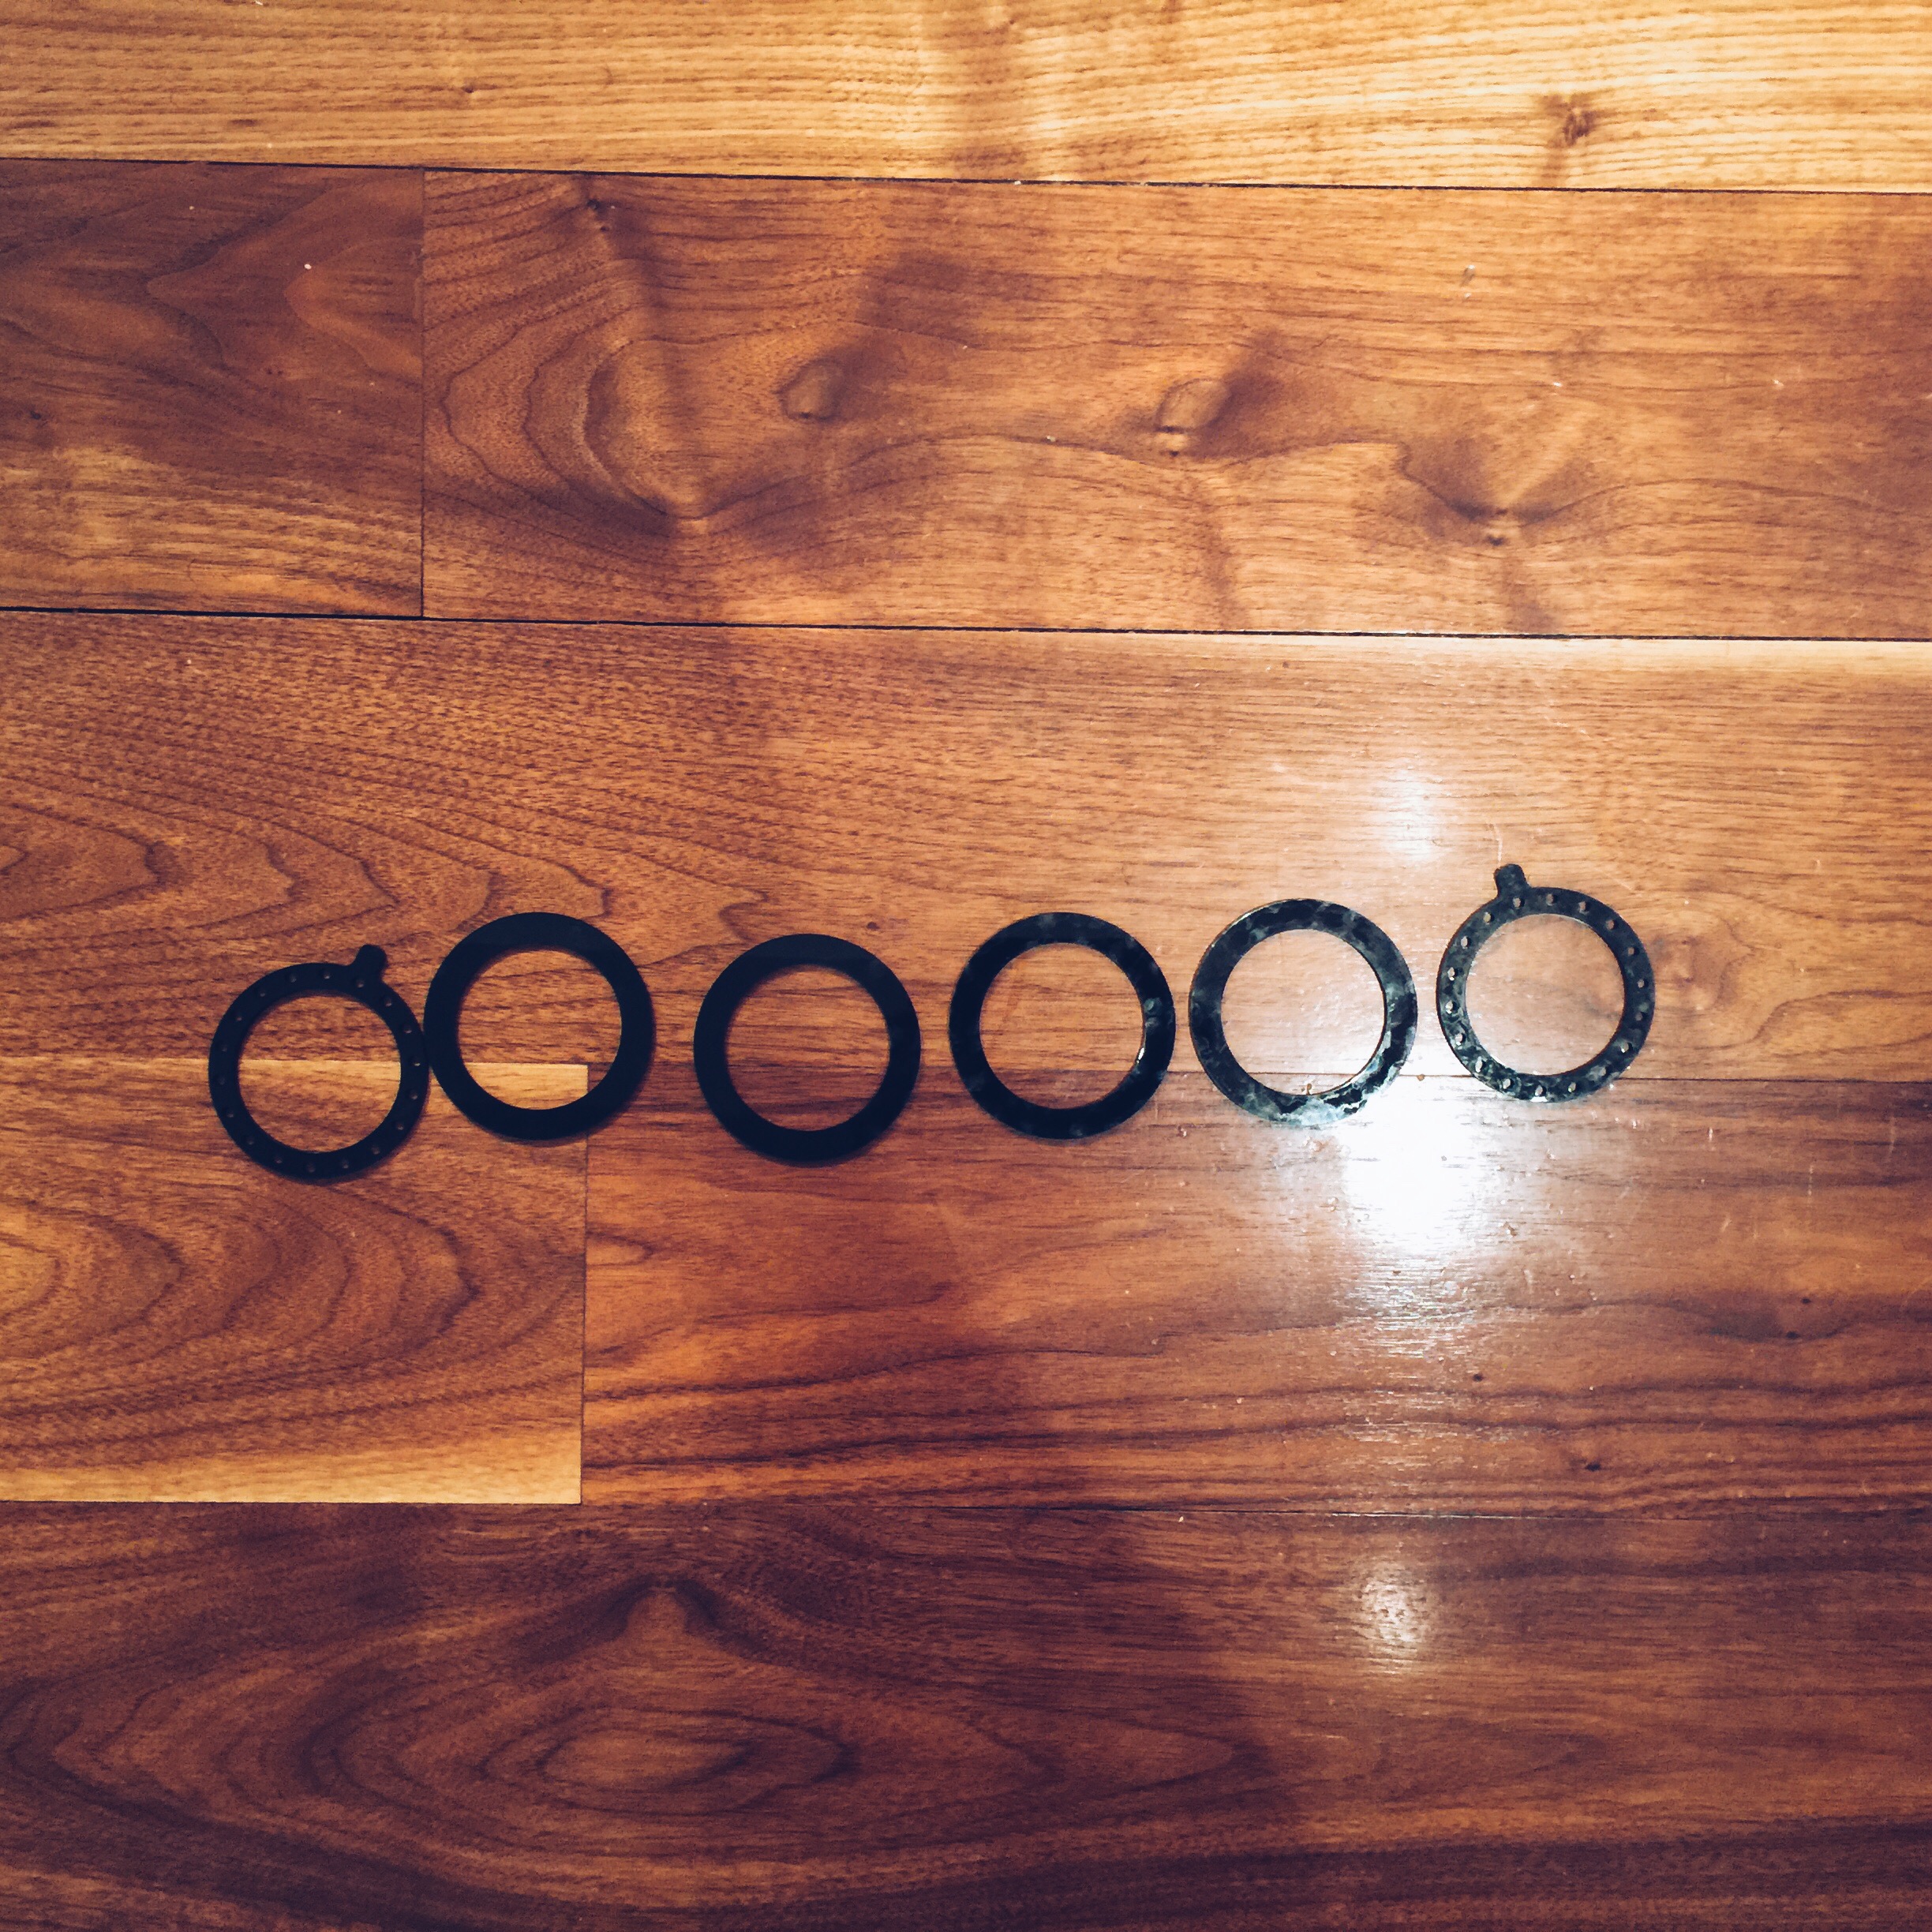
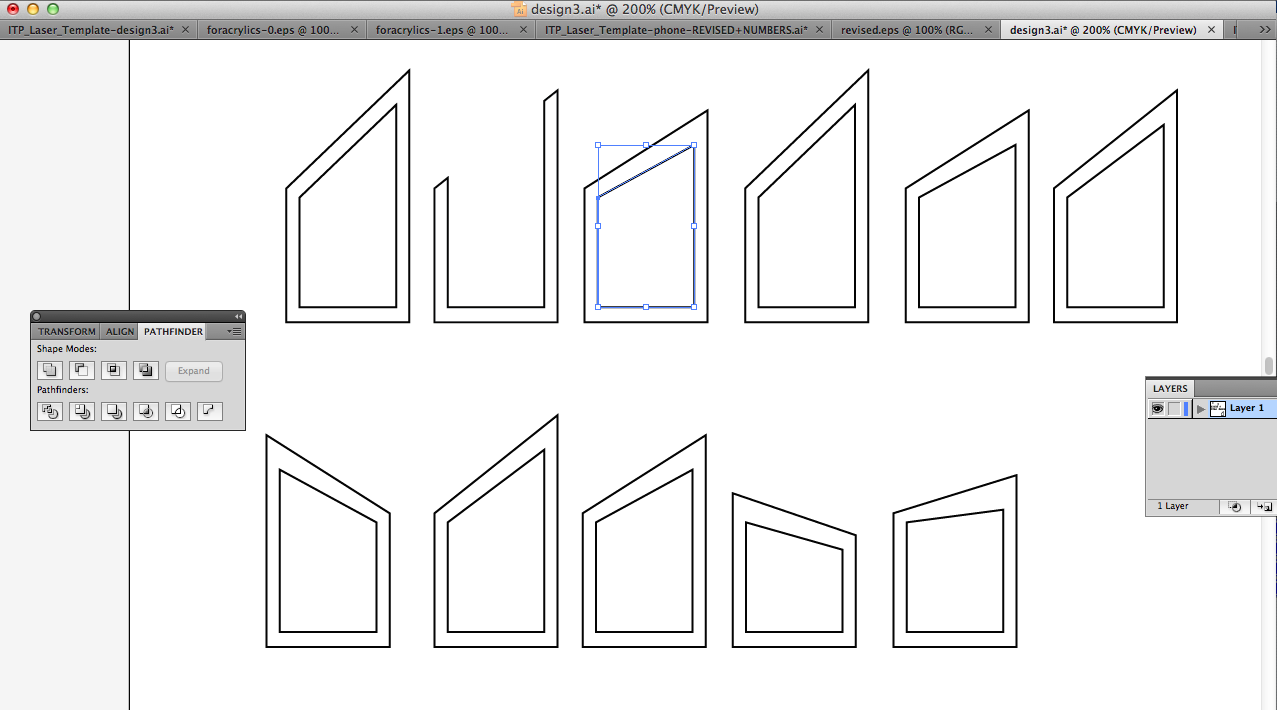
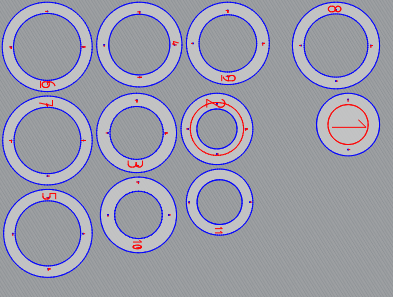
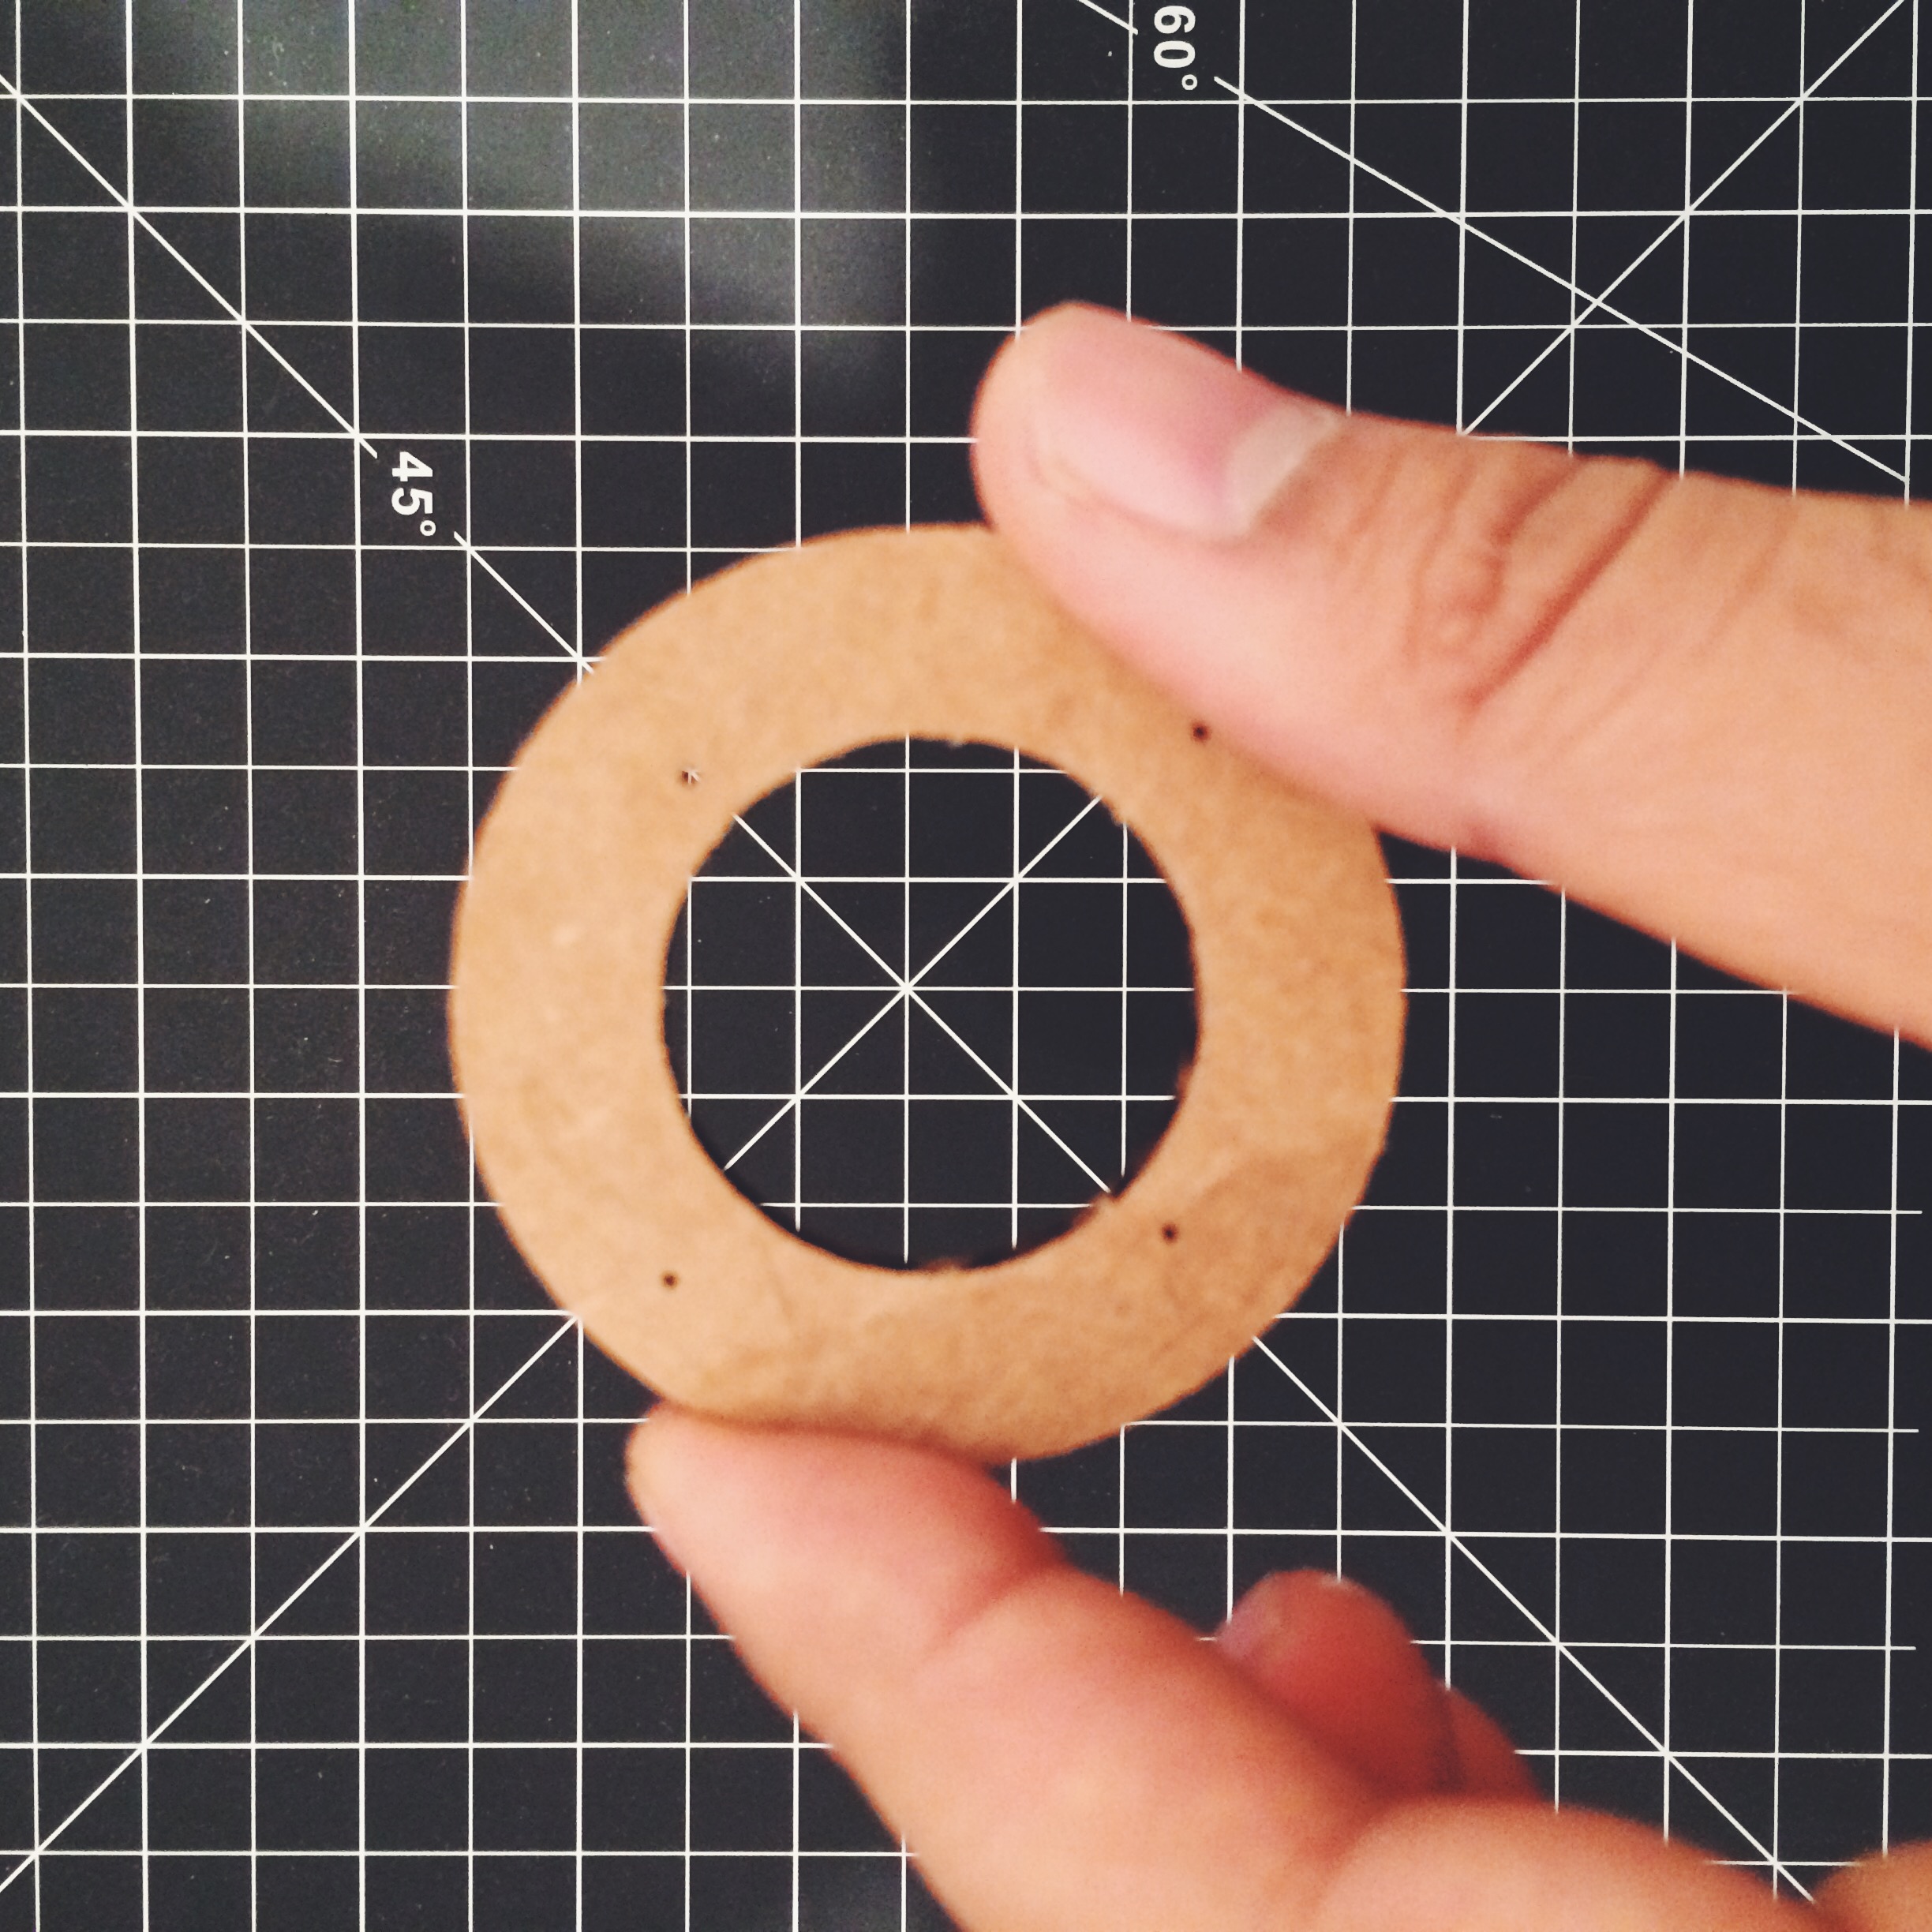
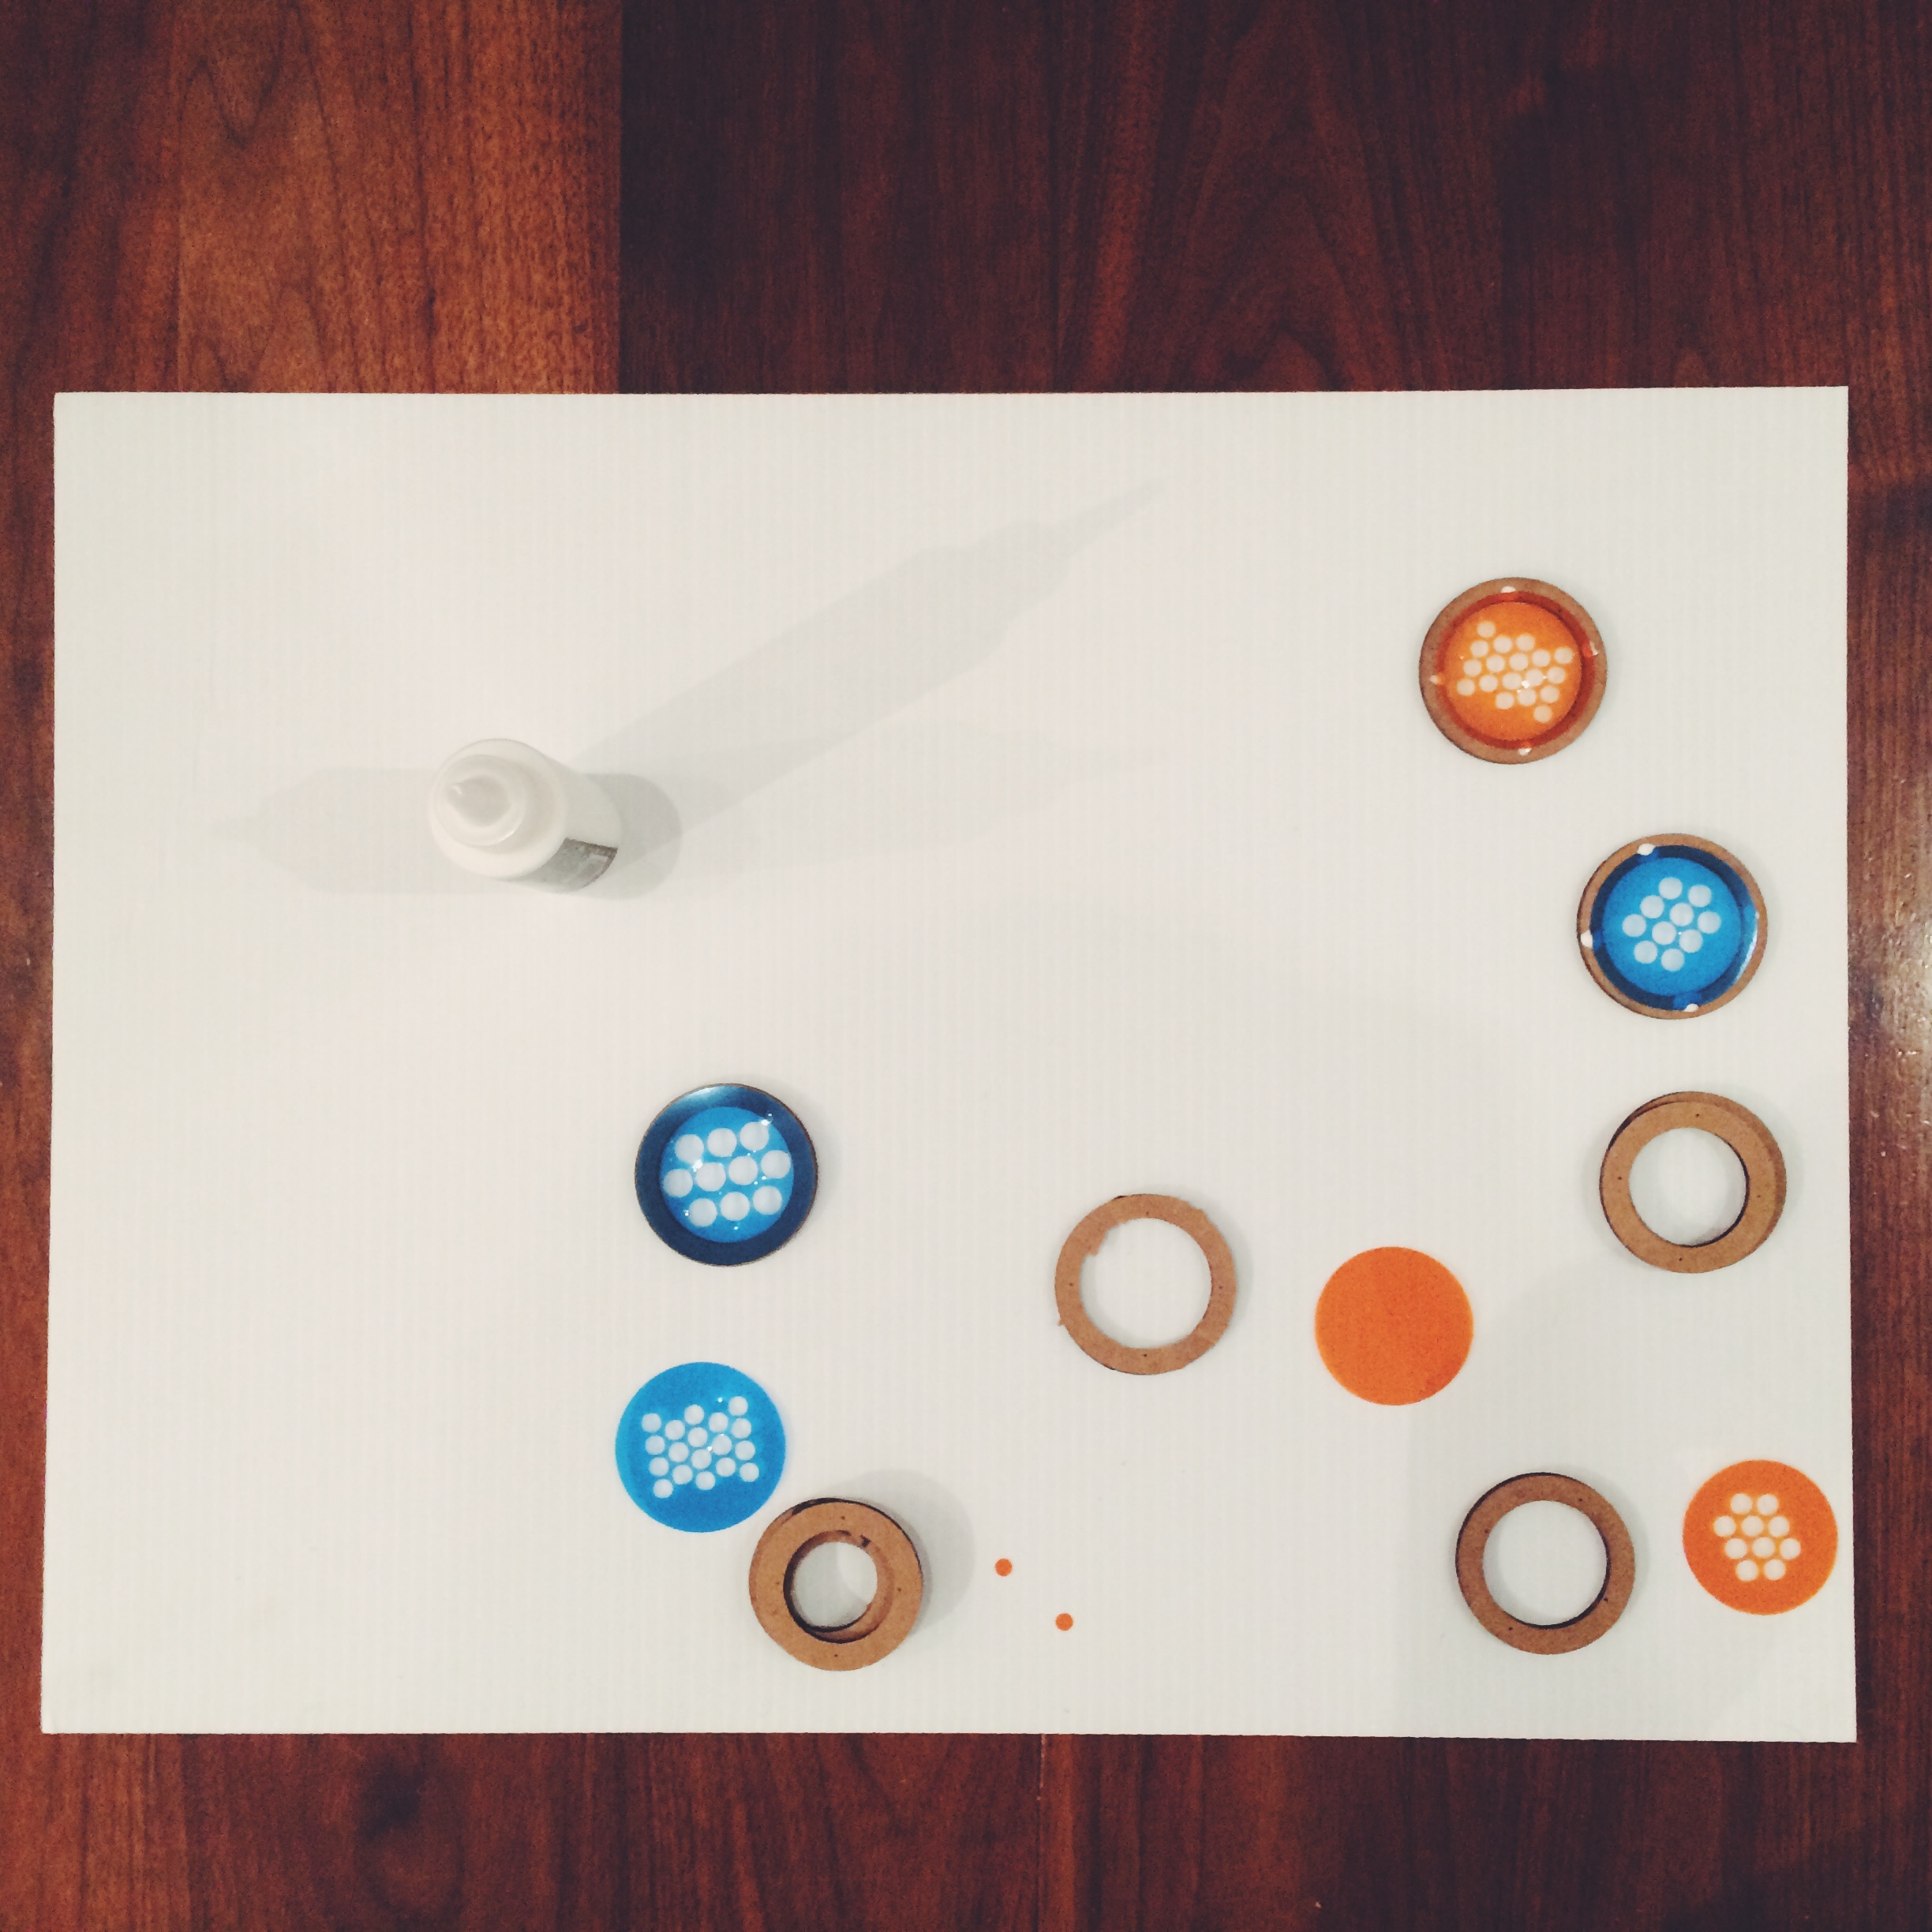
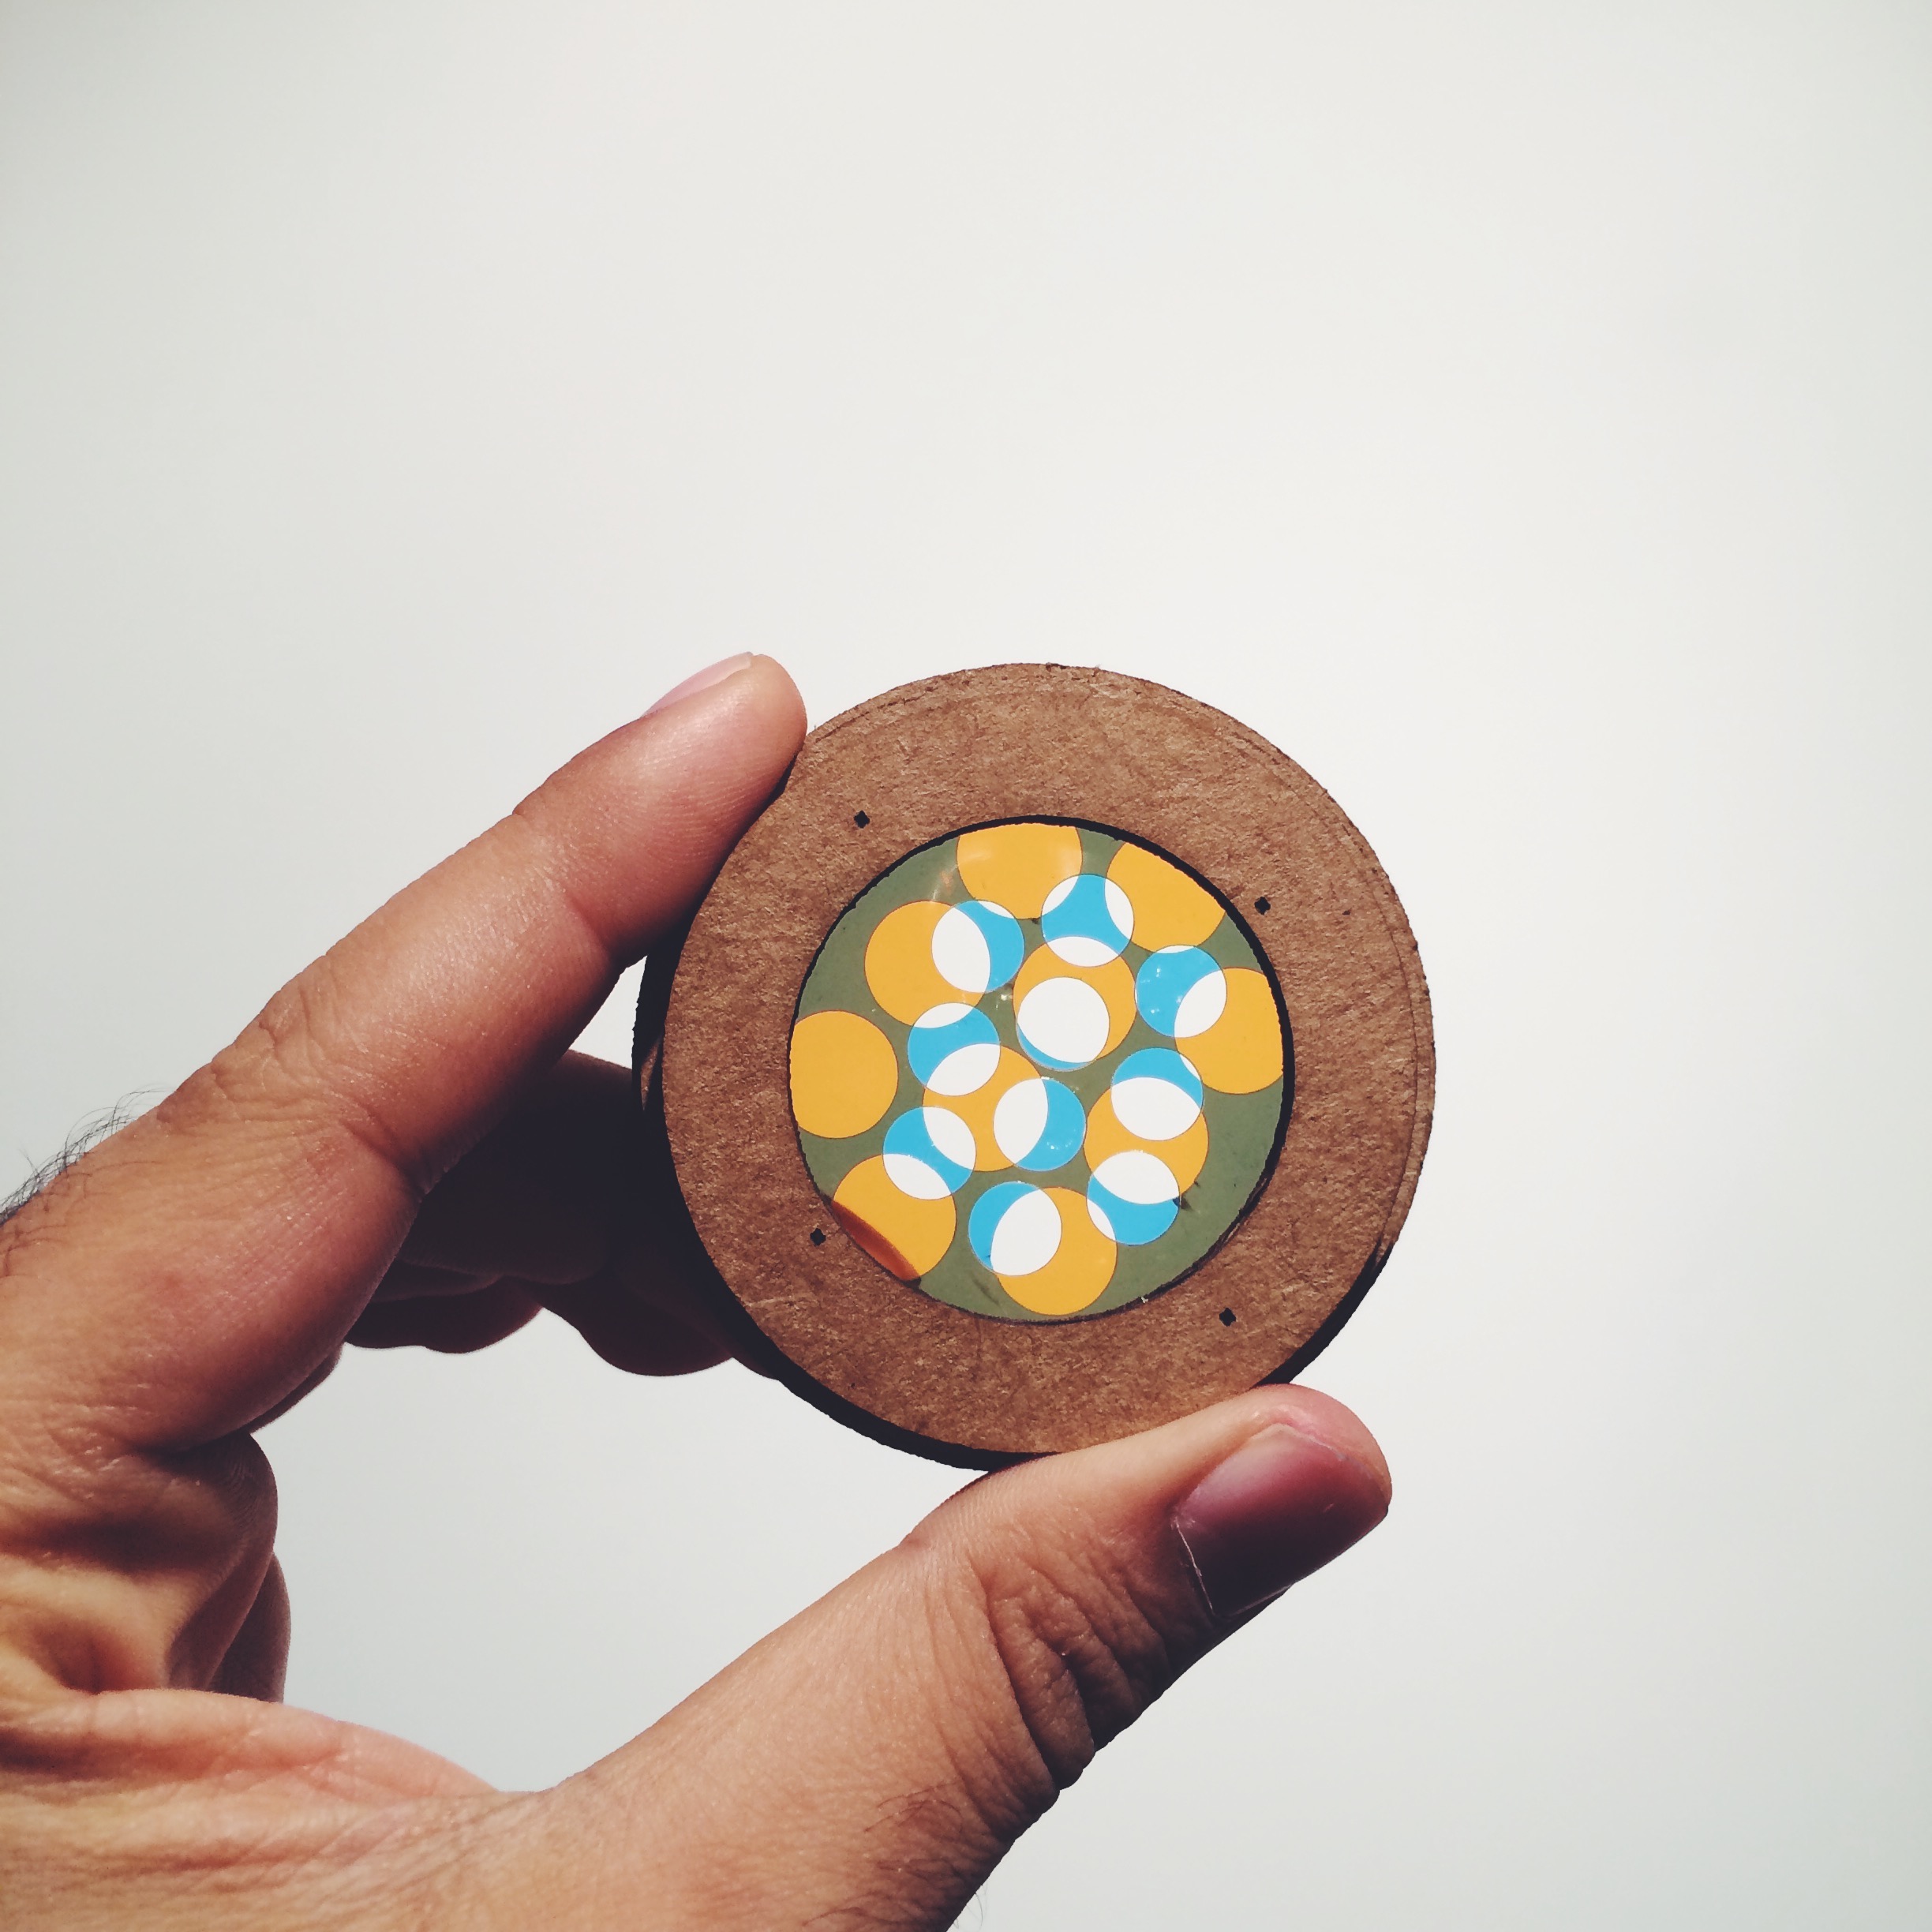
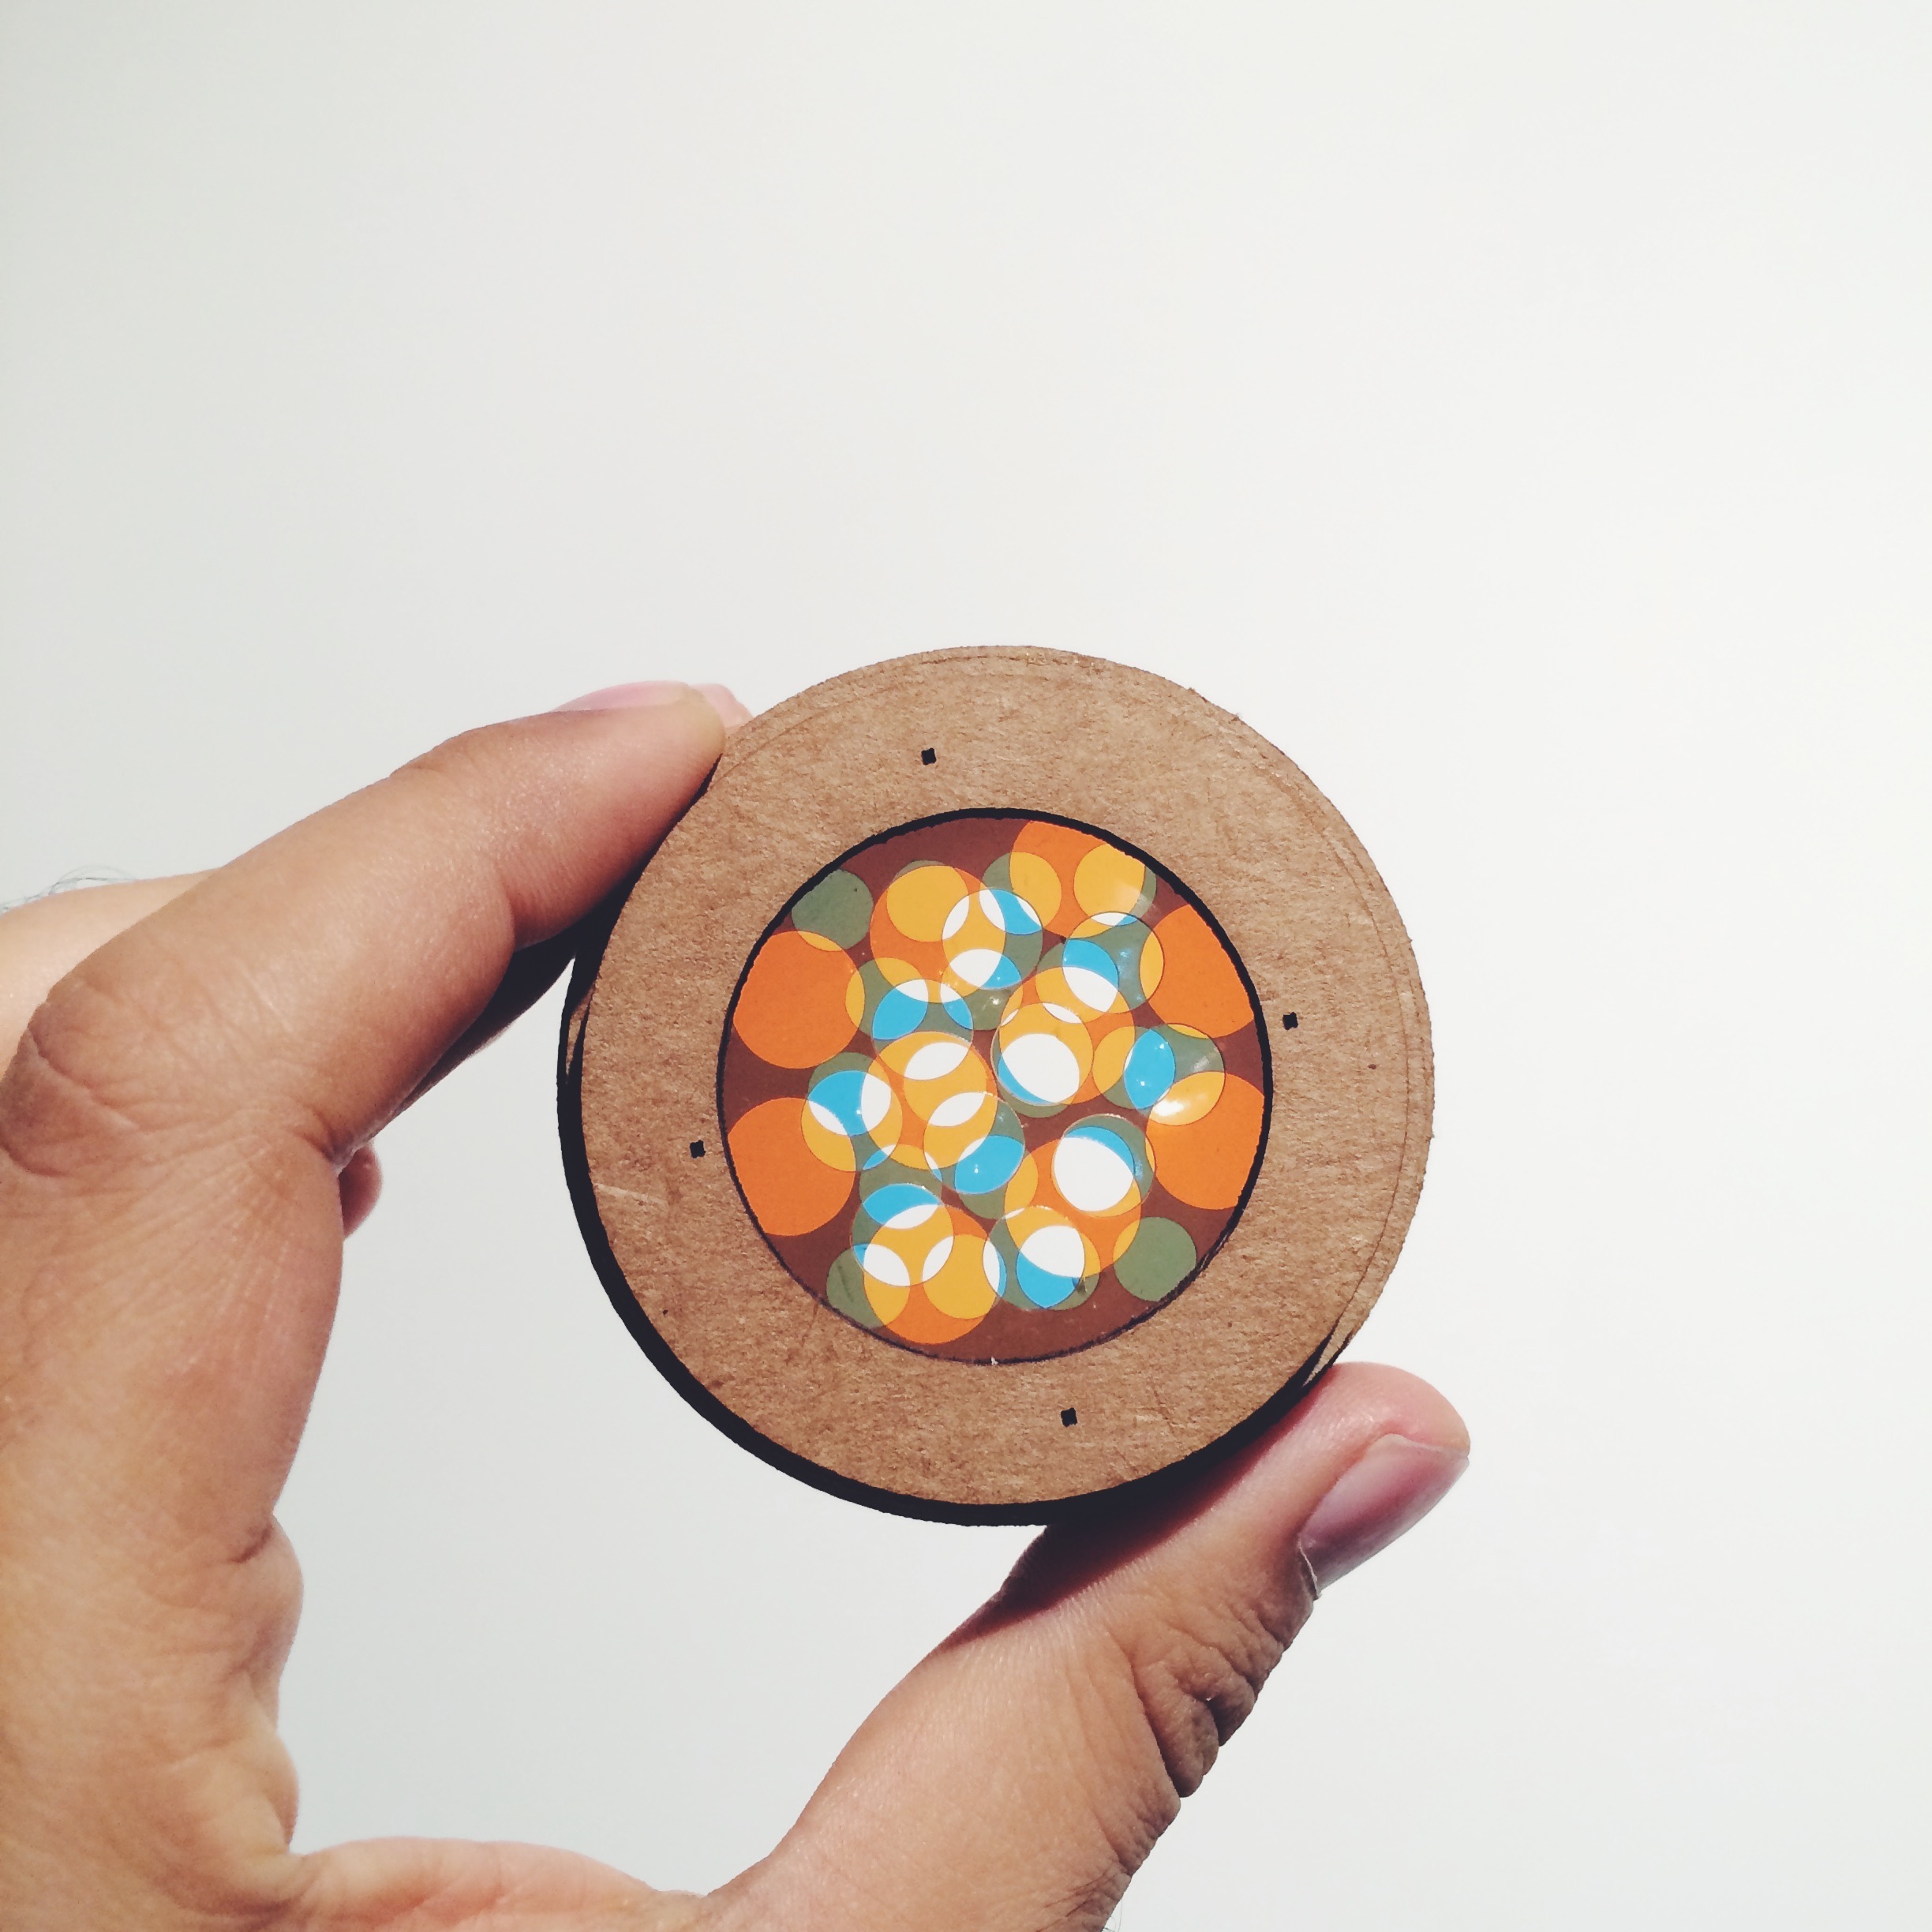
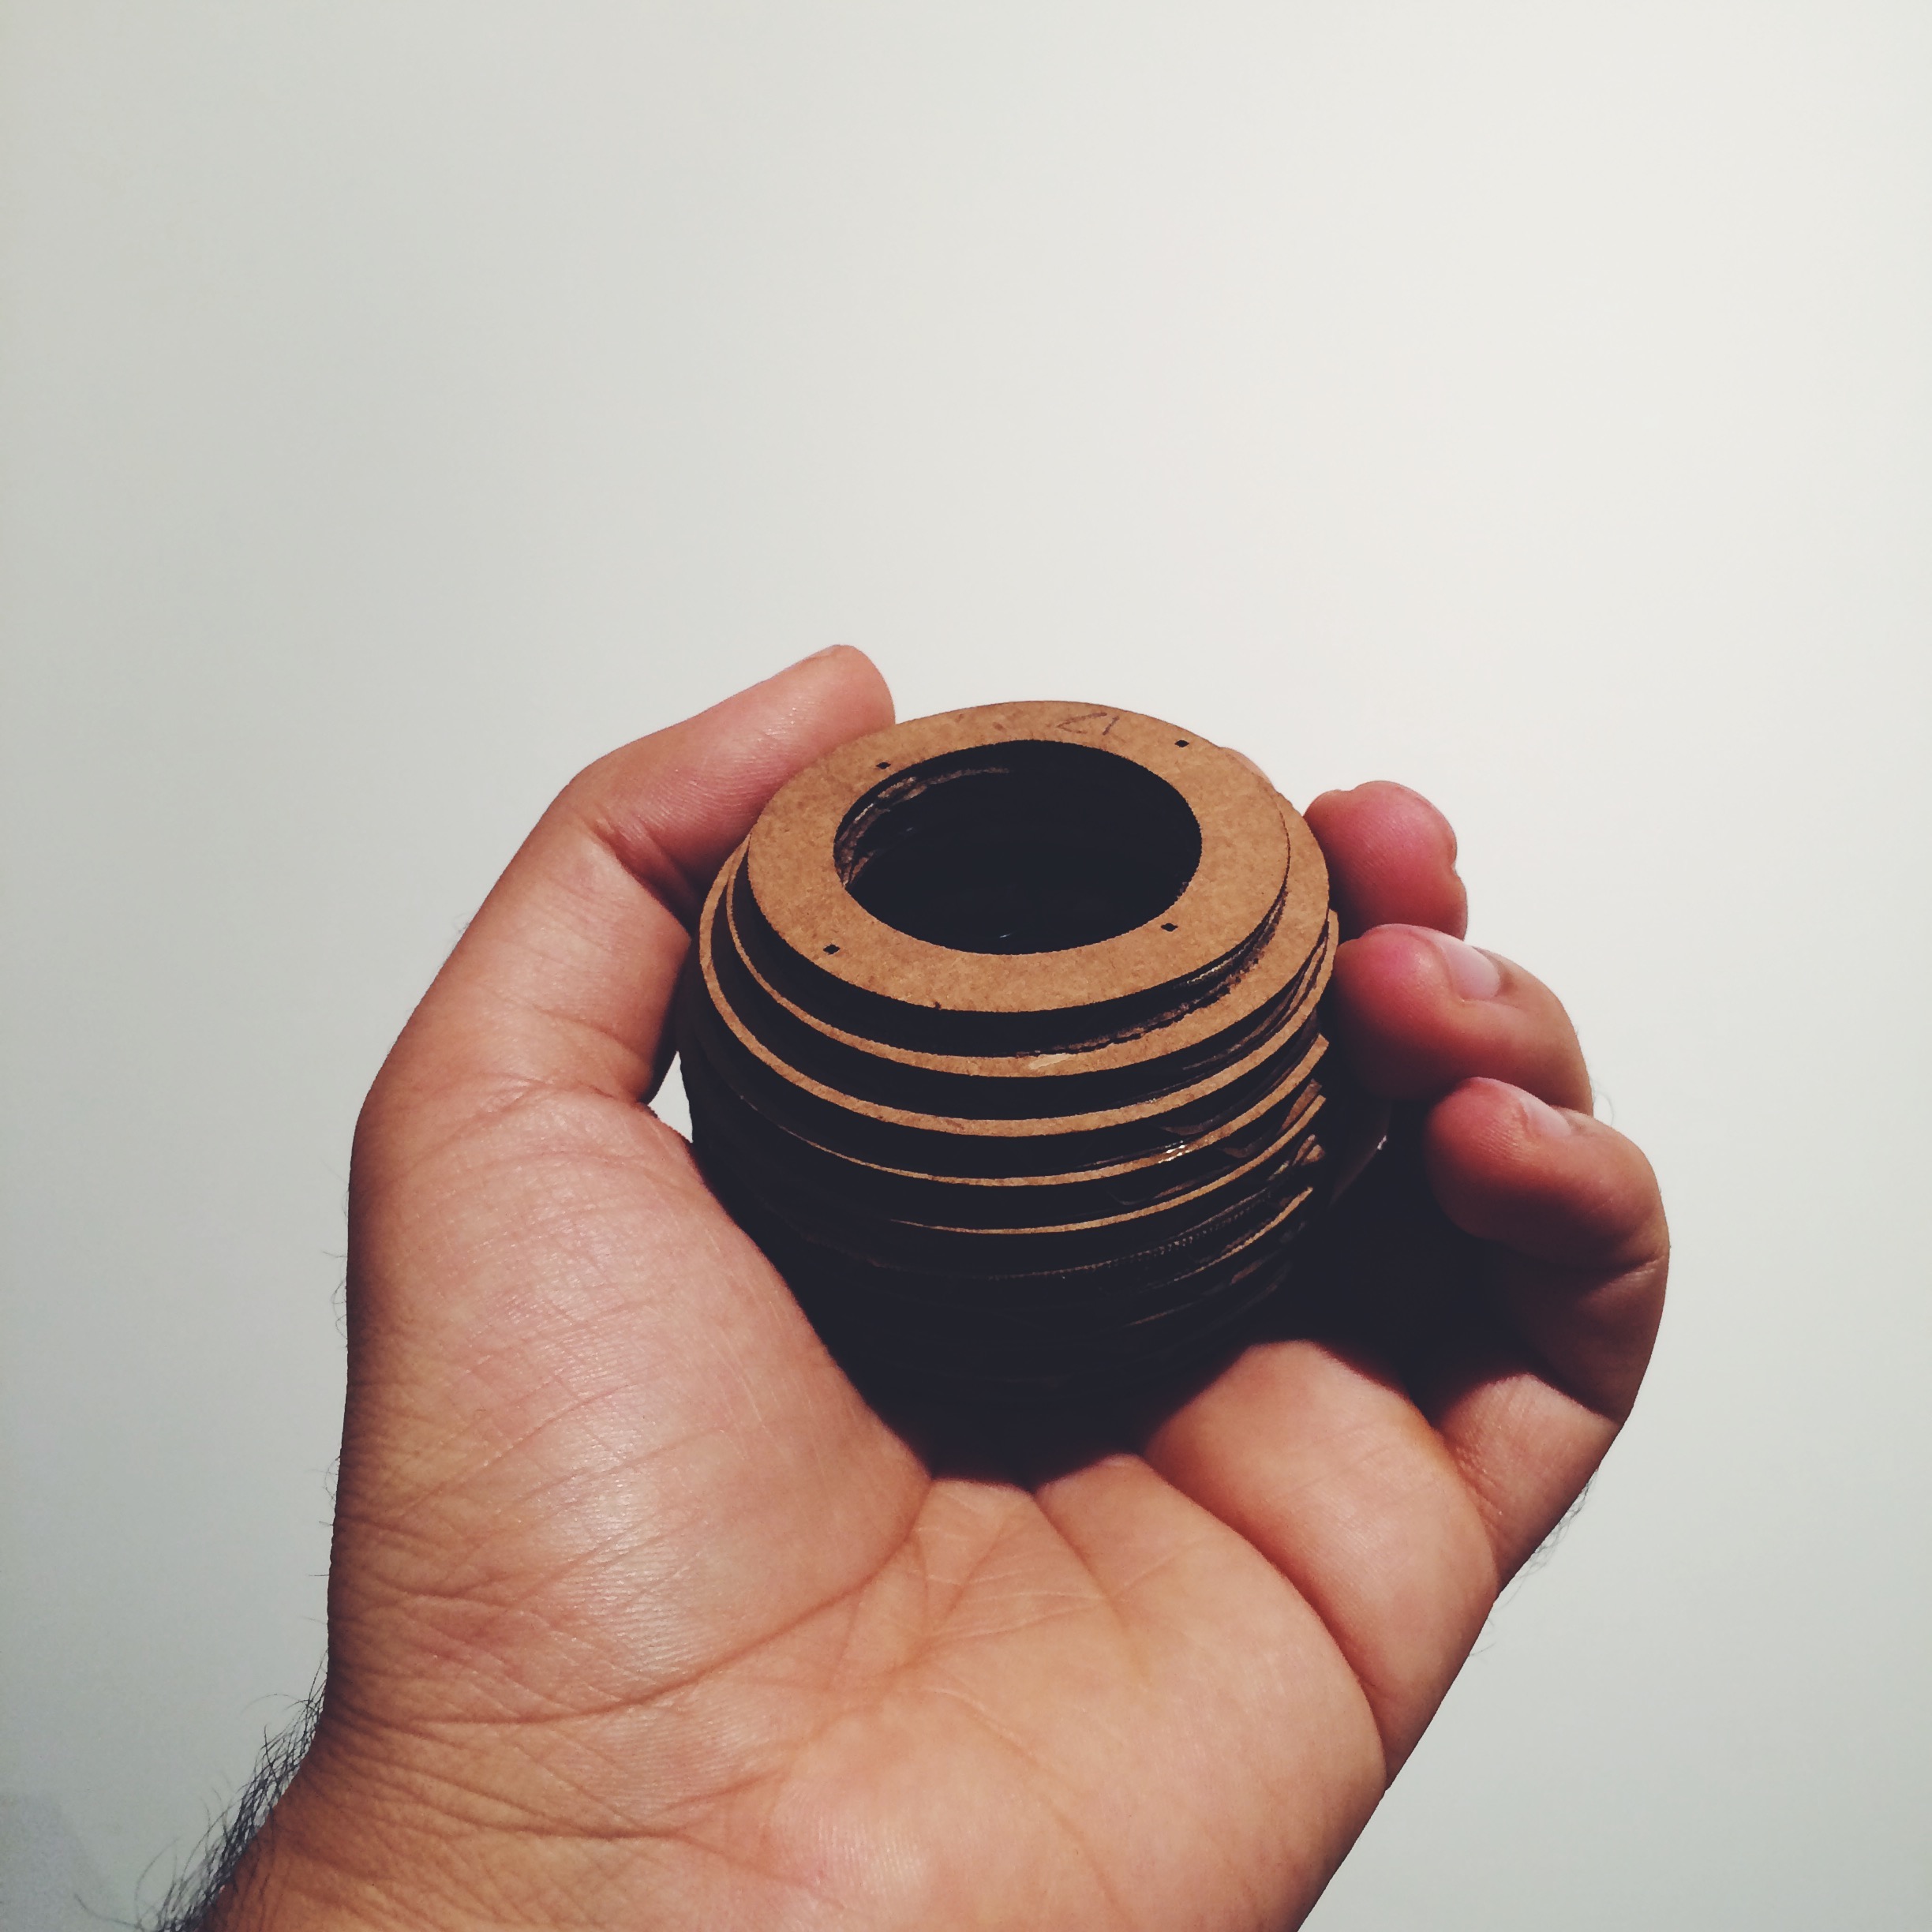
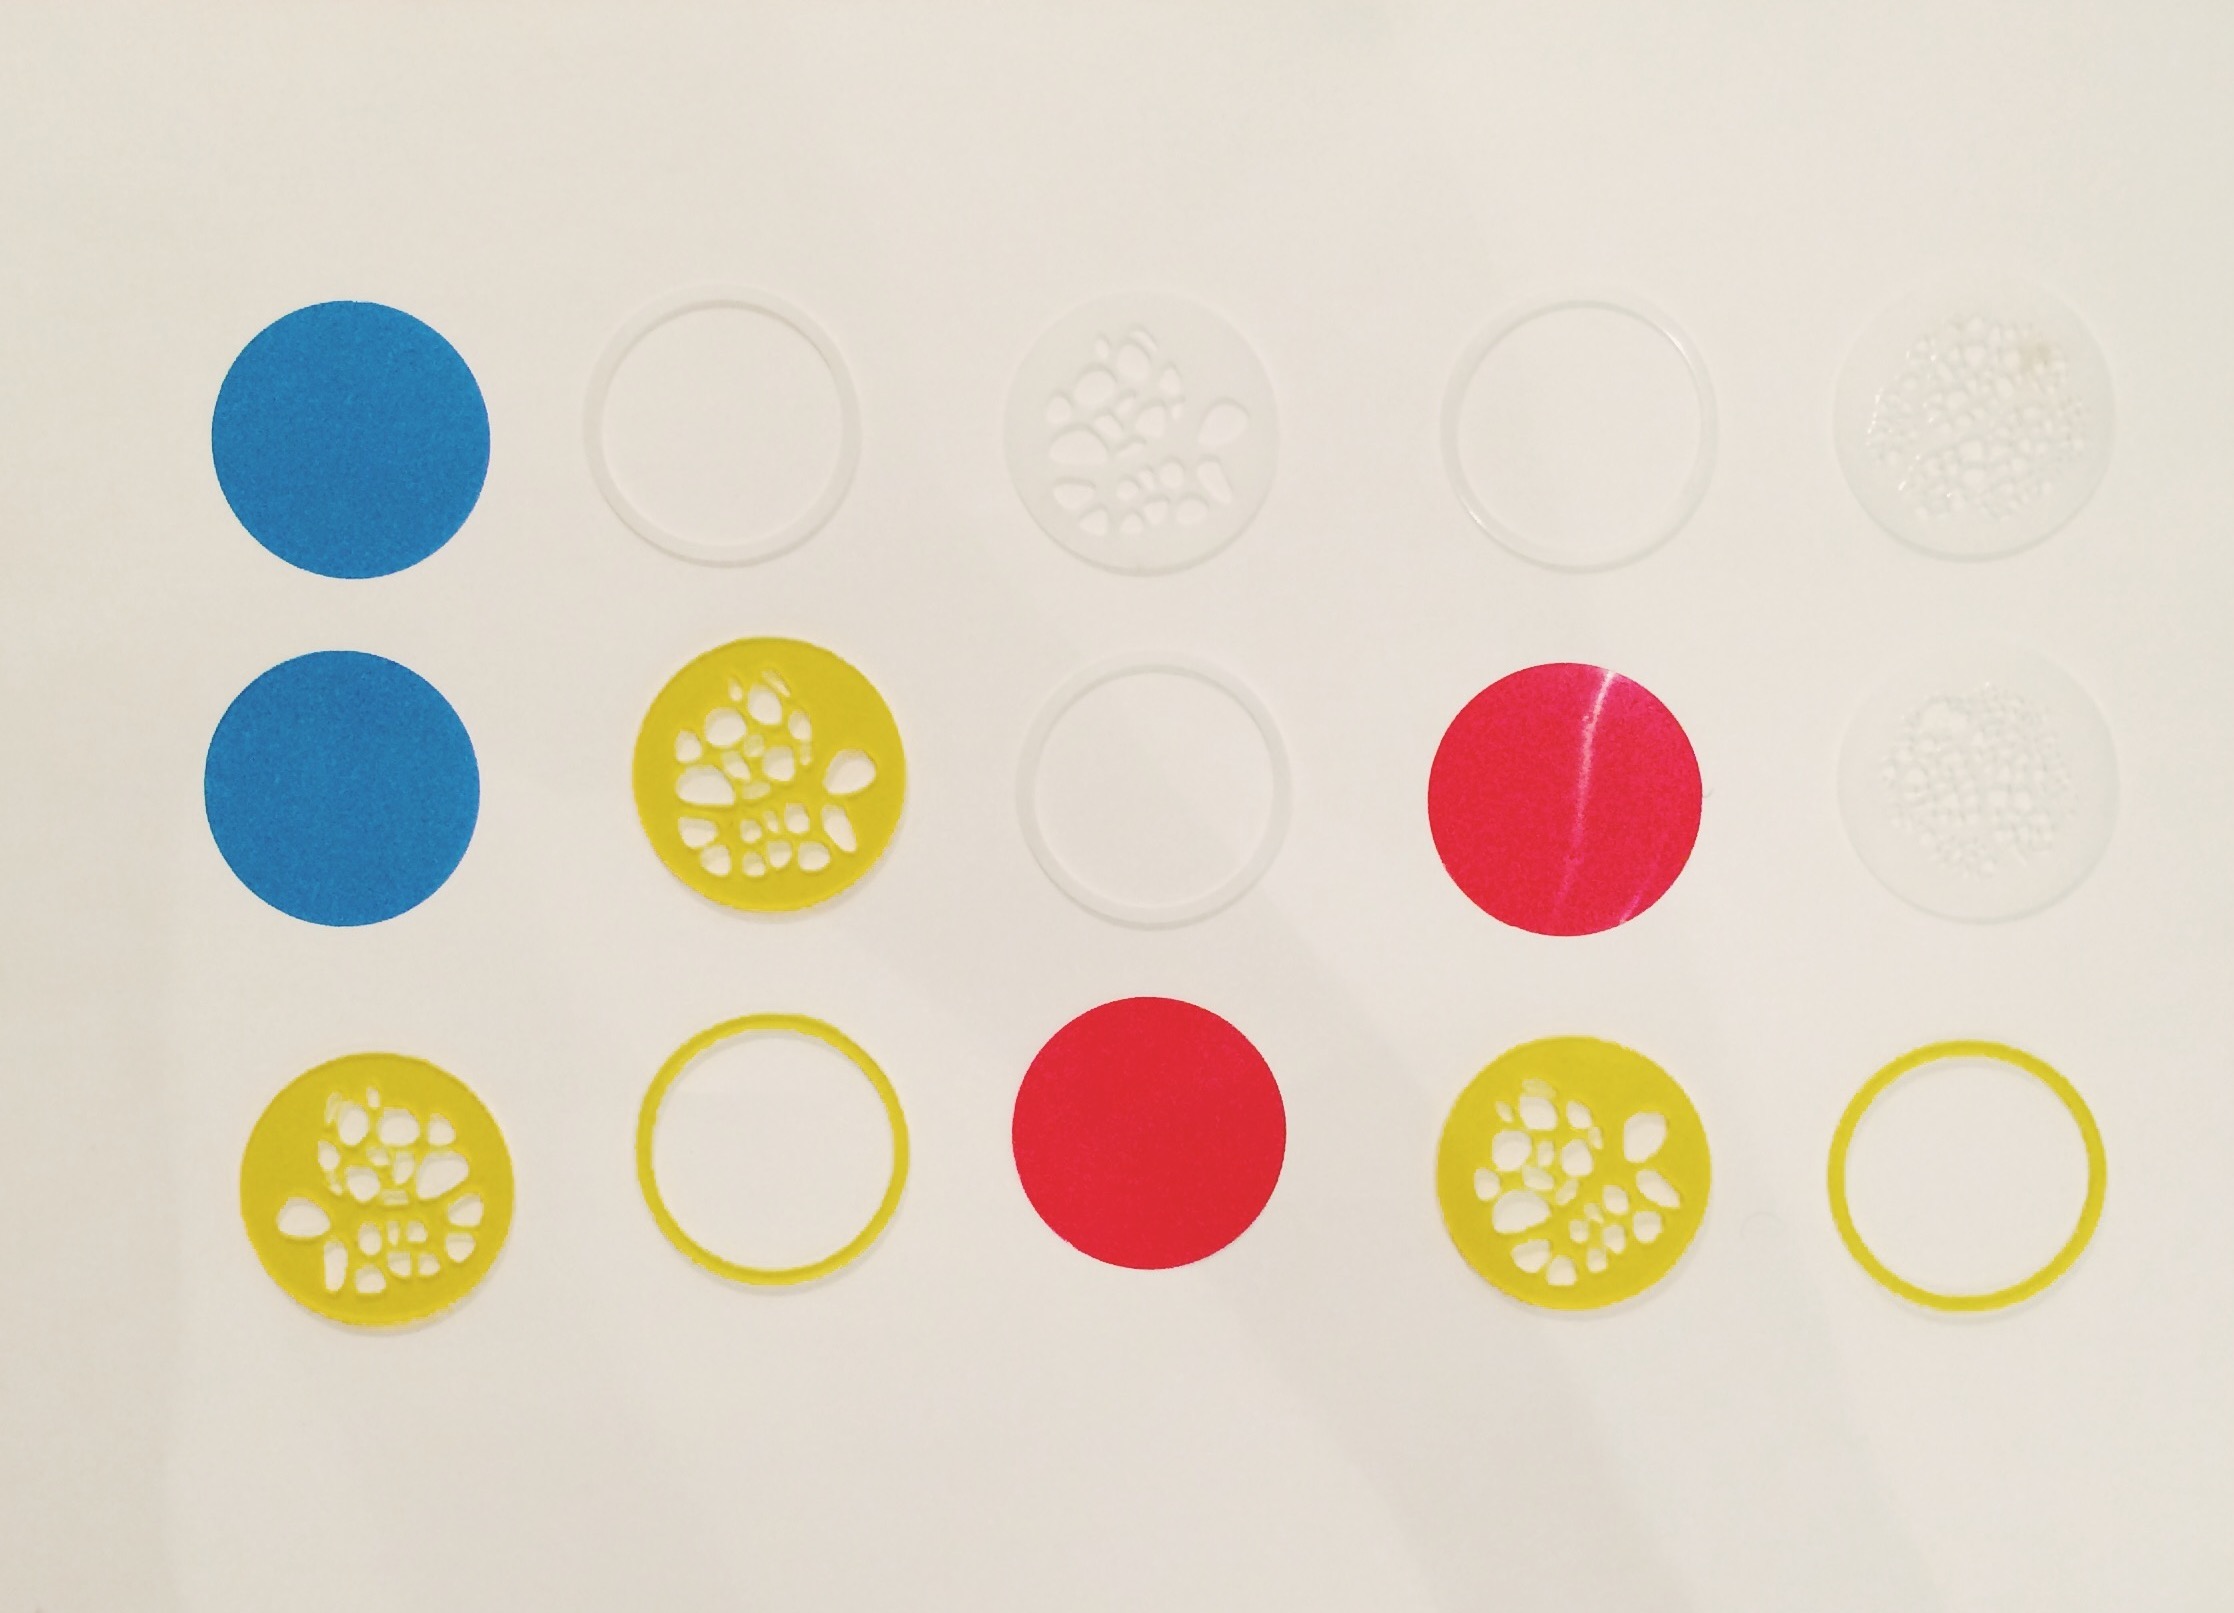
    The first prototype I made was to understand the basic structure and the constraints in movement. By following a few guides I read and watched online, I used the vinyl cutter to cut a number of wedges, as well as two different circular parts. The first is what the wedges are attached to. The second has the purpose of constraining a perpendicular part of each wedge so that a simple circular movement provides enough friction for the wedges to open (or close, depending on direction of movement).

    Processed with VSCOcam with f2 preset

    Processed with VSCOcam with f3 preset


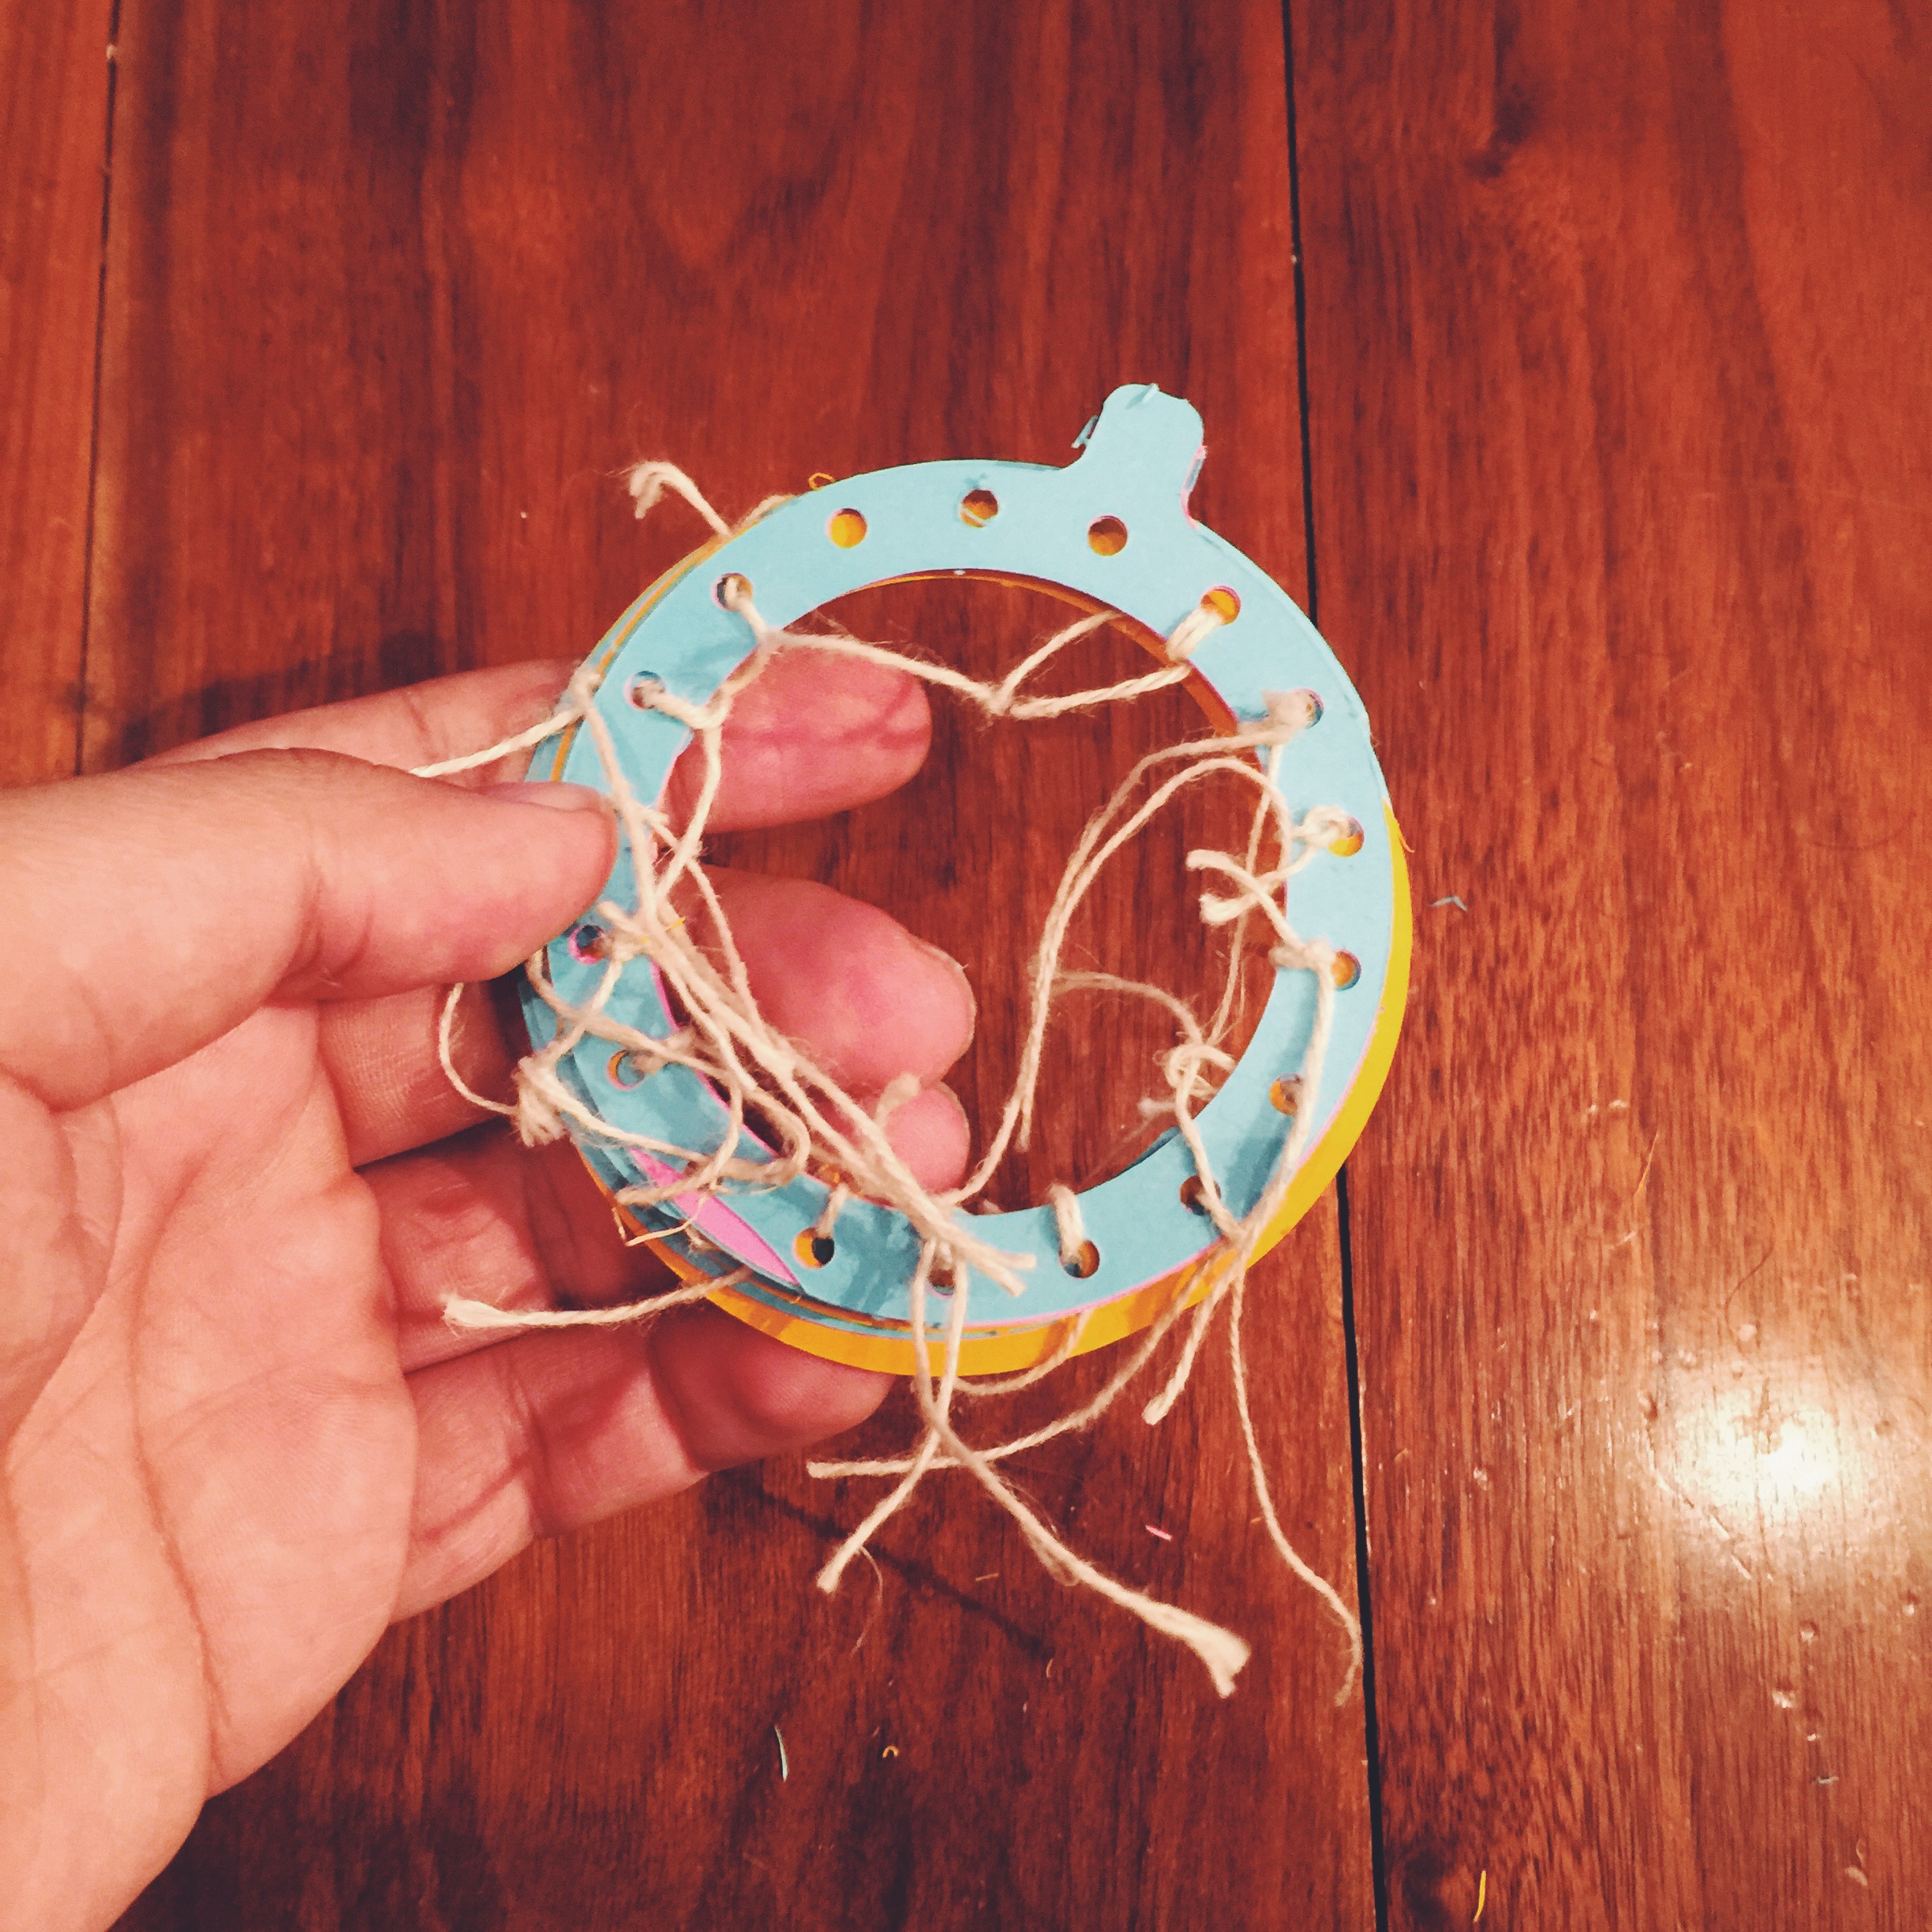
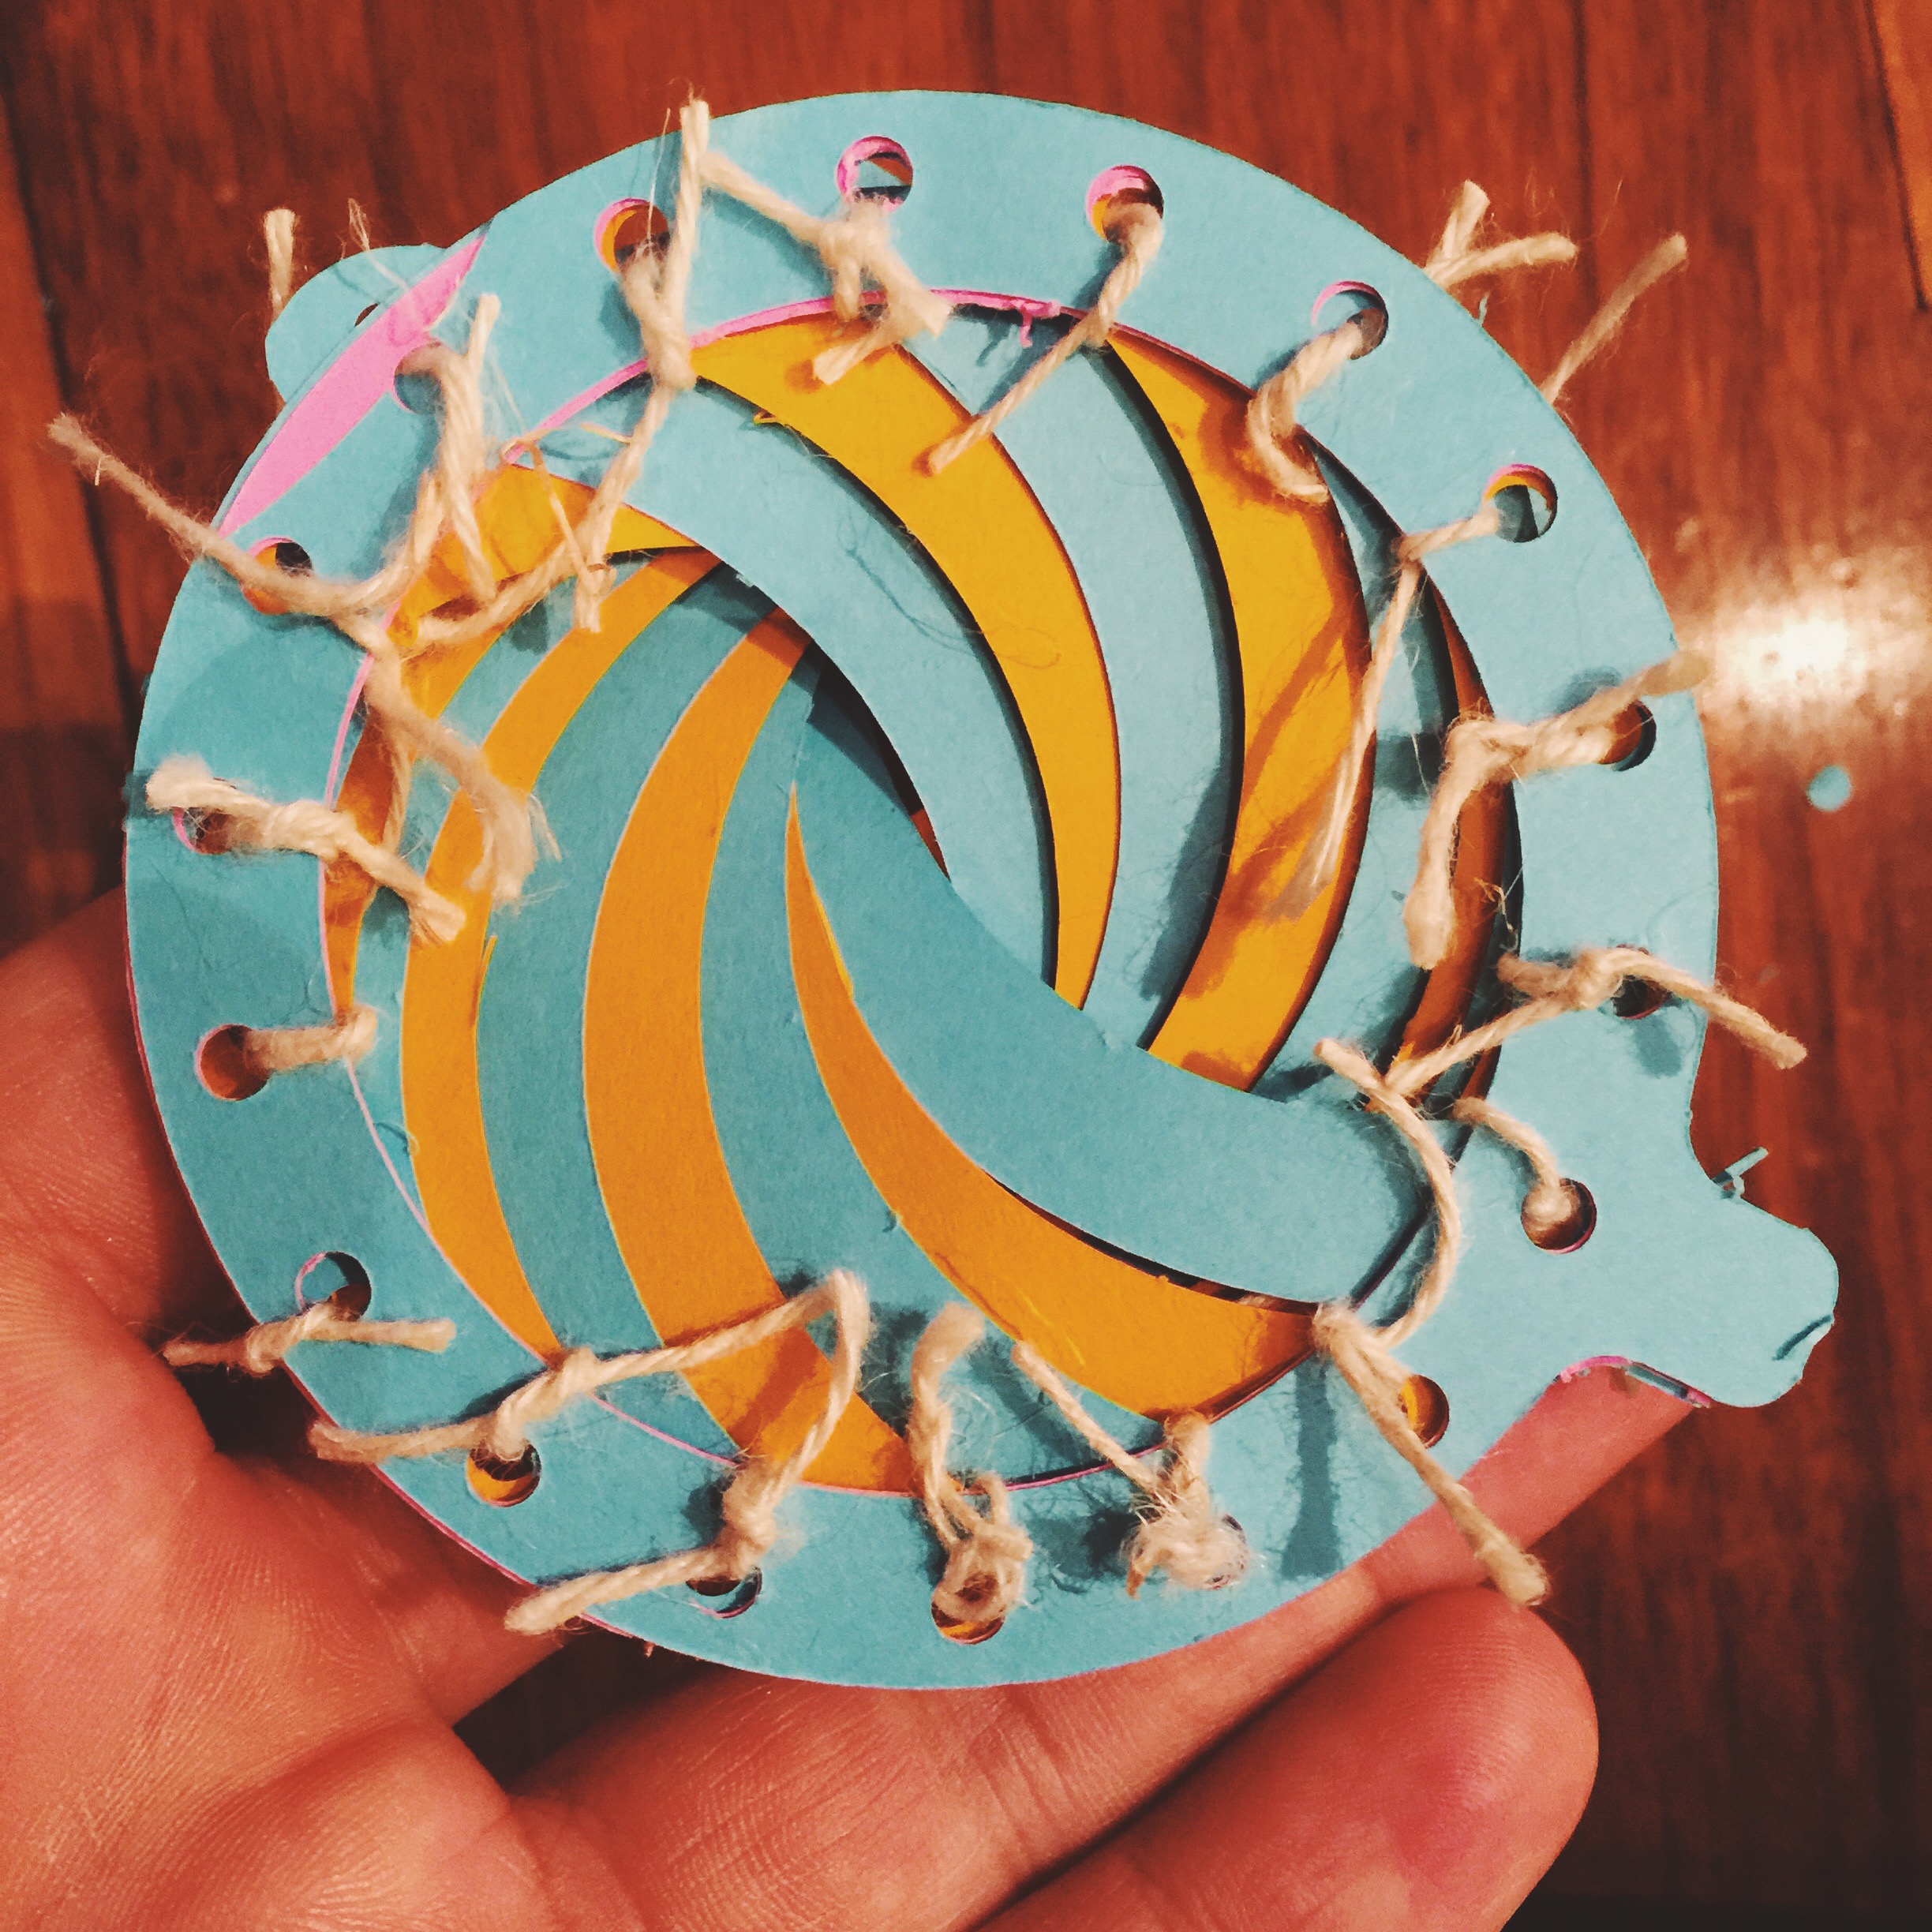
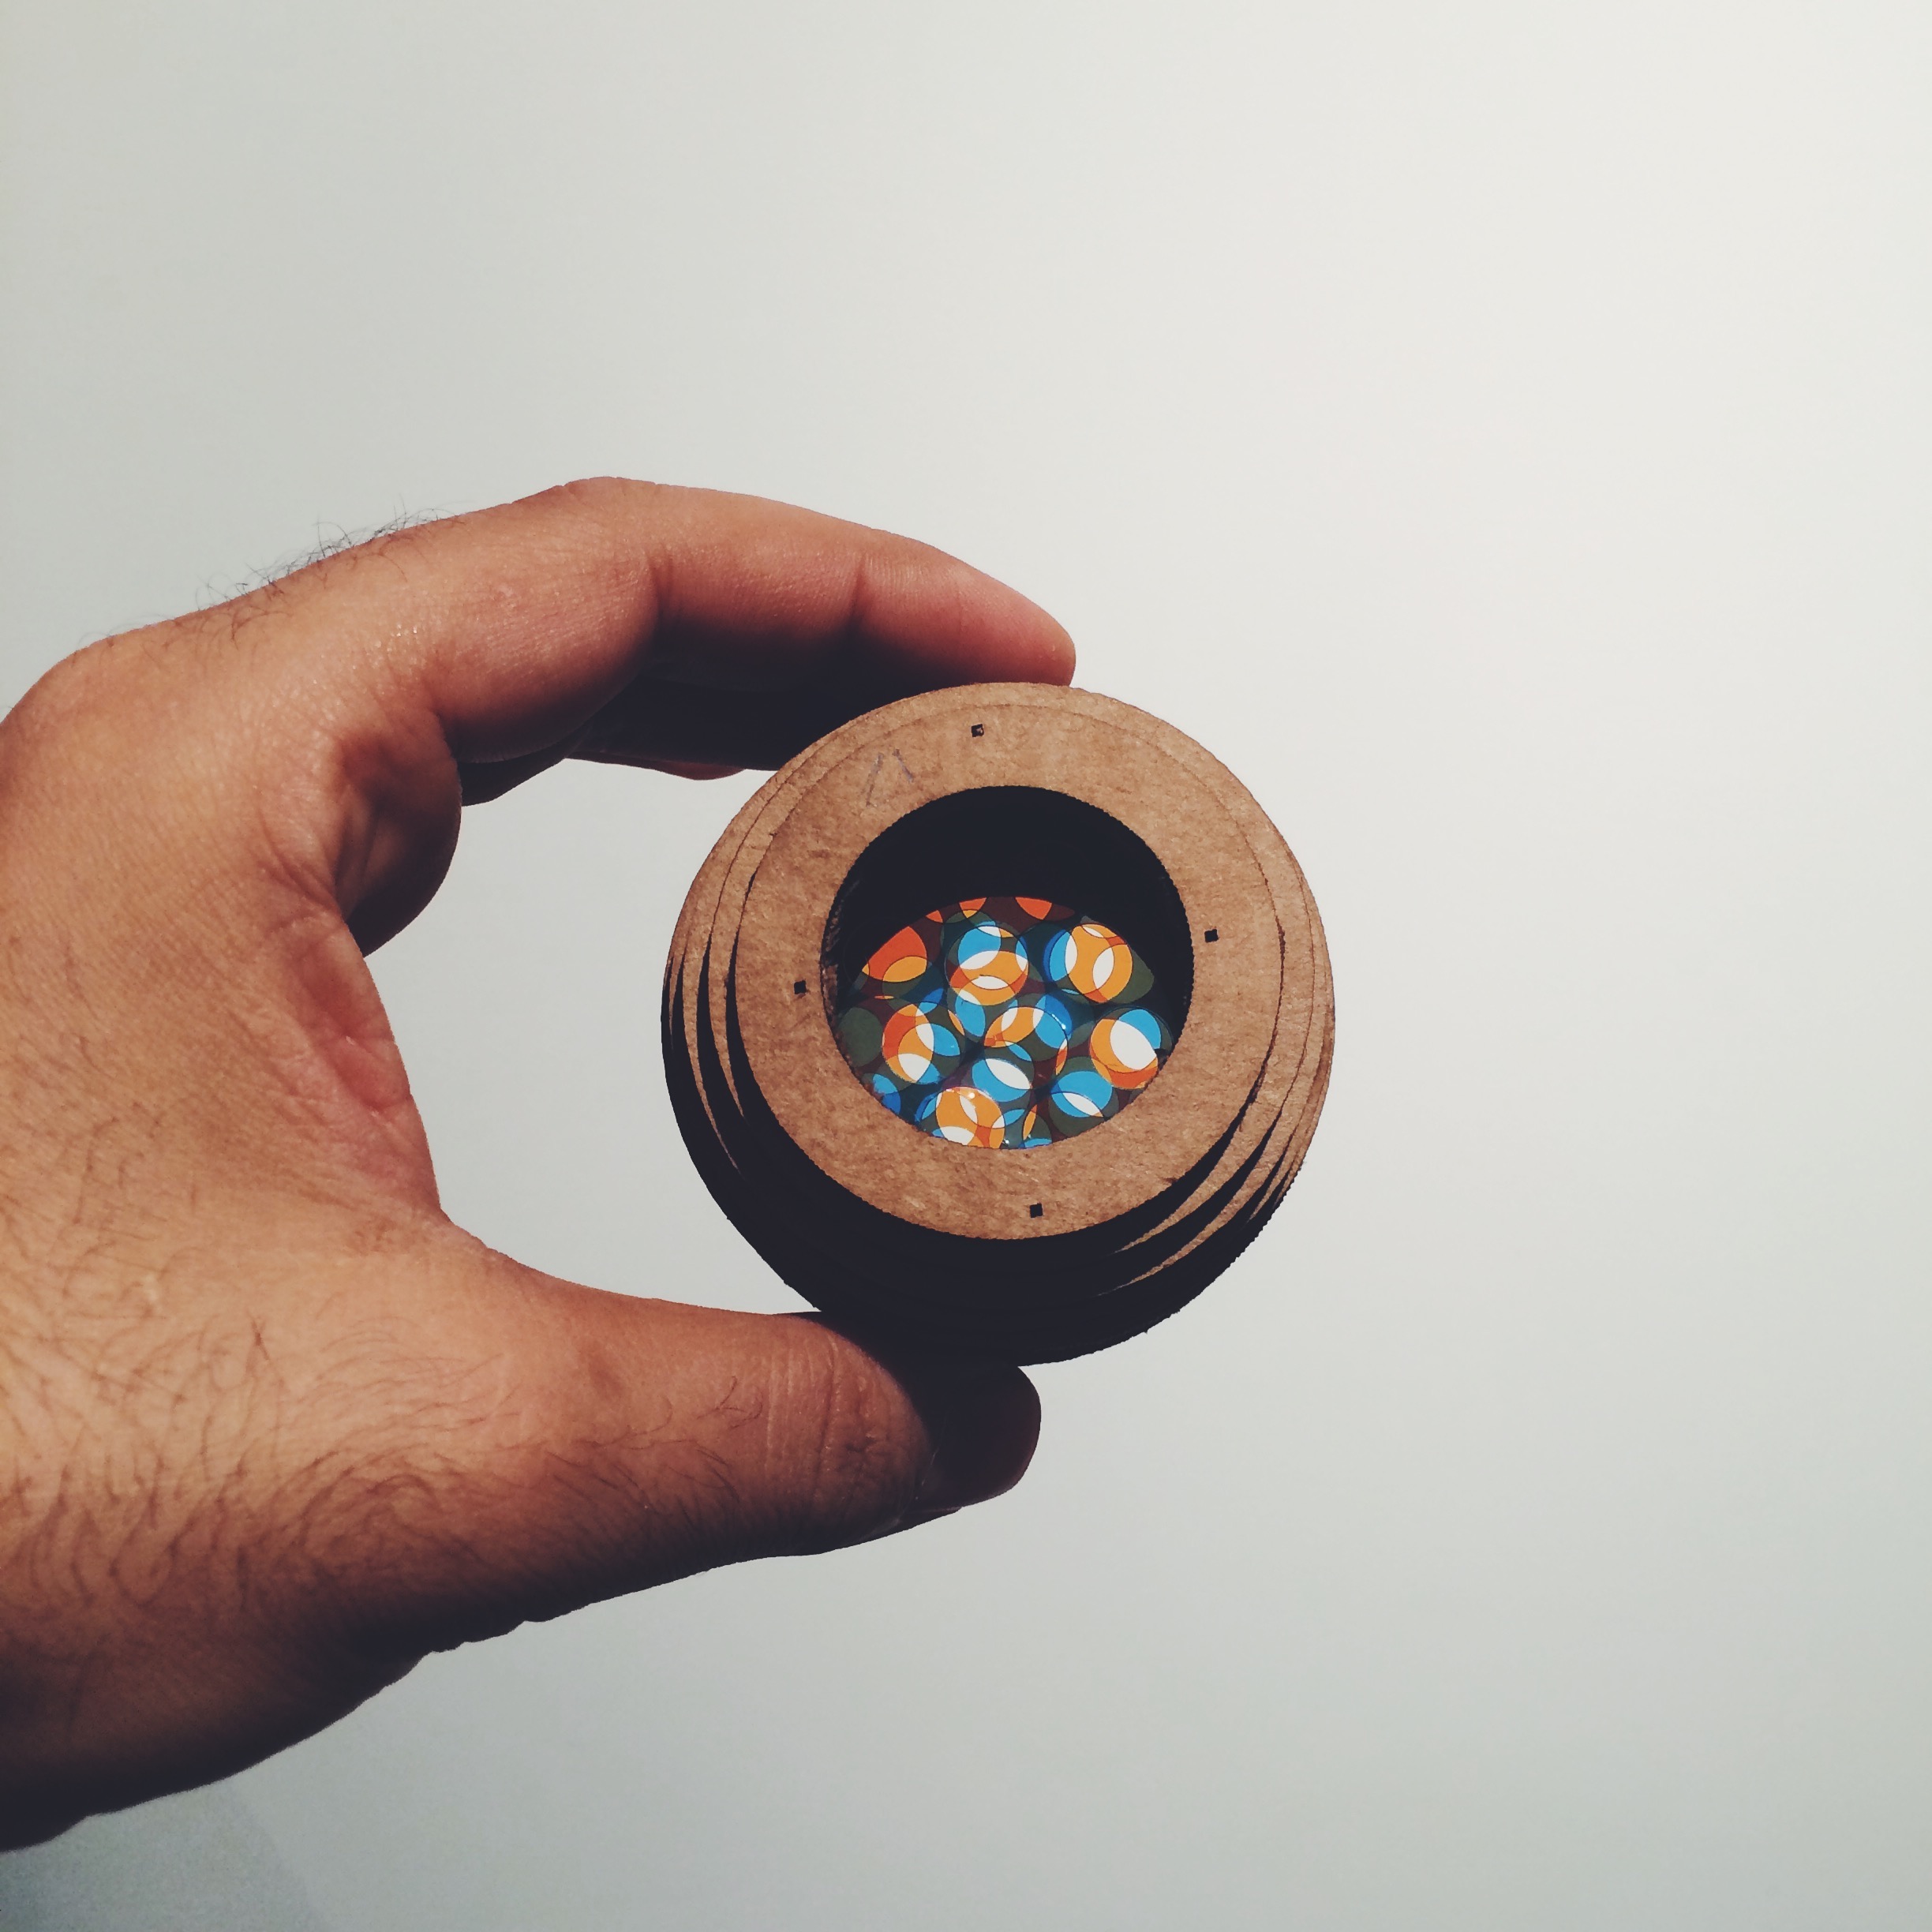
    The results where aesthetically acceptable, but functionally, the use of cardstock for the two circular parts resulted in an incorrect behavior. The paper material used is not firm enough to hold the pieces in place, nor to provide the required friction for the opening to occur. In addition, I used hemp threads to fasten the wedges into the frame, which is really hard to work with and to make stay in place.

    Second Prototype

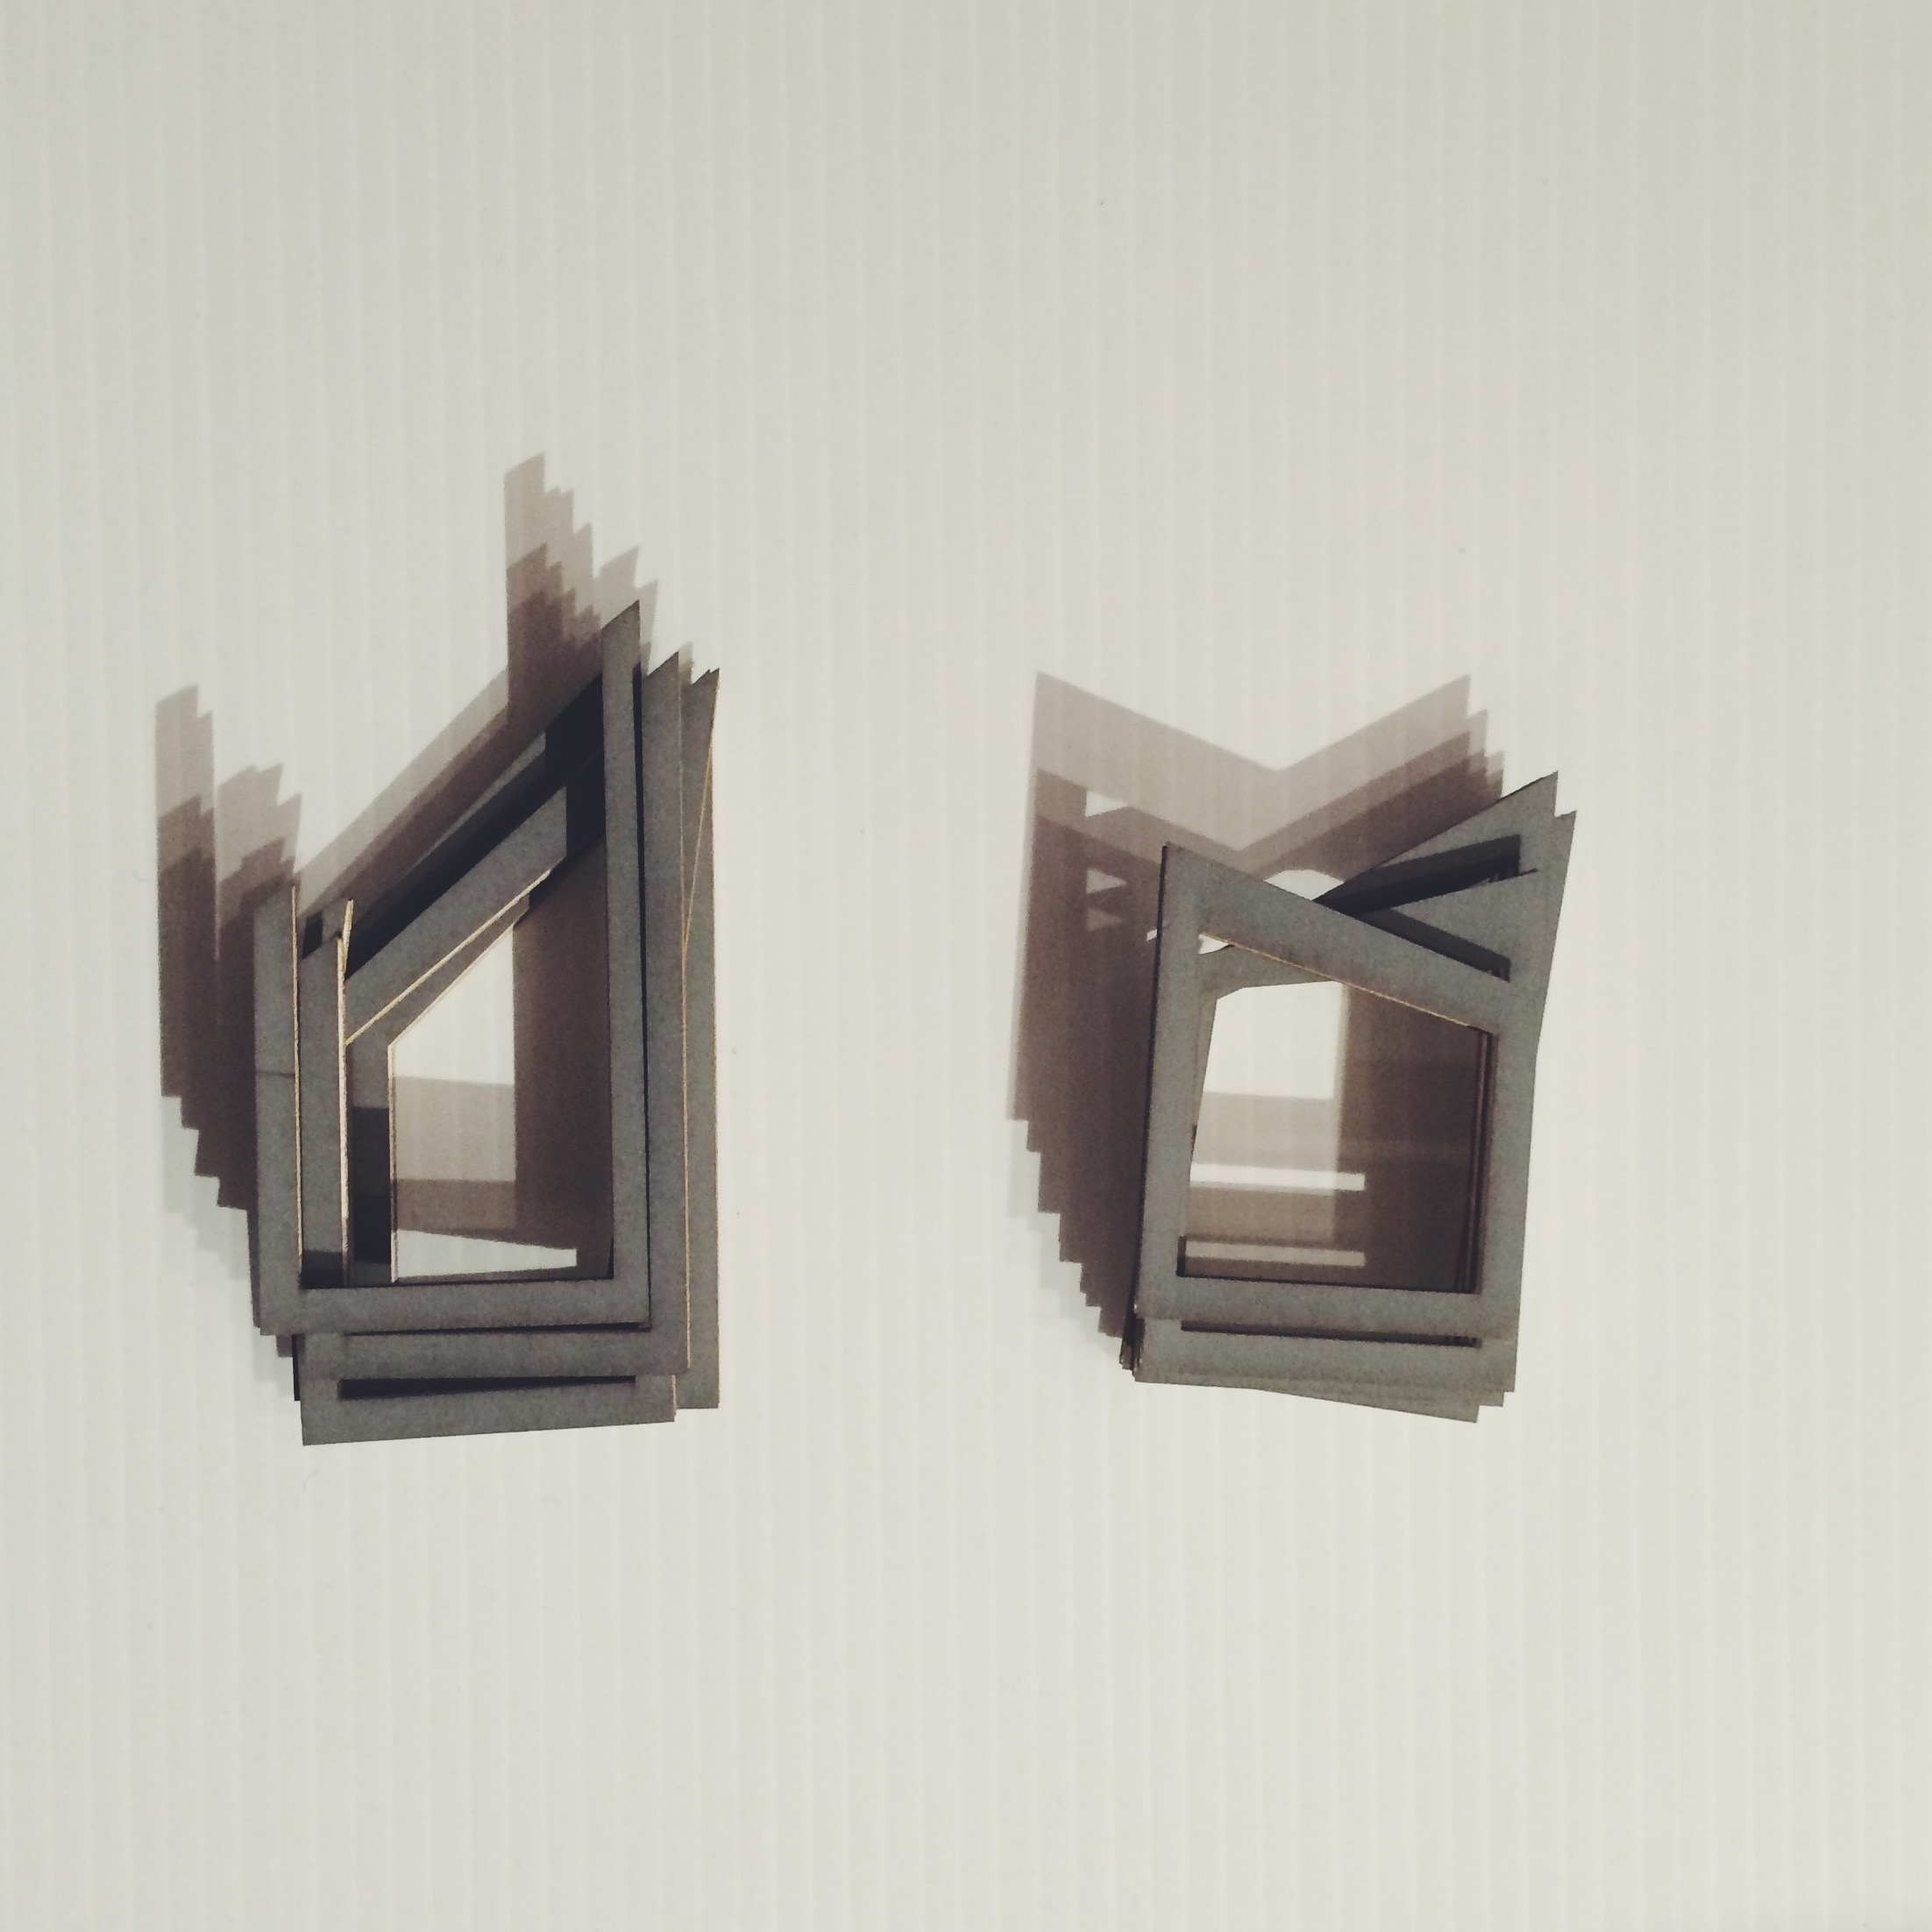
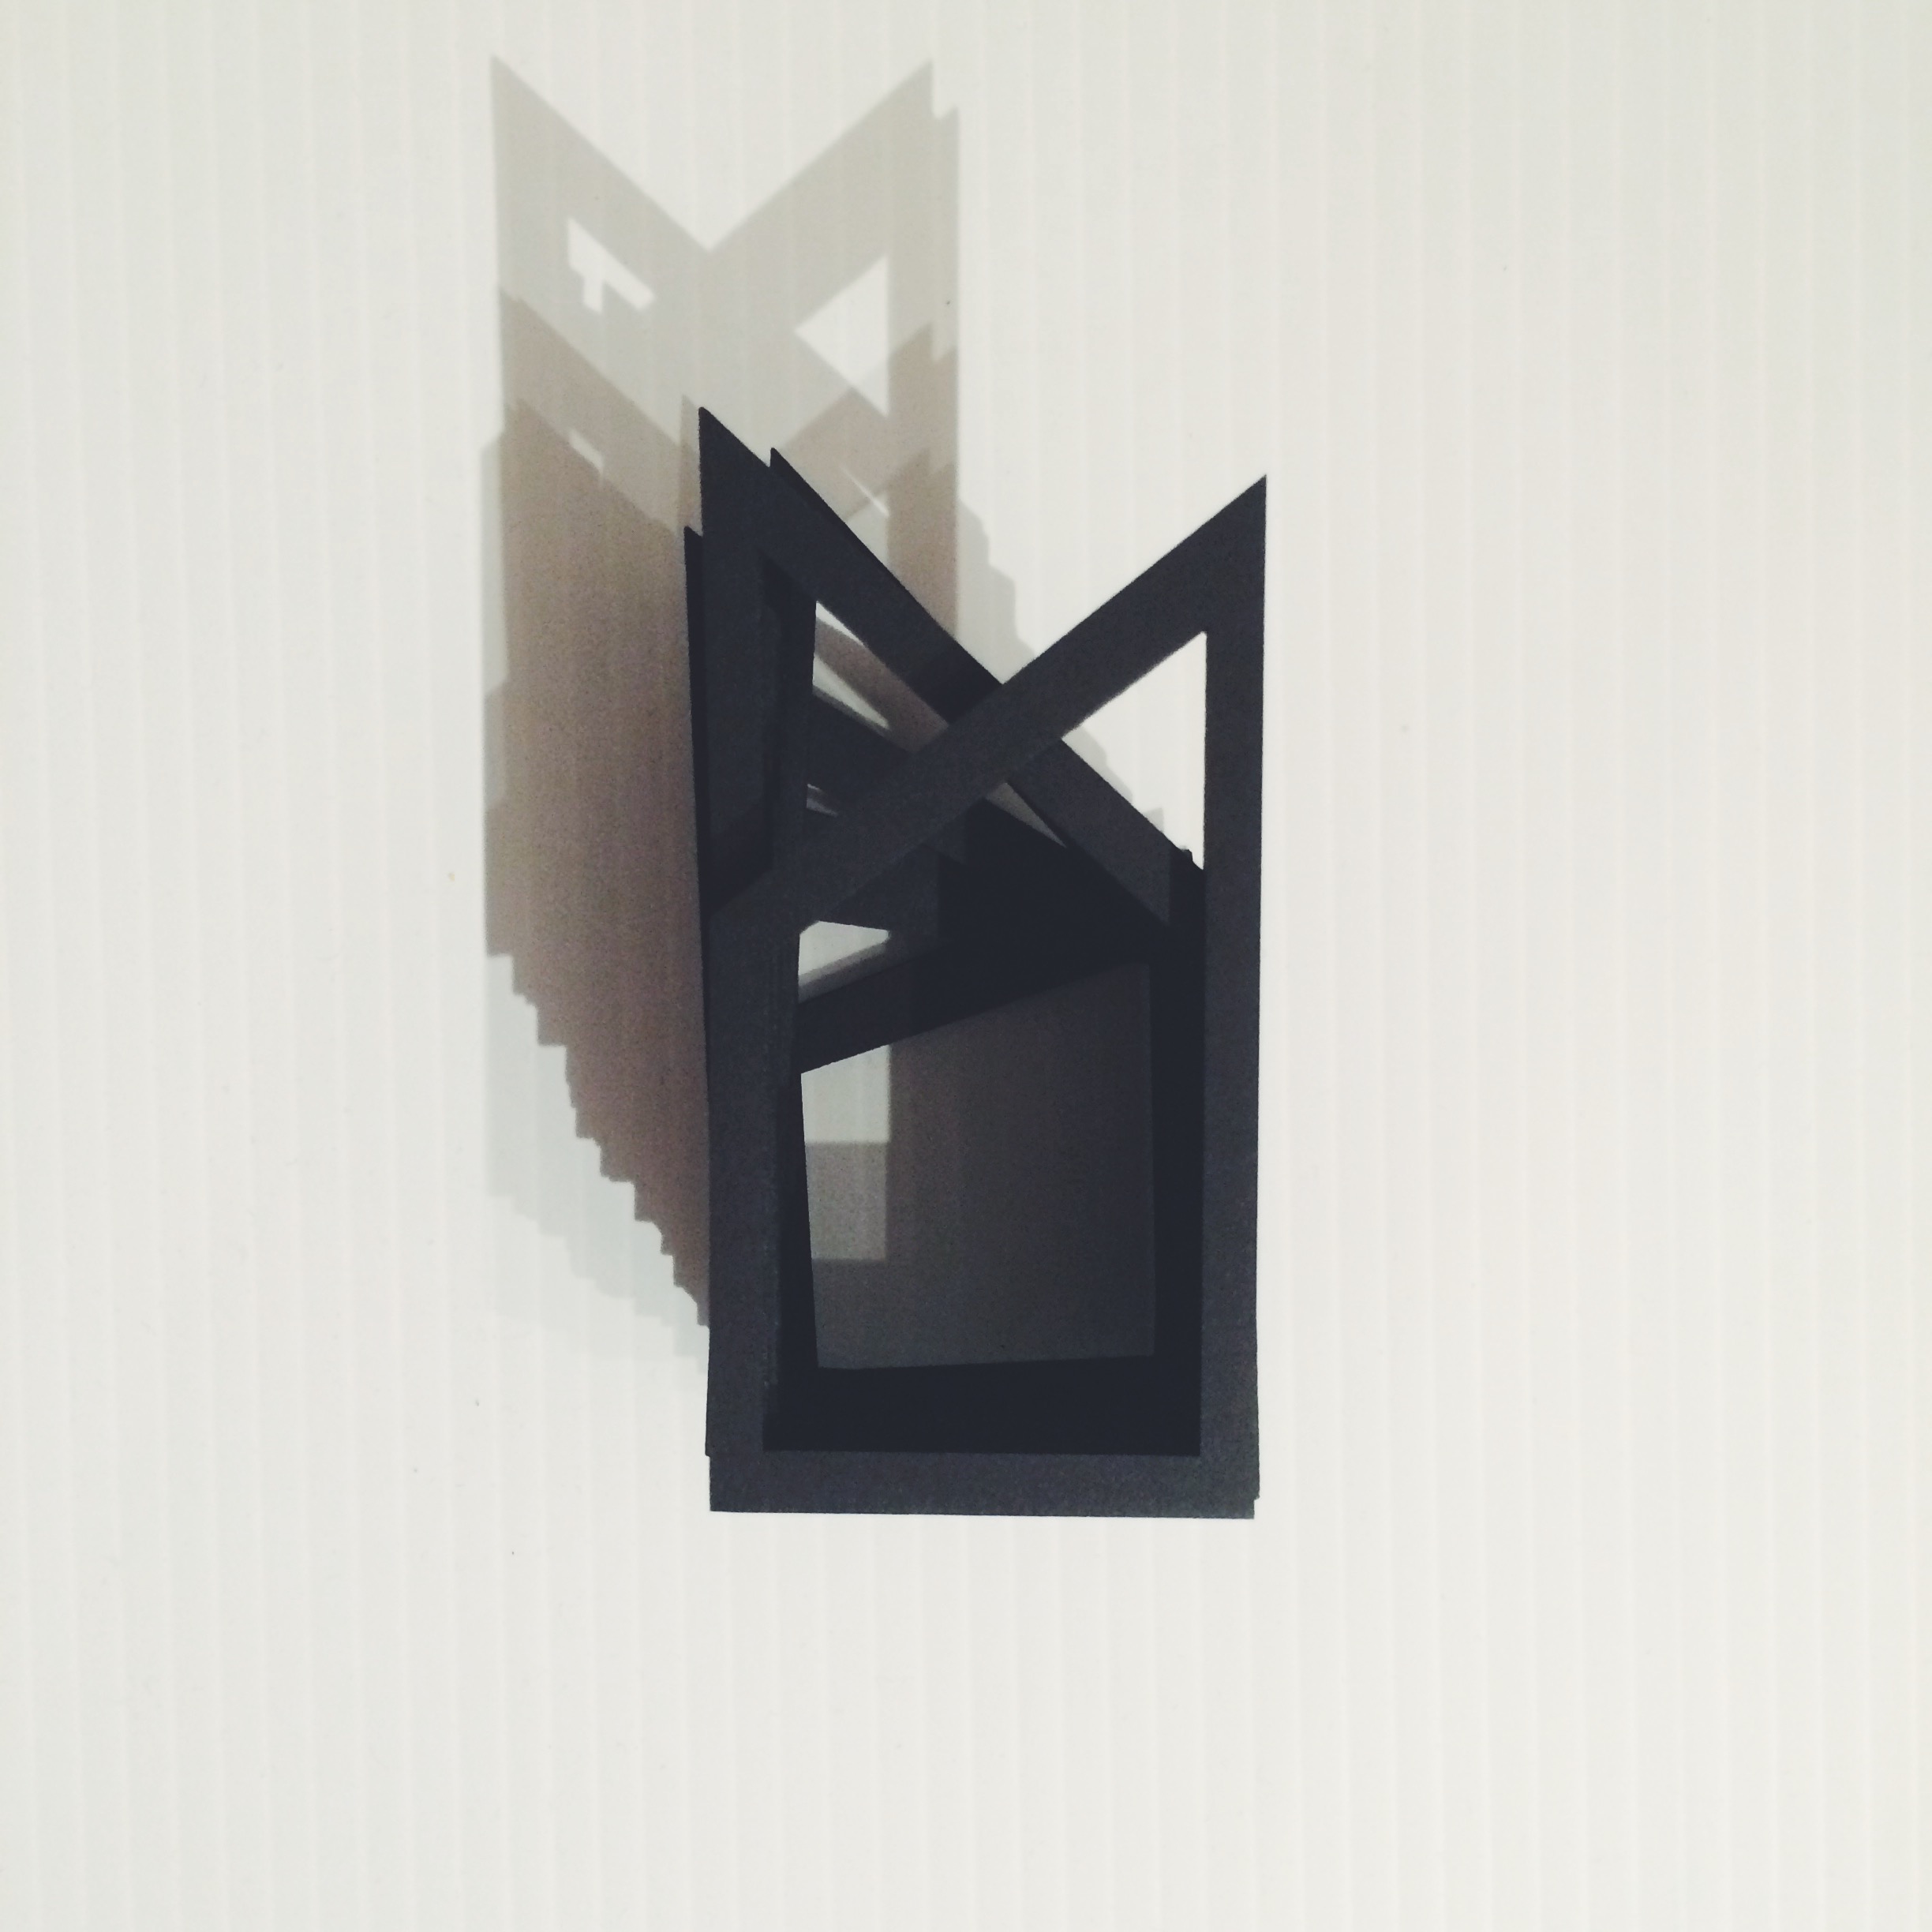
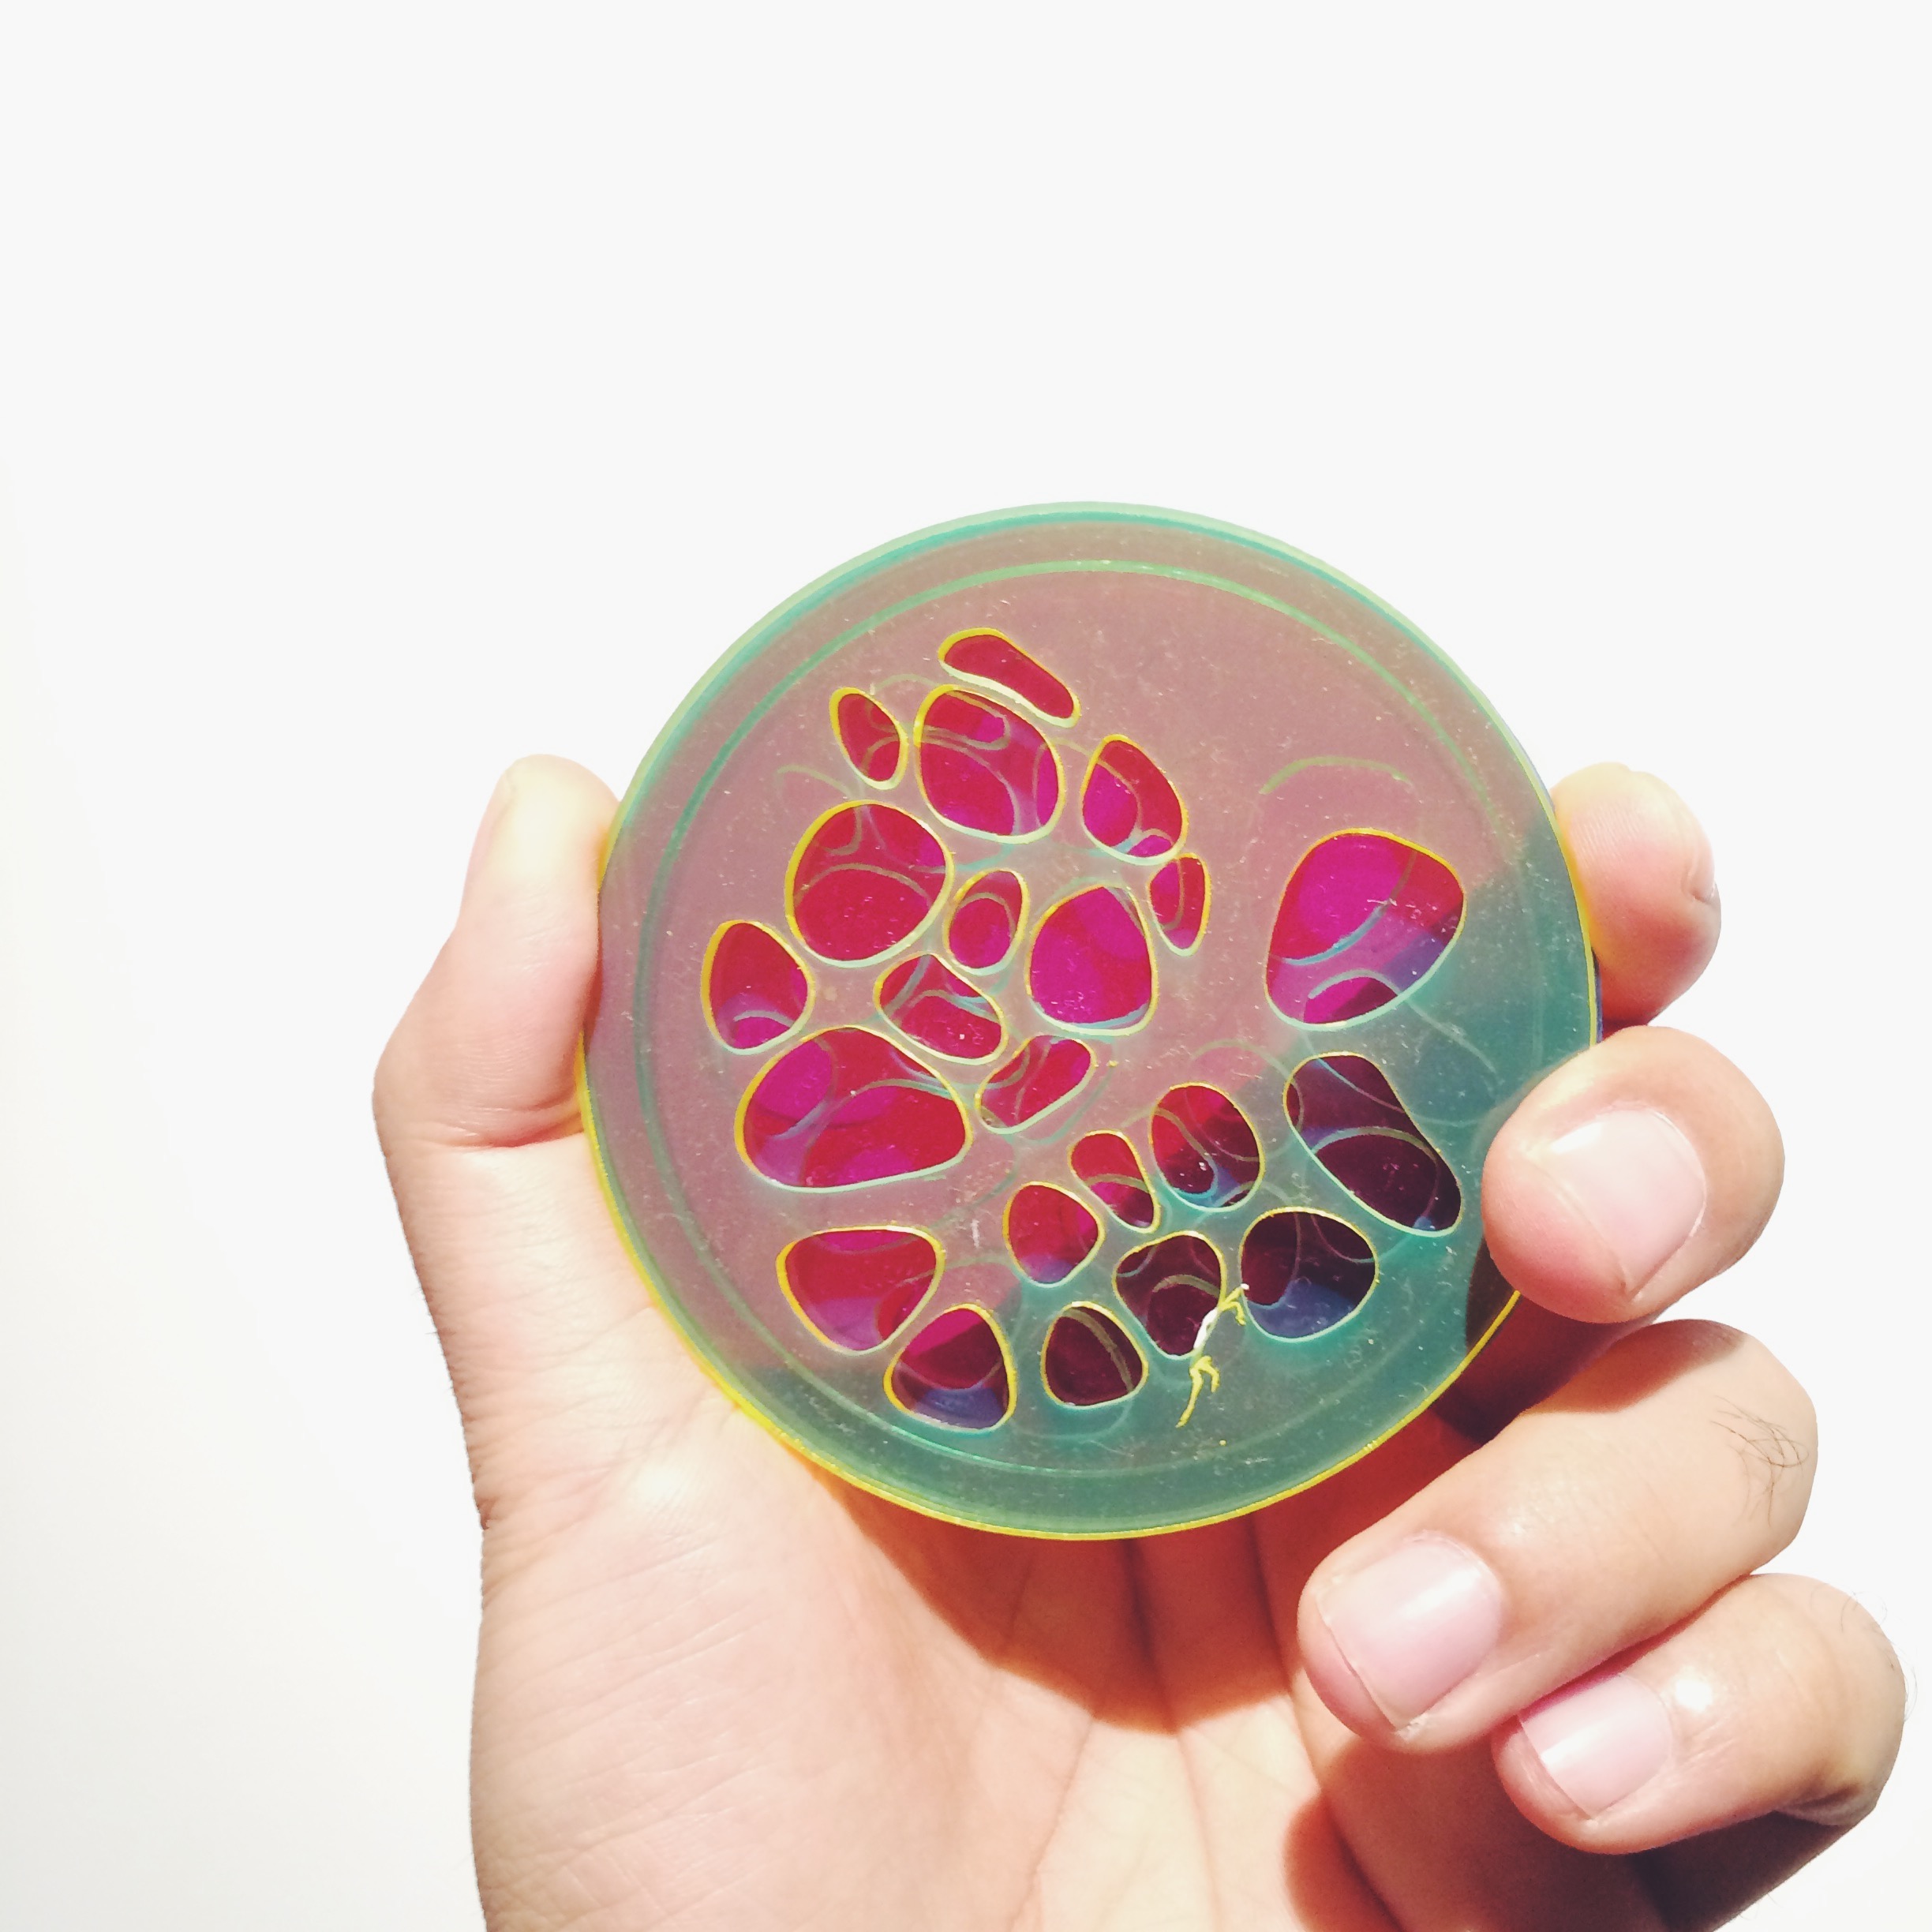
    I attempted to solve the problems with the first prototype by using other materials for both the circular parts, as well as the threads used to keep the wedges in place as a pivot.

    Processed with VSCOcam with a5 preset

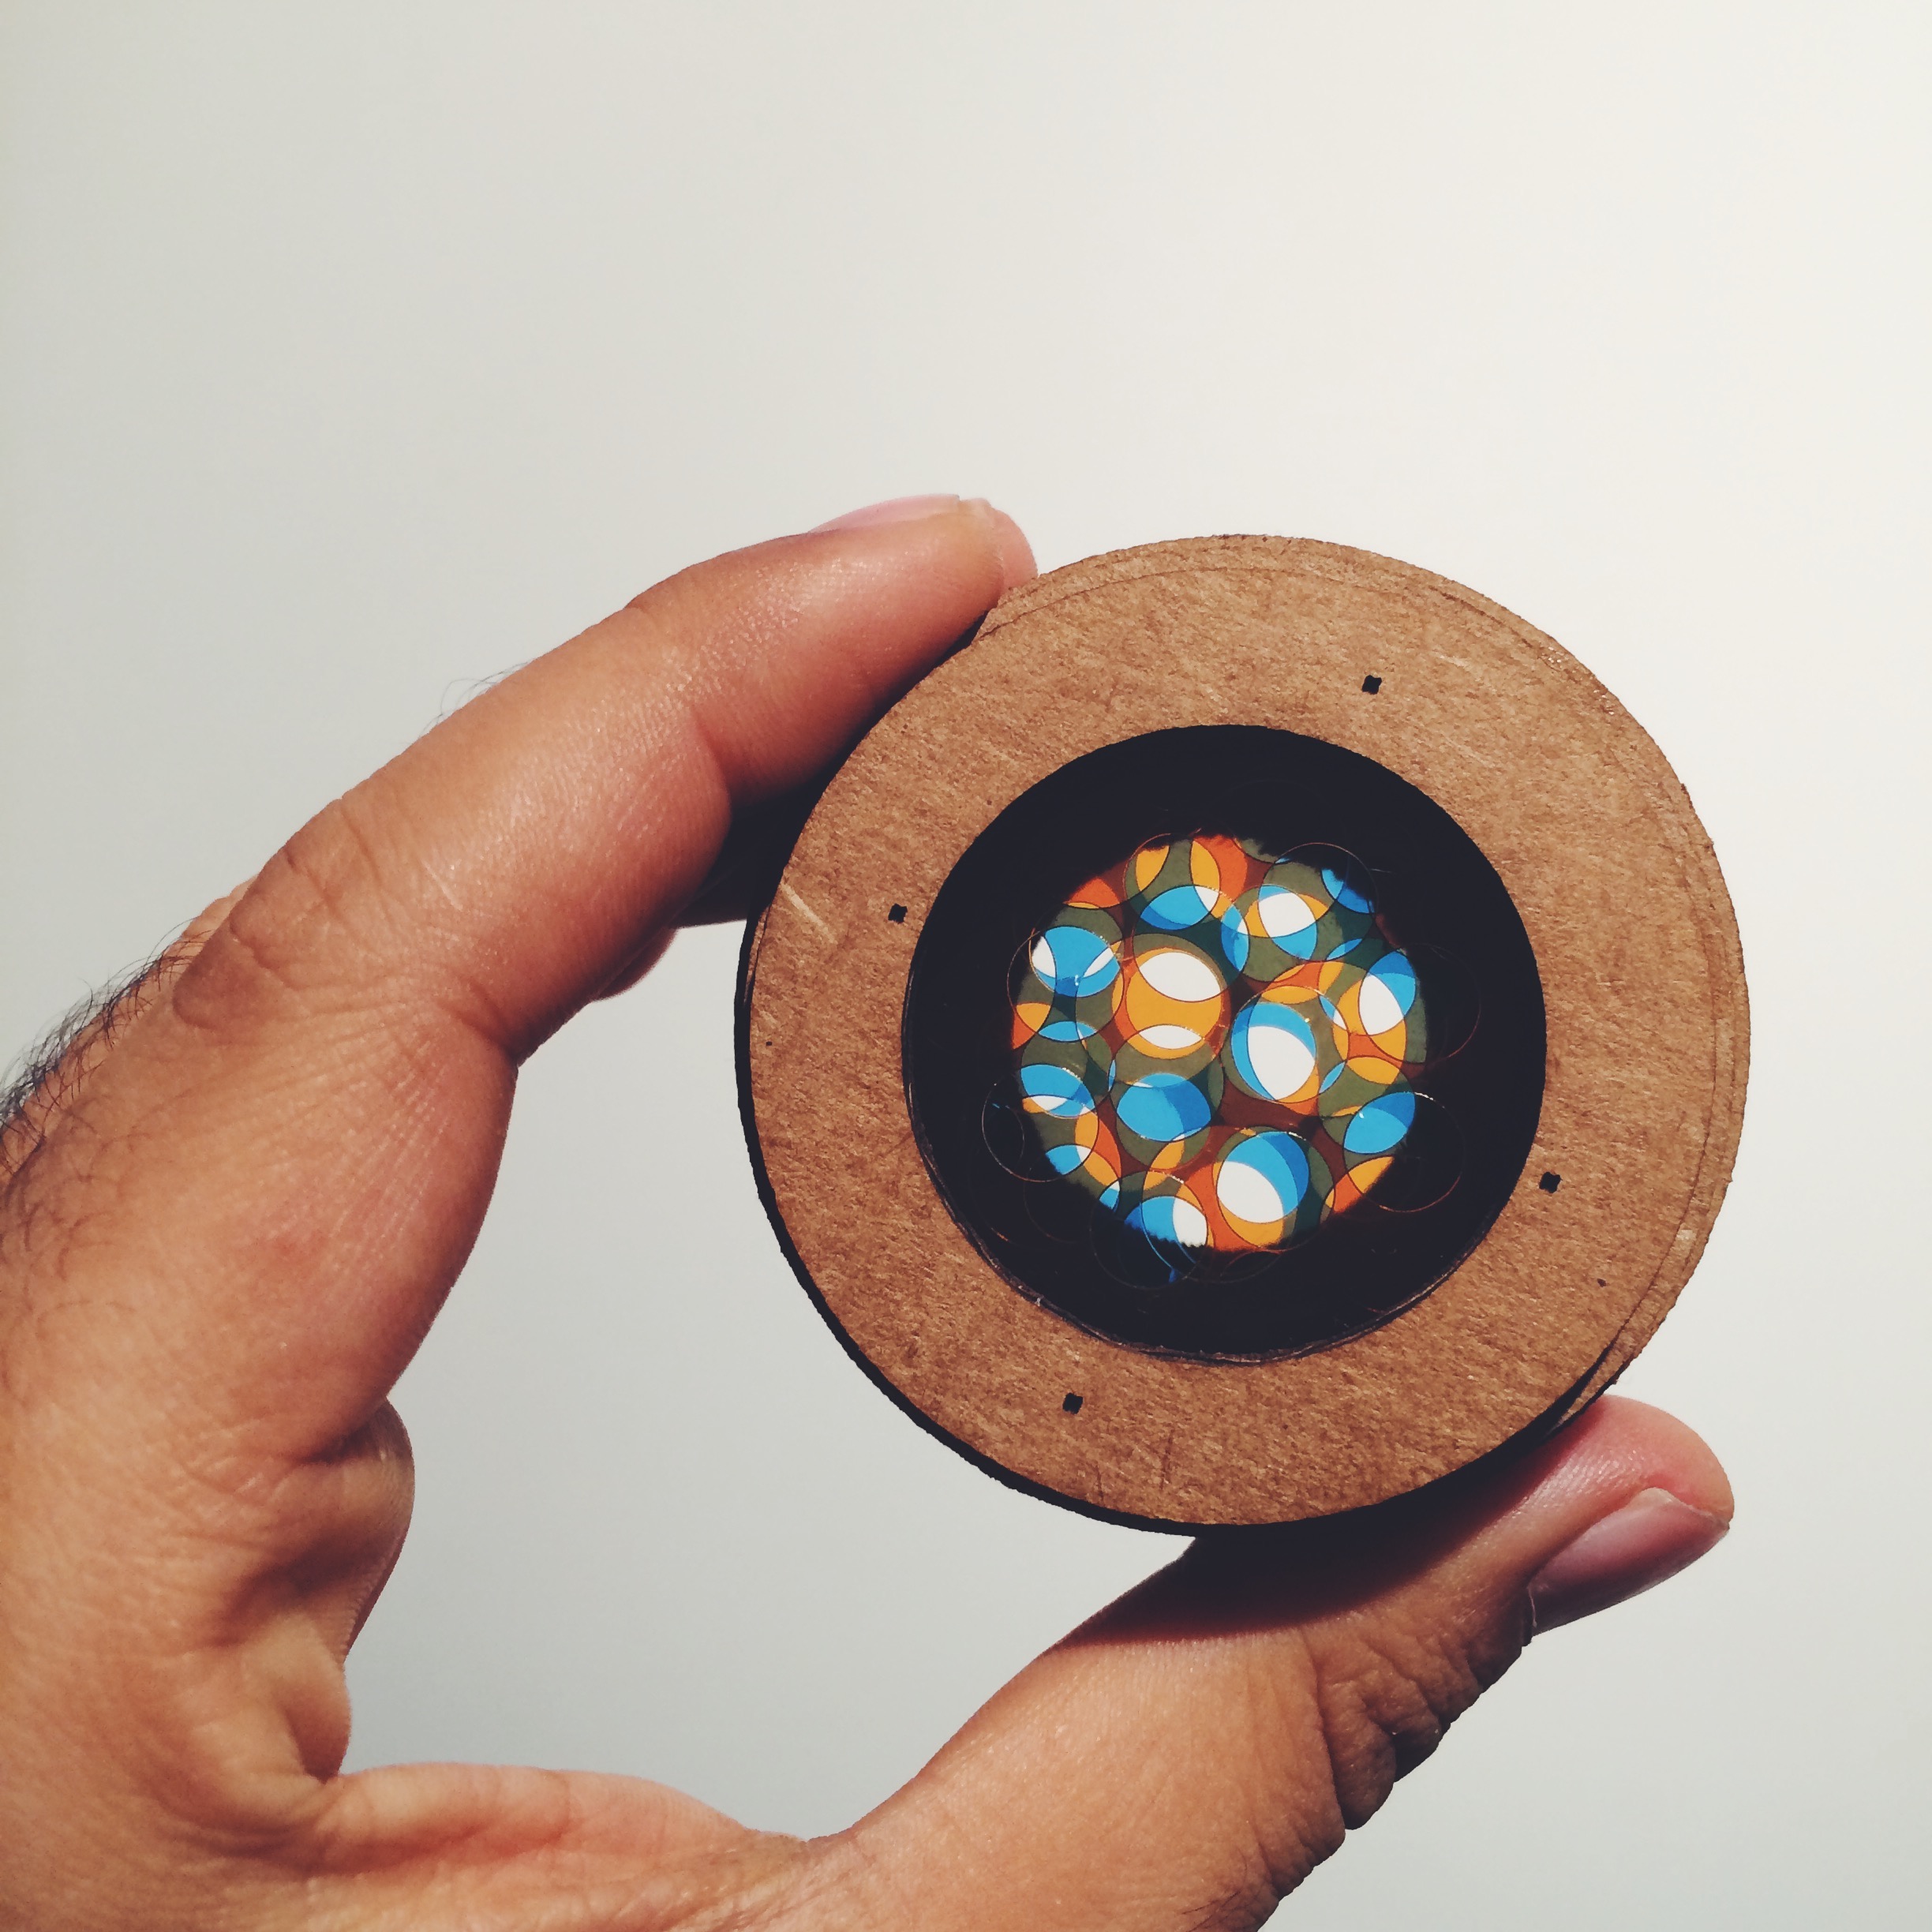
    I used relatively thin black acrylic for the circular frames, cutting the pieces using the laser-cutter. I also added a third circular frame type to cover the design from above and below.

    Processed with VSCOcam with a5 preset


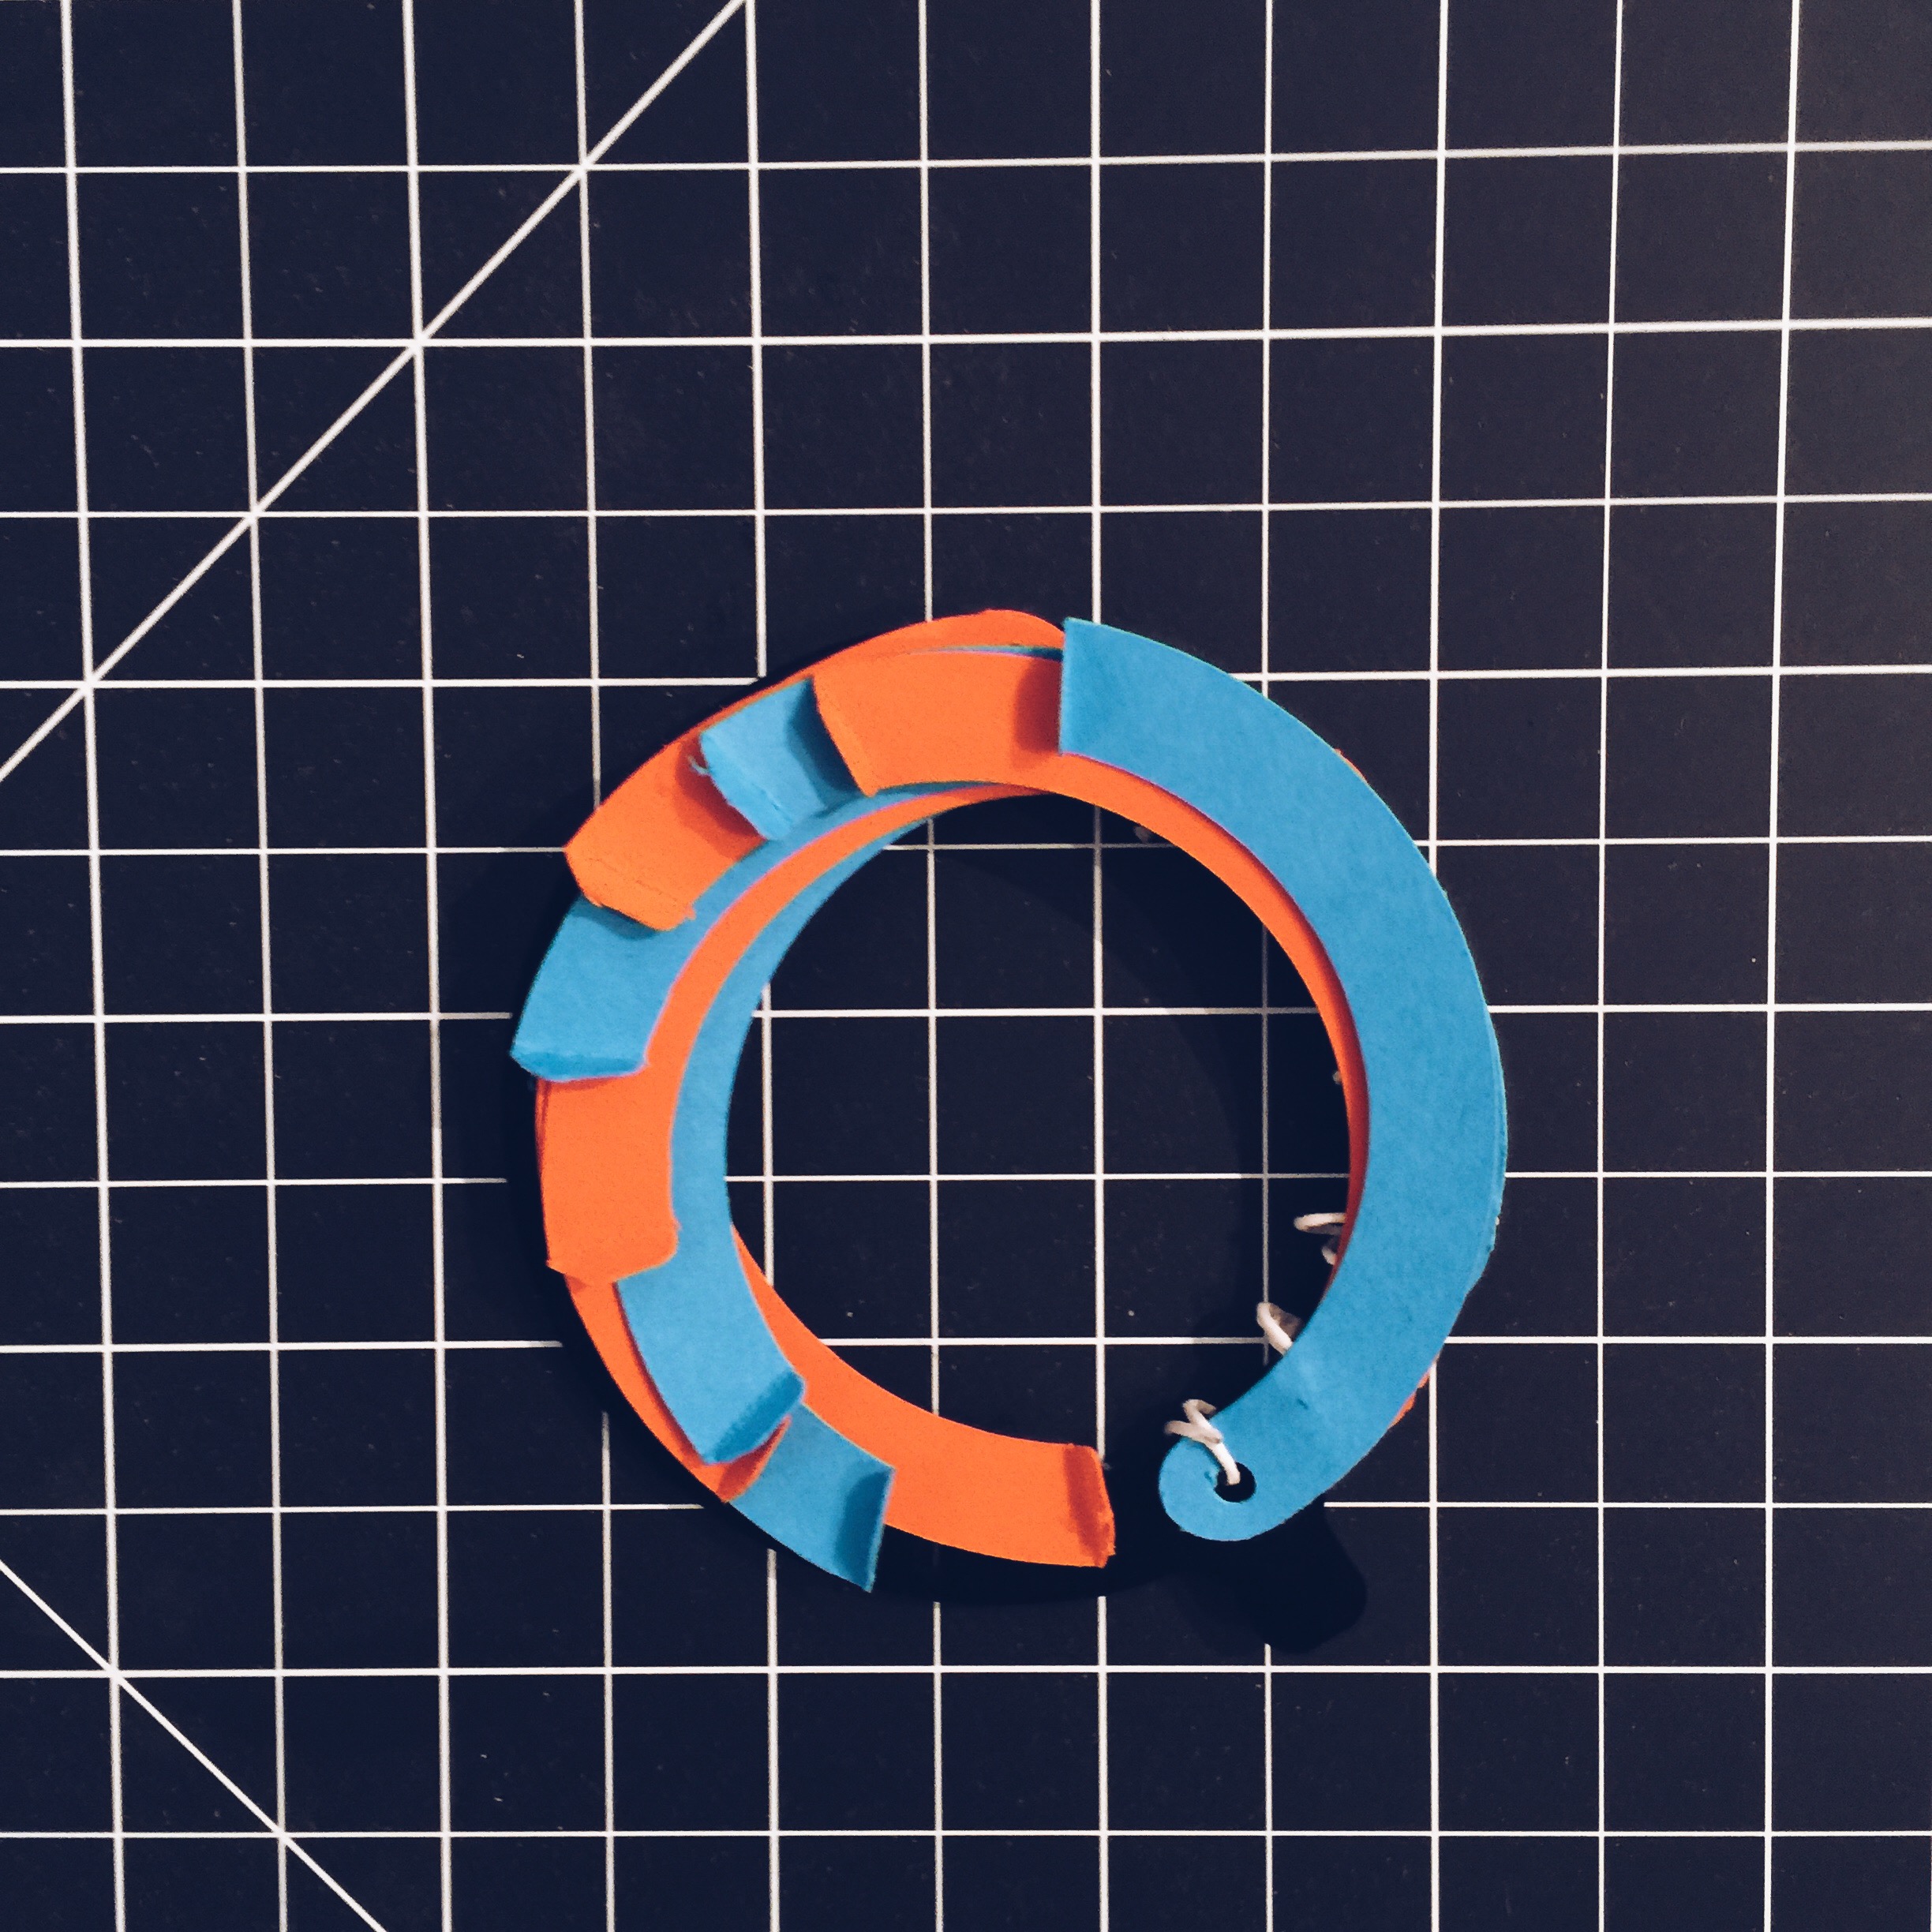
    The process of placing the wedges is time consuming, but the choice of using malleable wires as fasteners (instead of the hemp threads I used in the previous prototype), made the process much smoother.

    Processed with VSCOcam with f2 preset


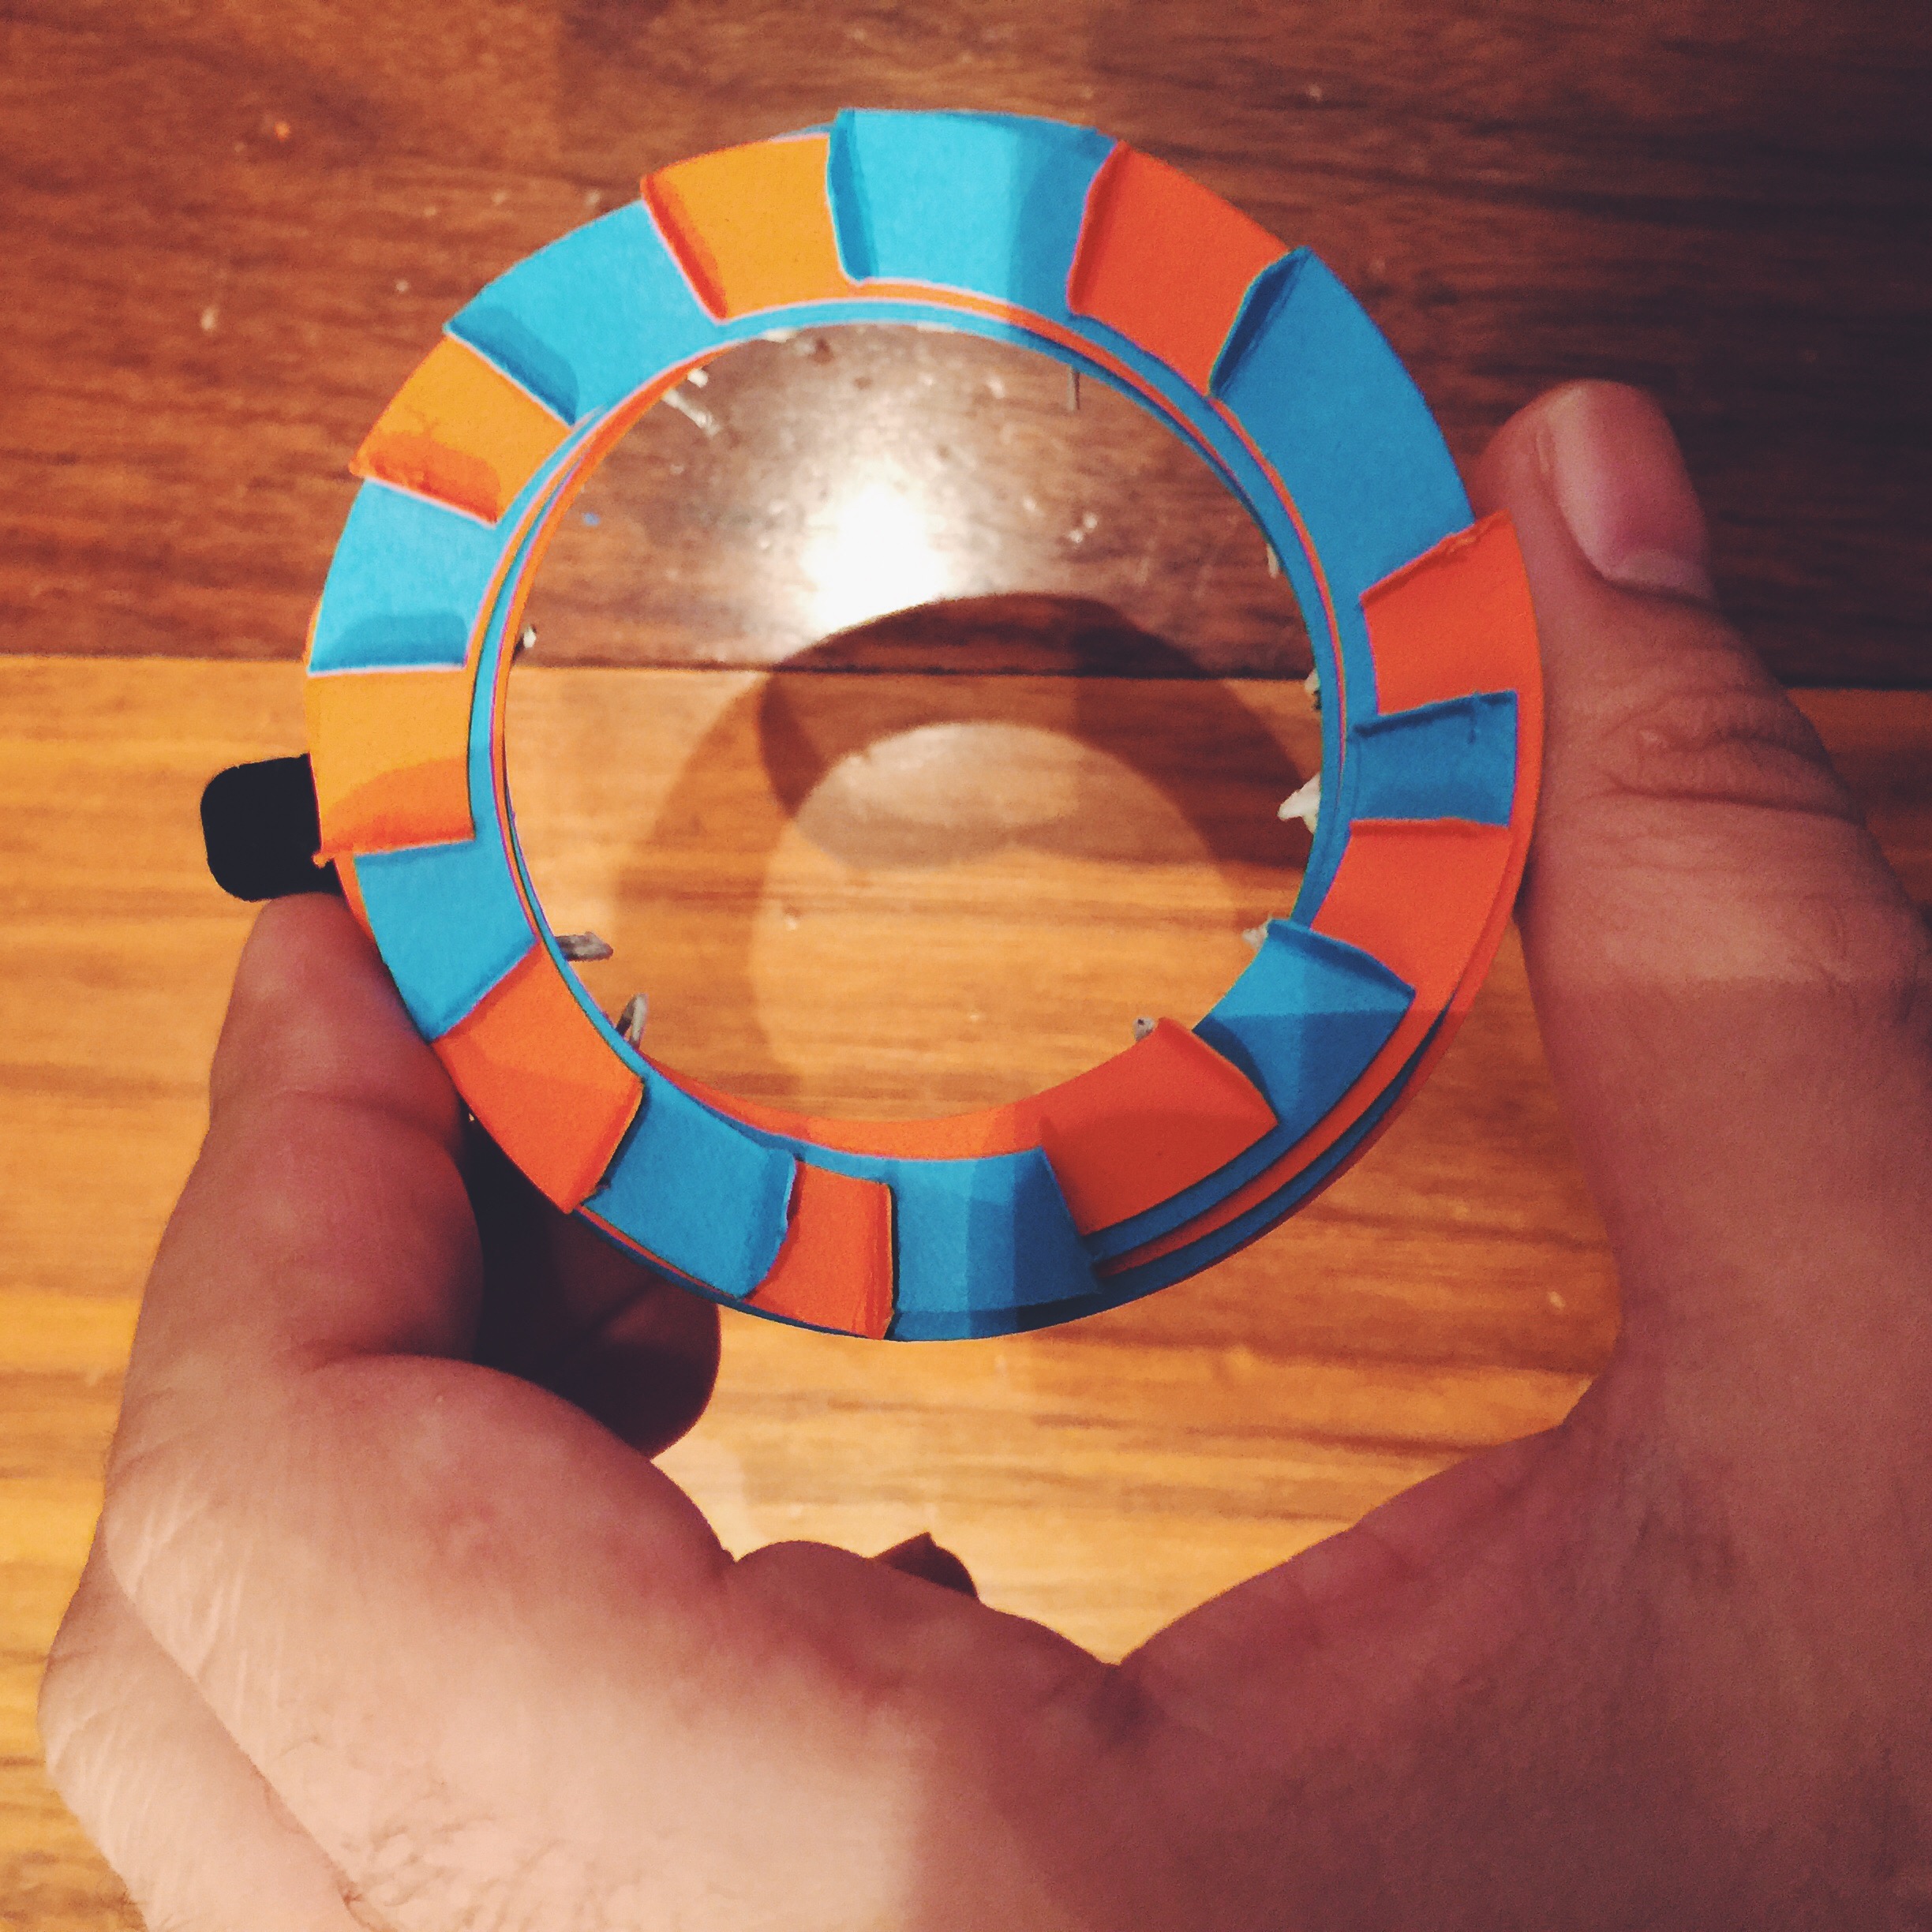
    Using the acrylic, laser-cut “friction” frame, the movement was constrained in the way it is supposed to be.


    Processed with VSCOcam with a5 preset

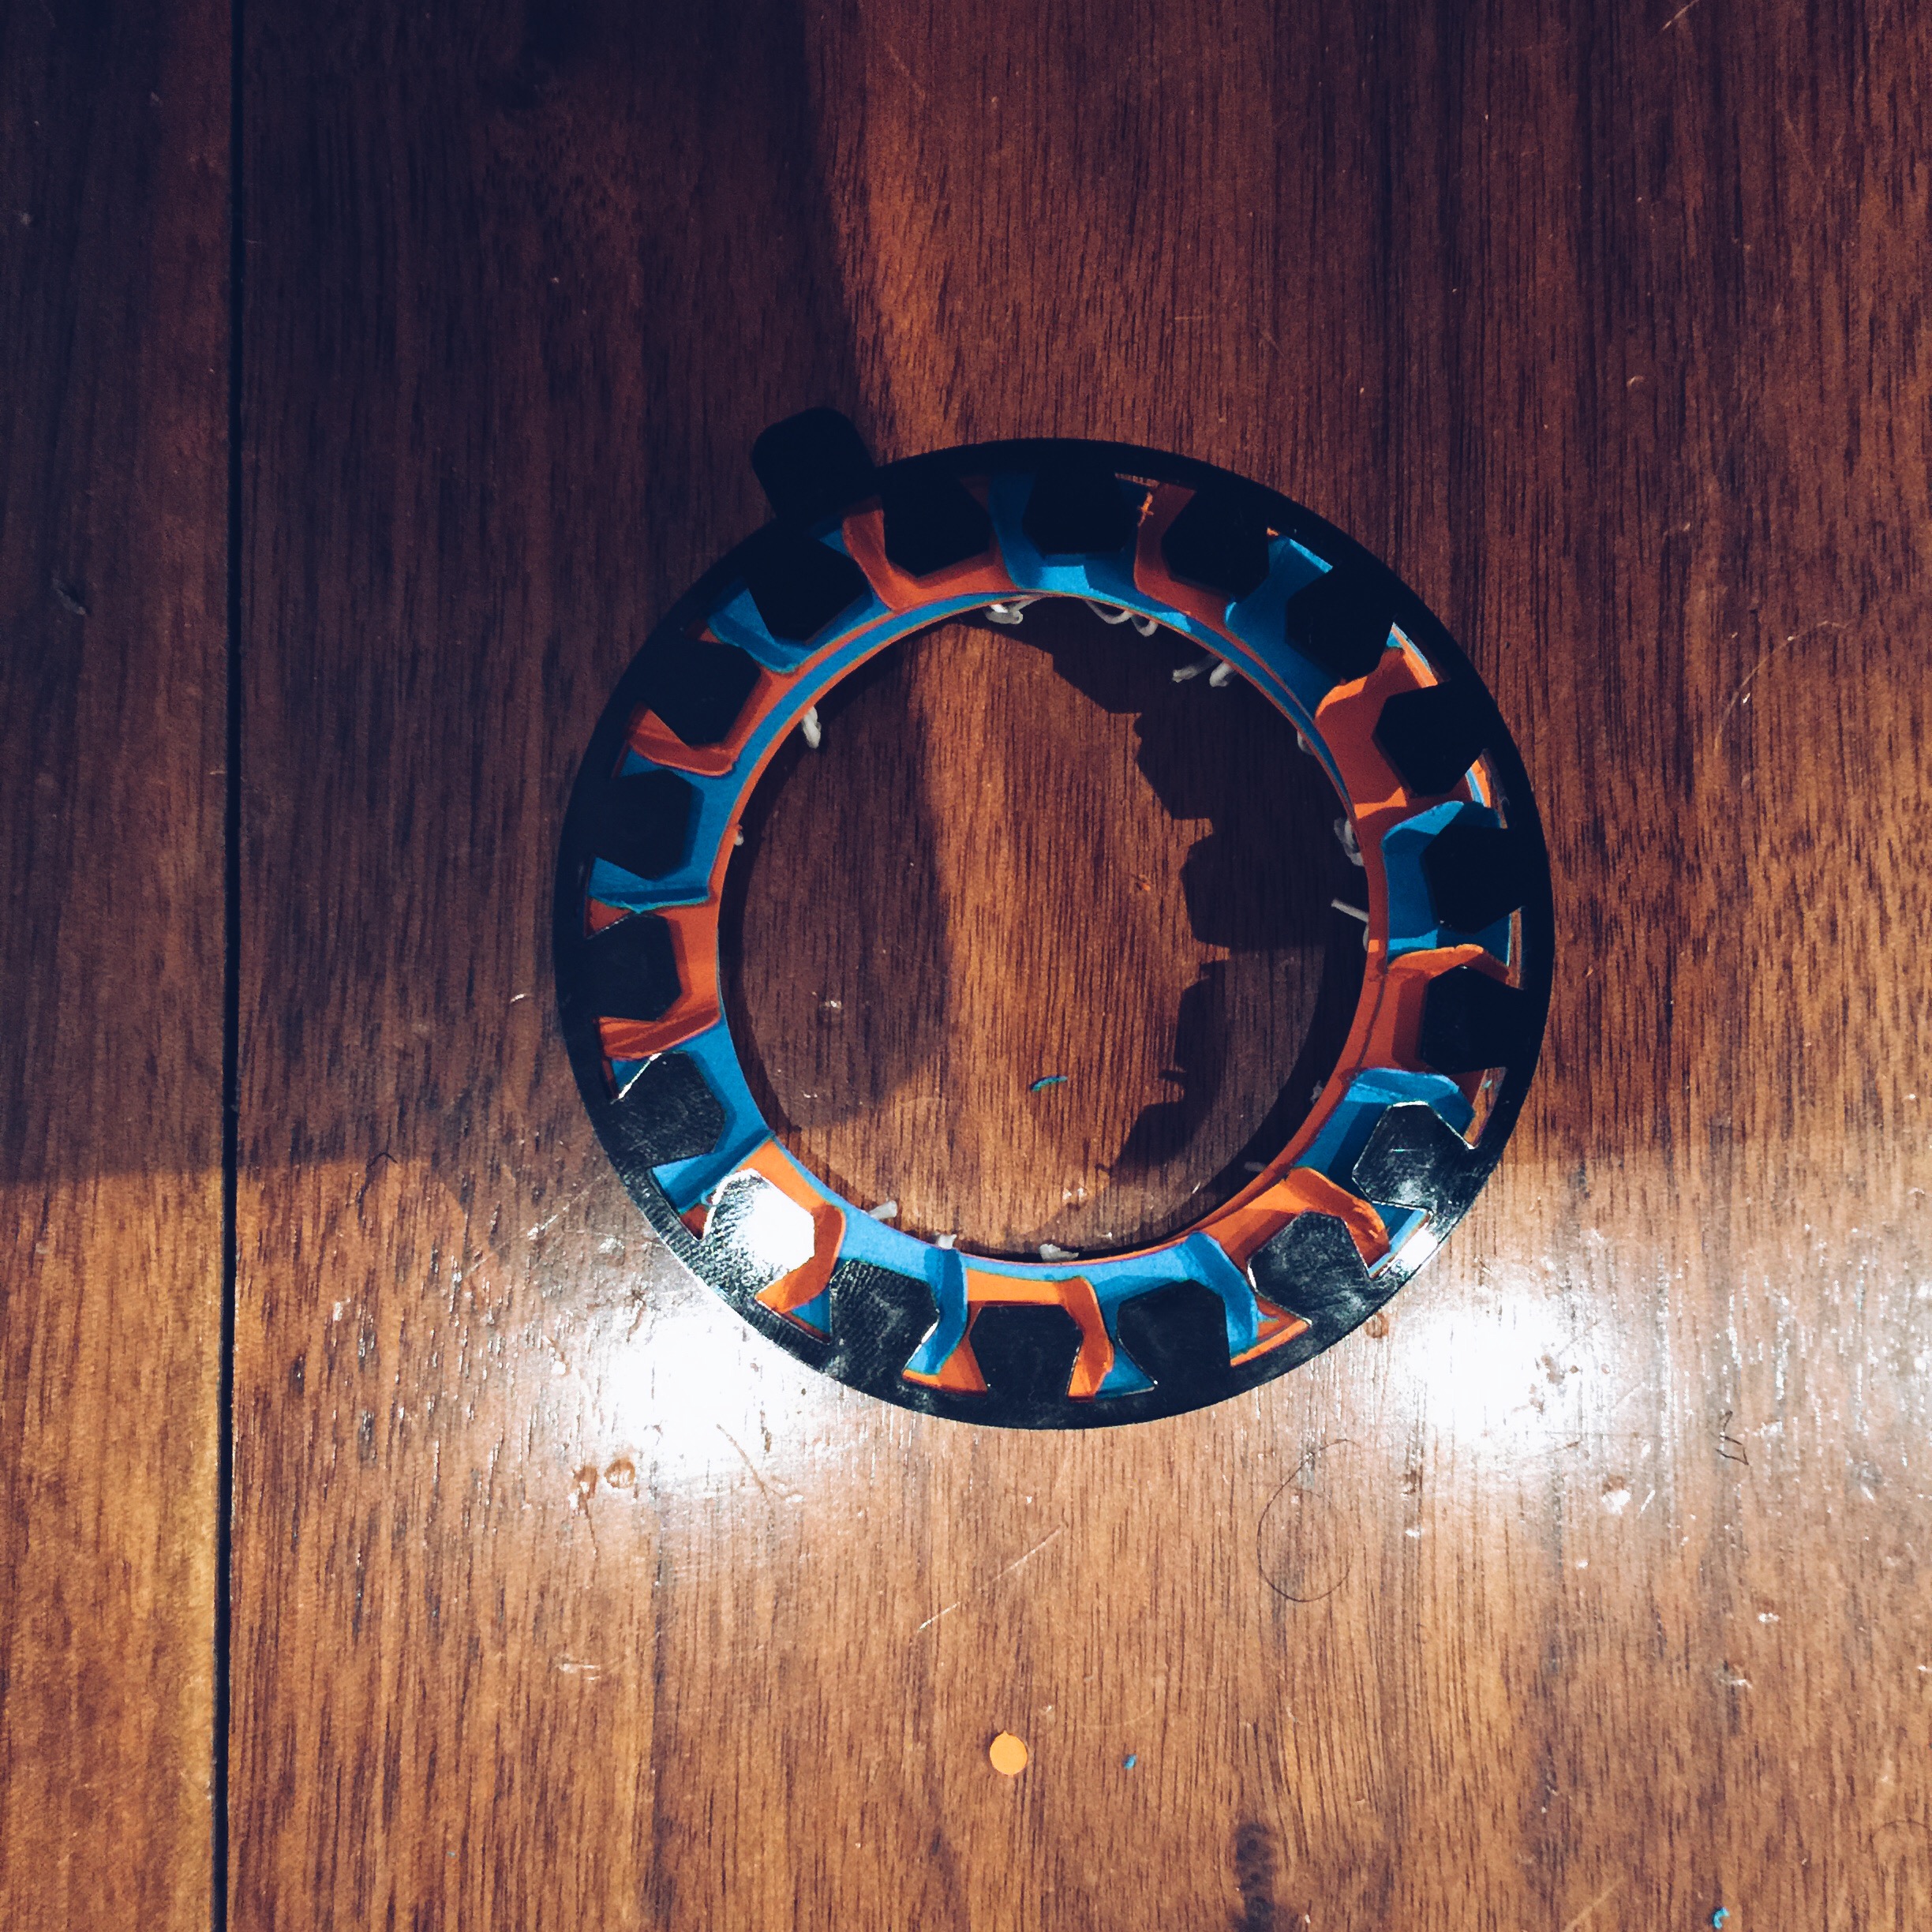
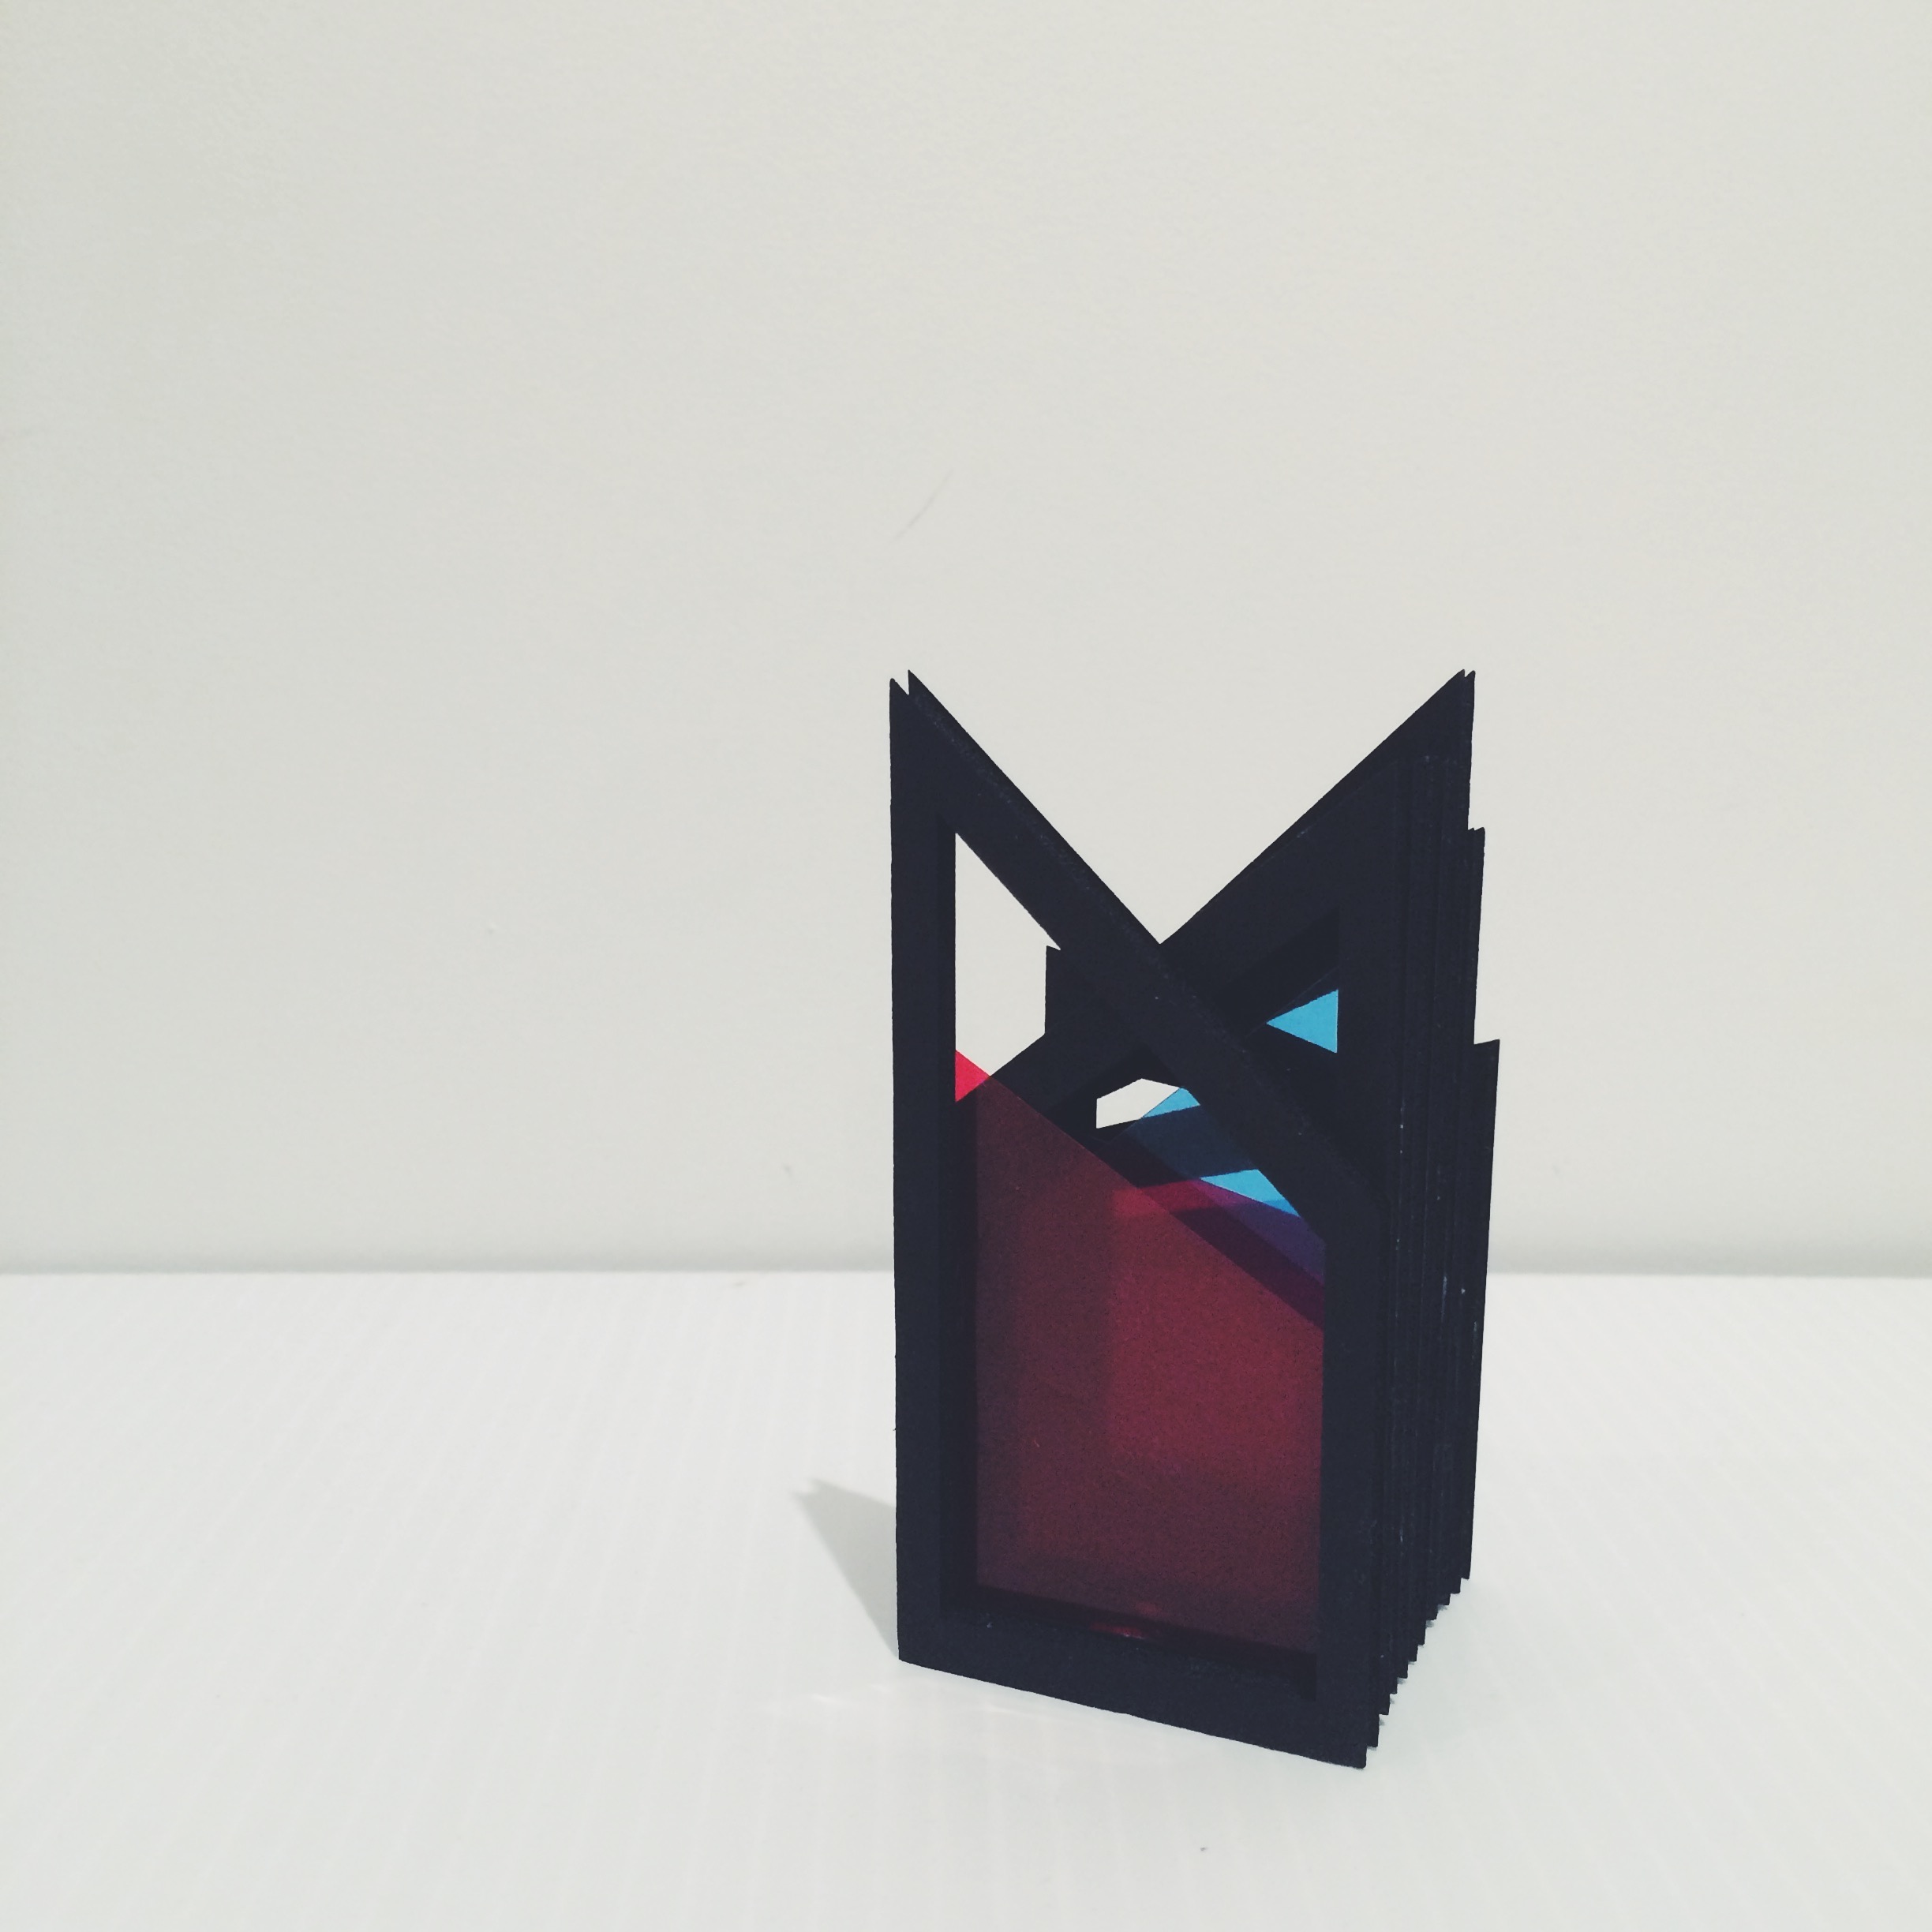
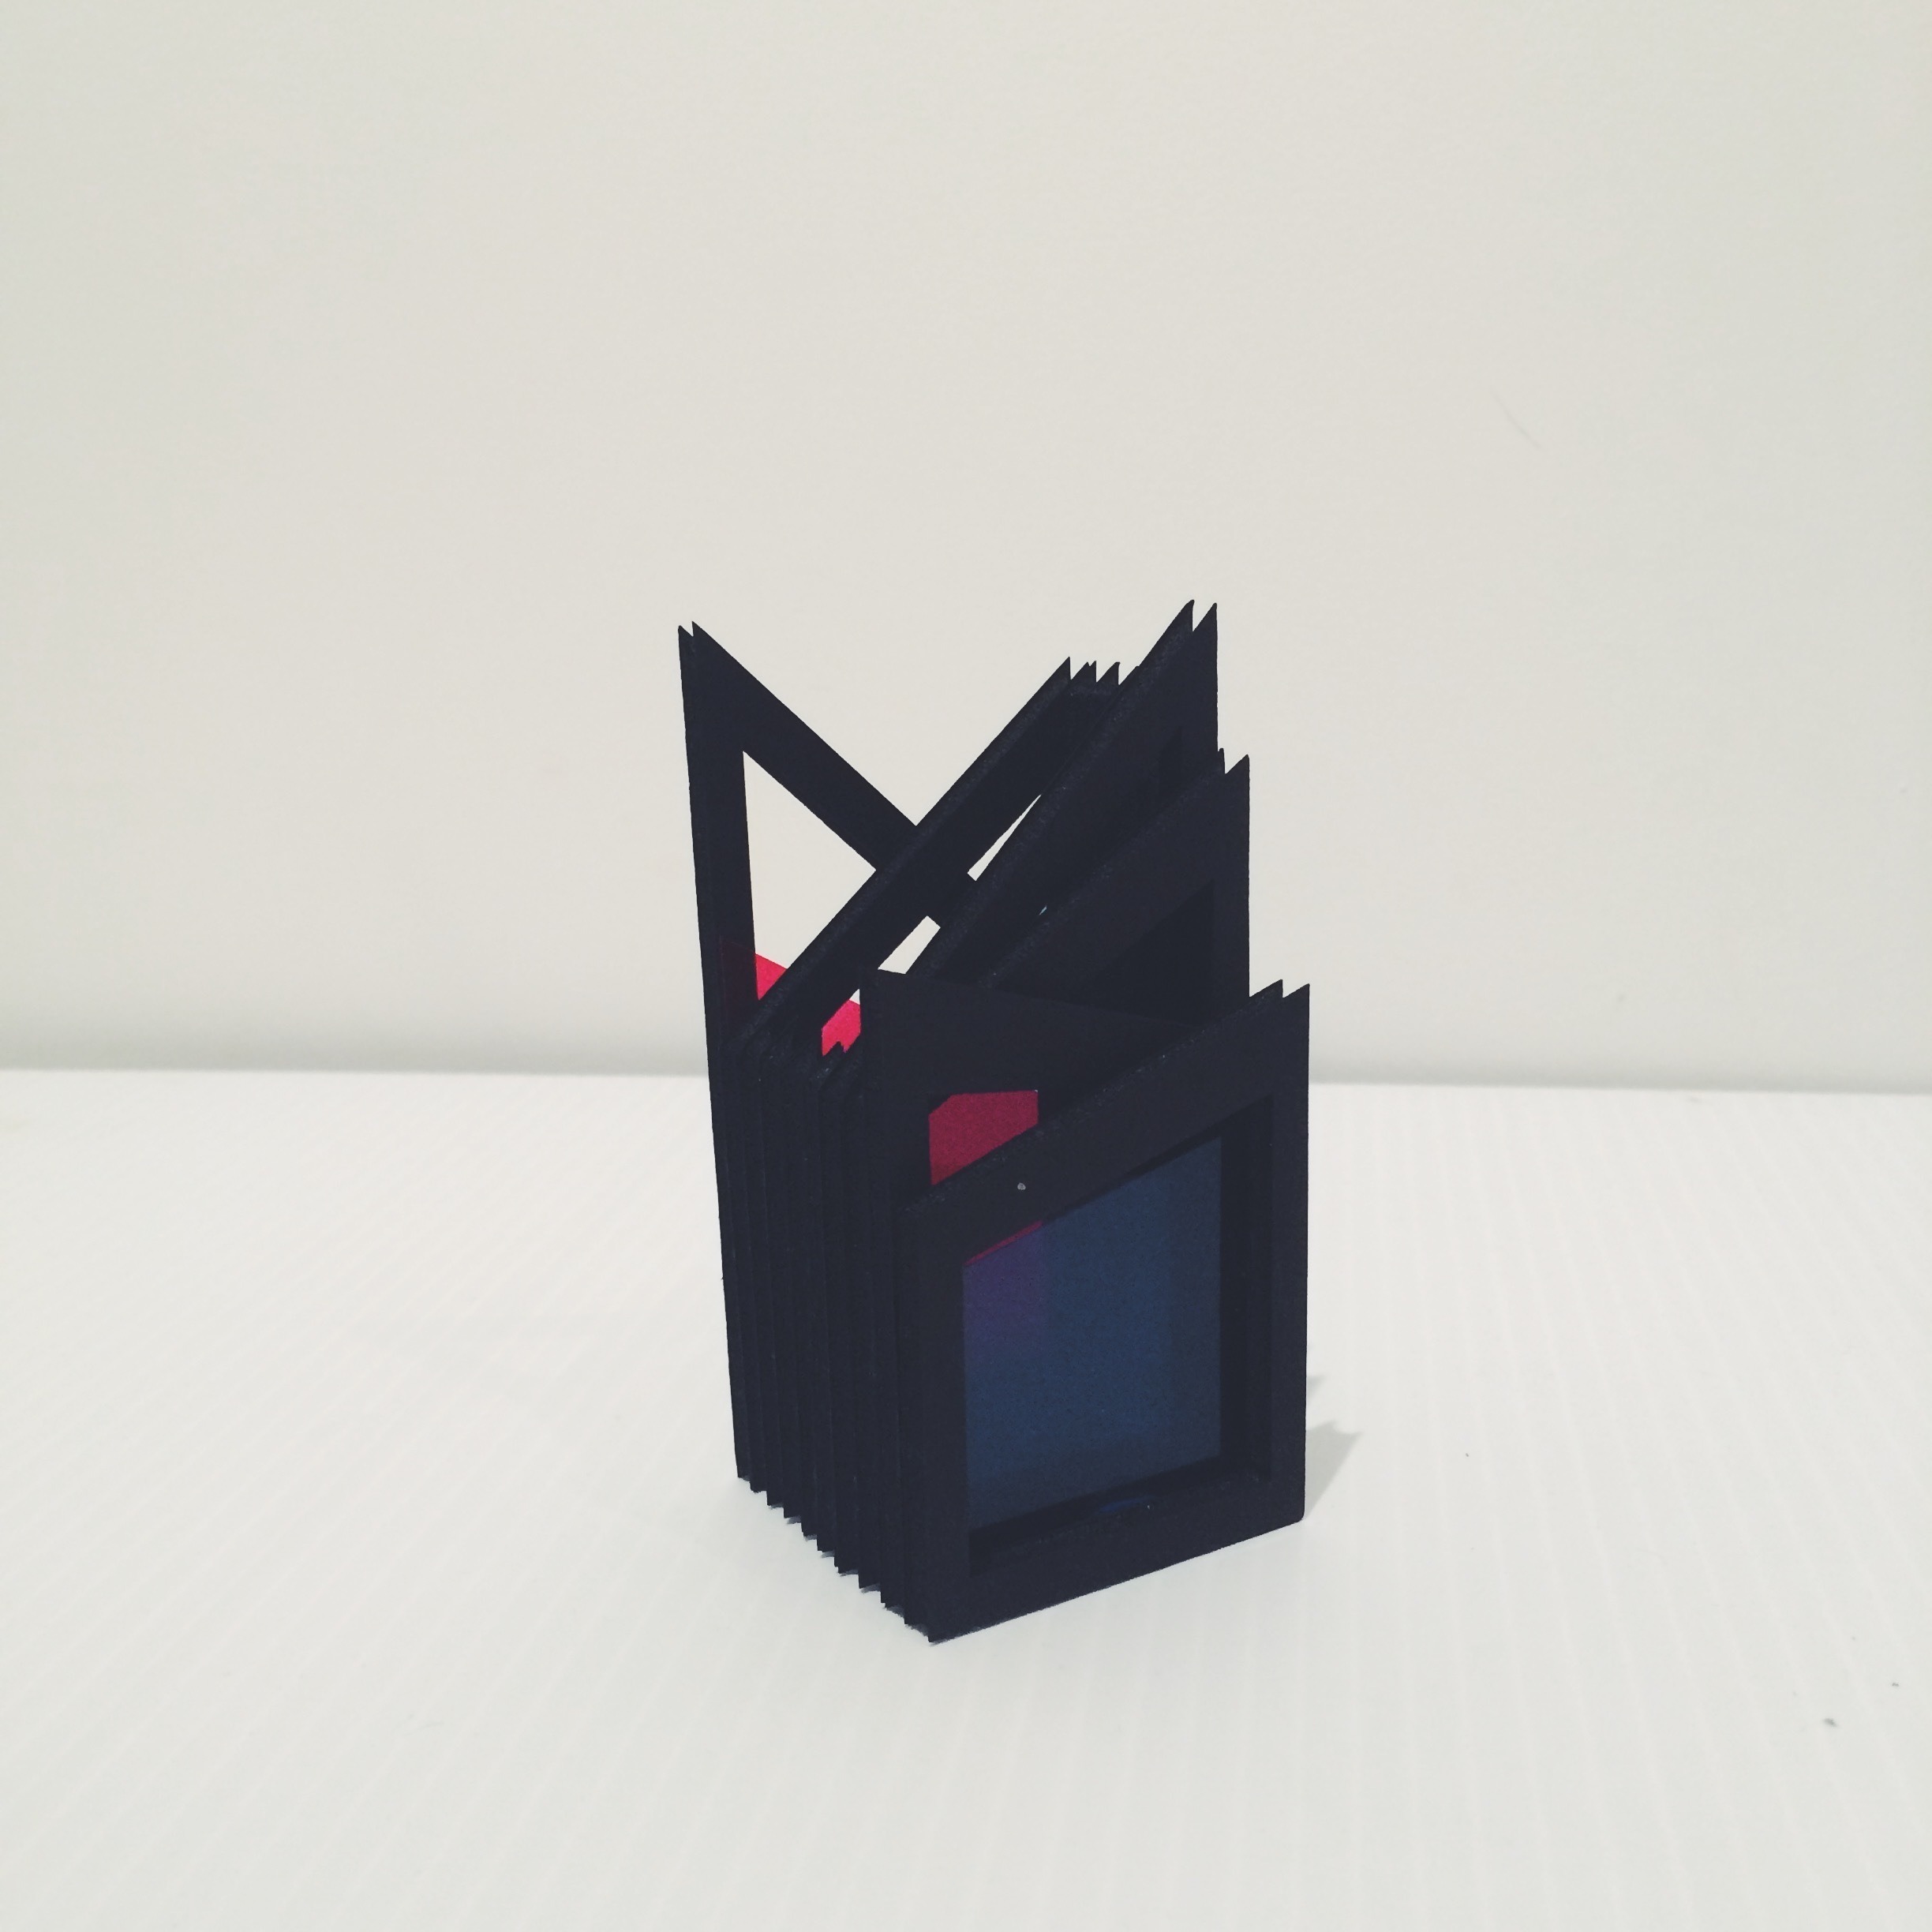
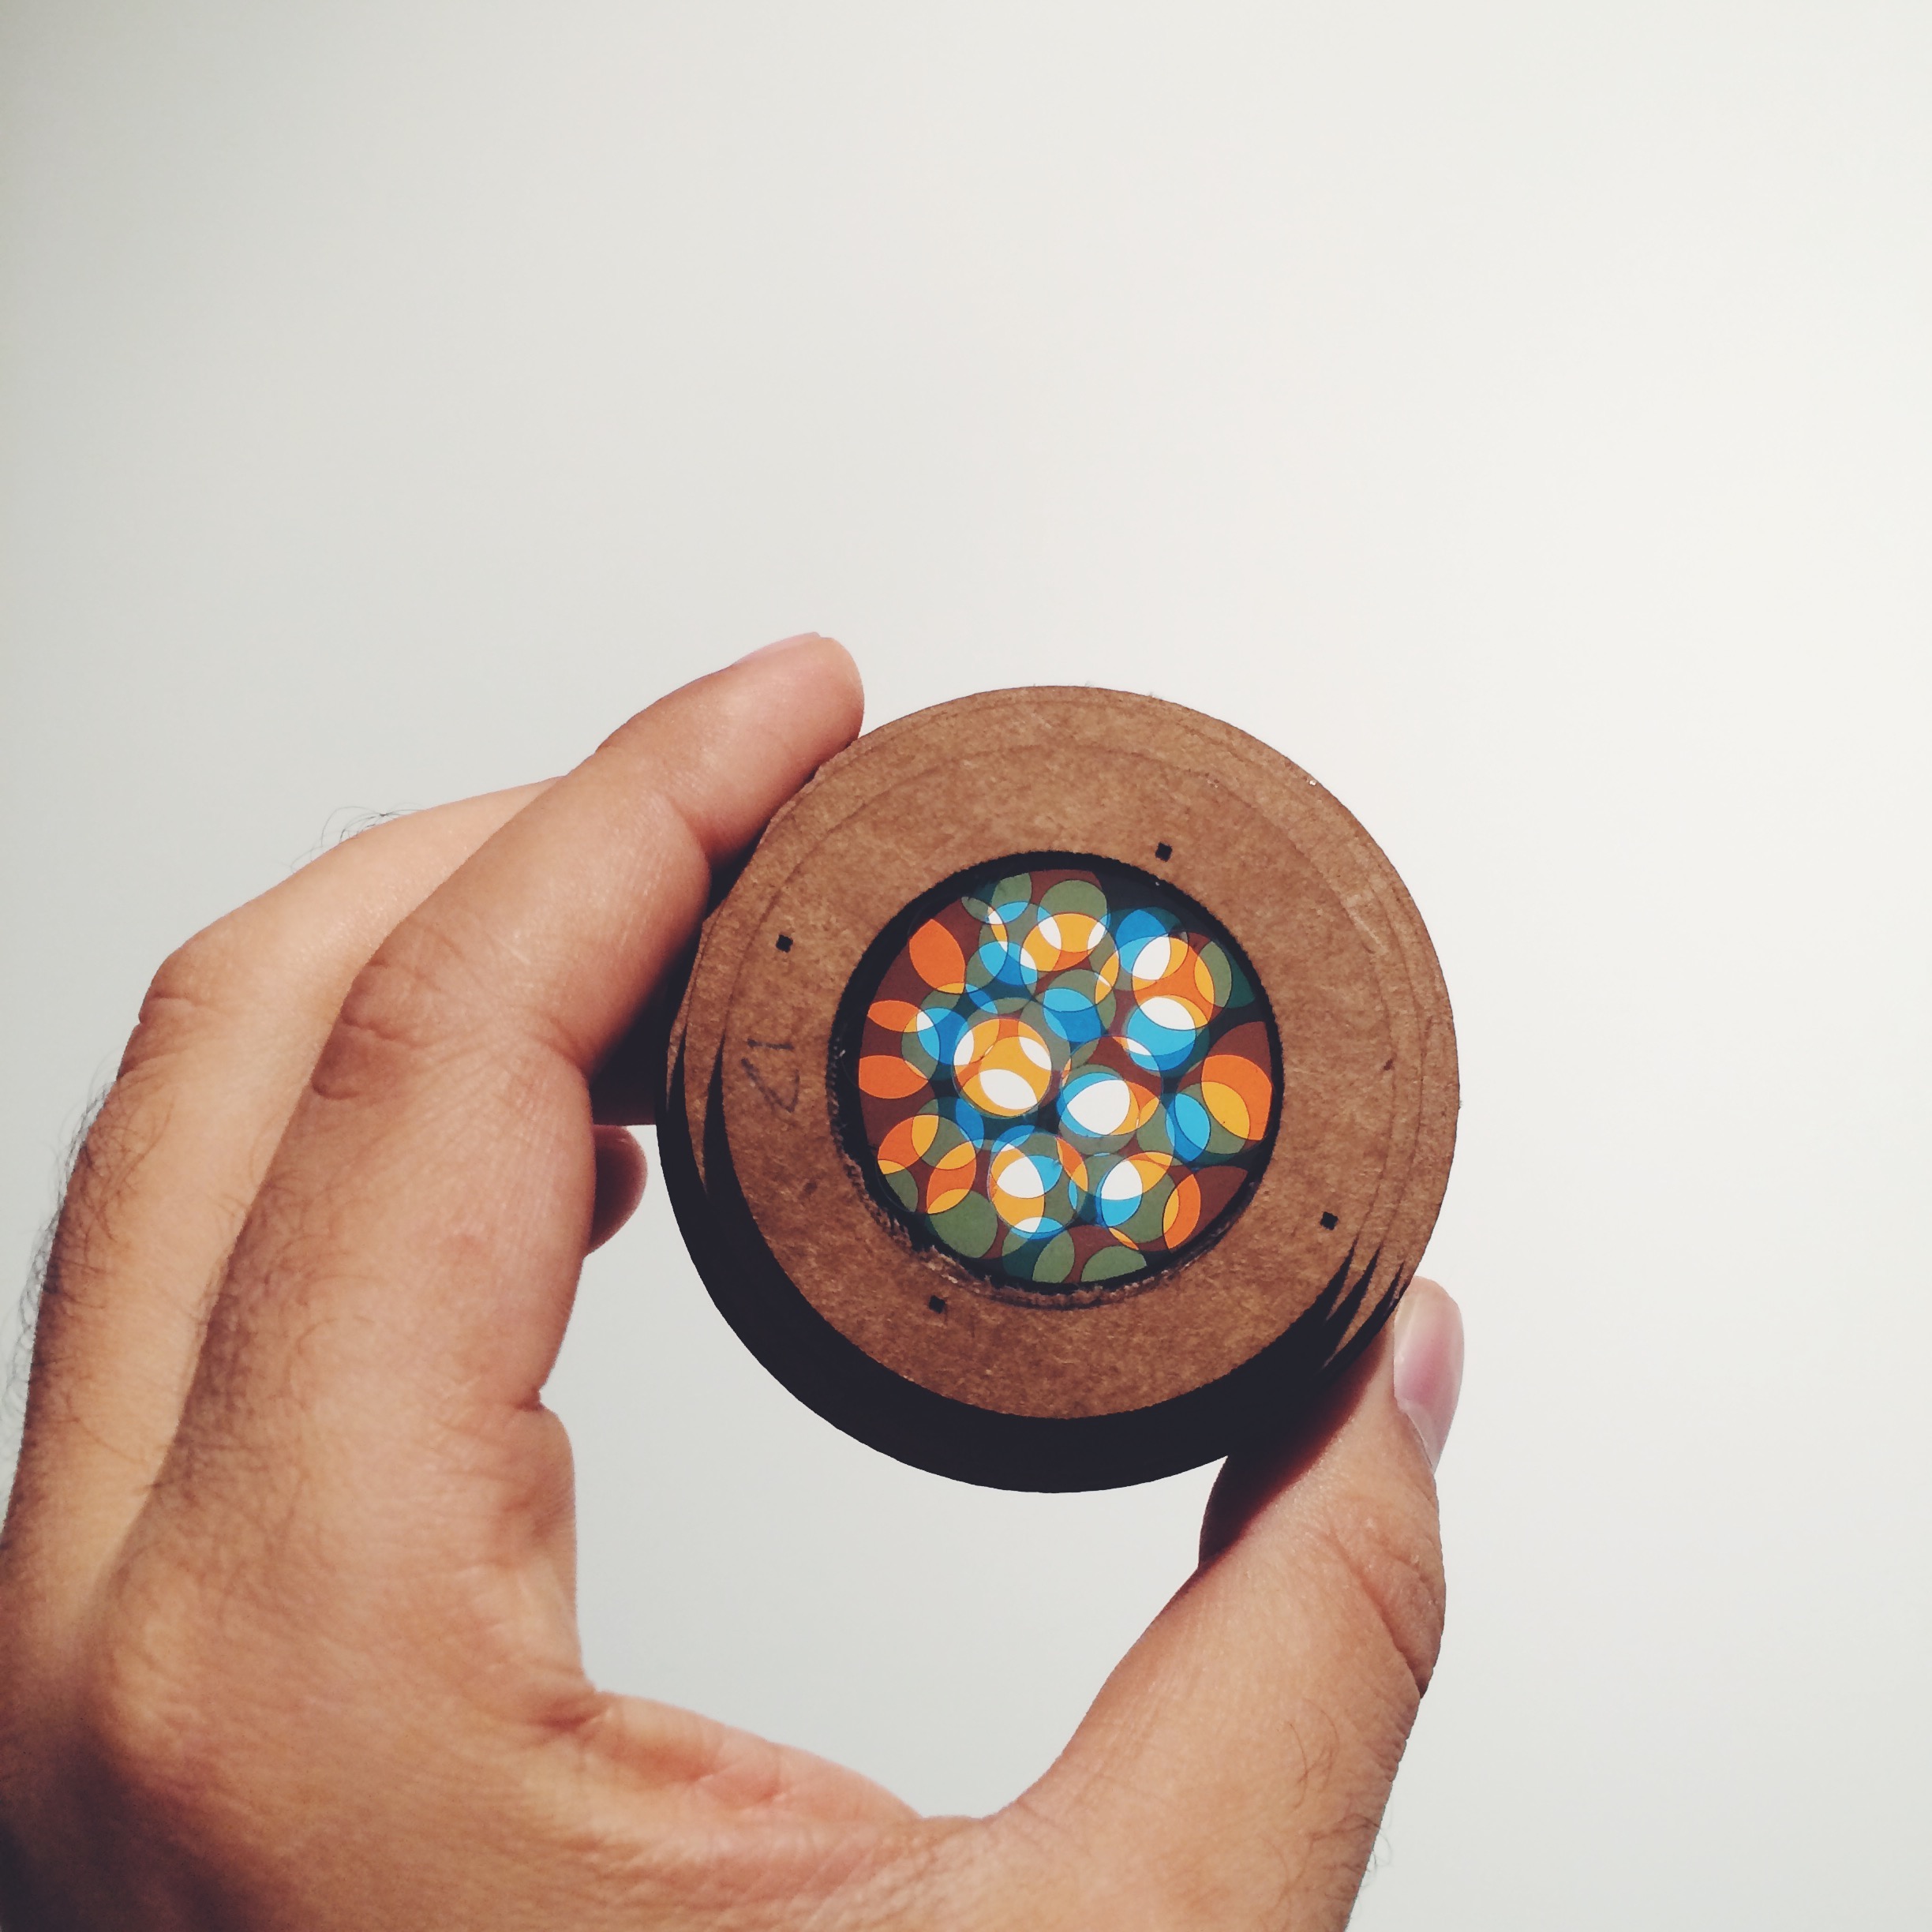
    The final result, as is shown in the image at the top of this post, is functionally quite the improvement over the previous prototype. However, it has its share of problems: the choice of cardstock for the wedges is not strong enough to withstand the force applied by the friction frame. While it worked well initially (the wedges moved appropriately according to the direction of the motion), it soon lost its resistance and the pieces came undone.

    Also, there is the visual problem of the visible wire fasteners. The appropriate substitute would be a non-wire like material, that I am yet to identify.
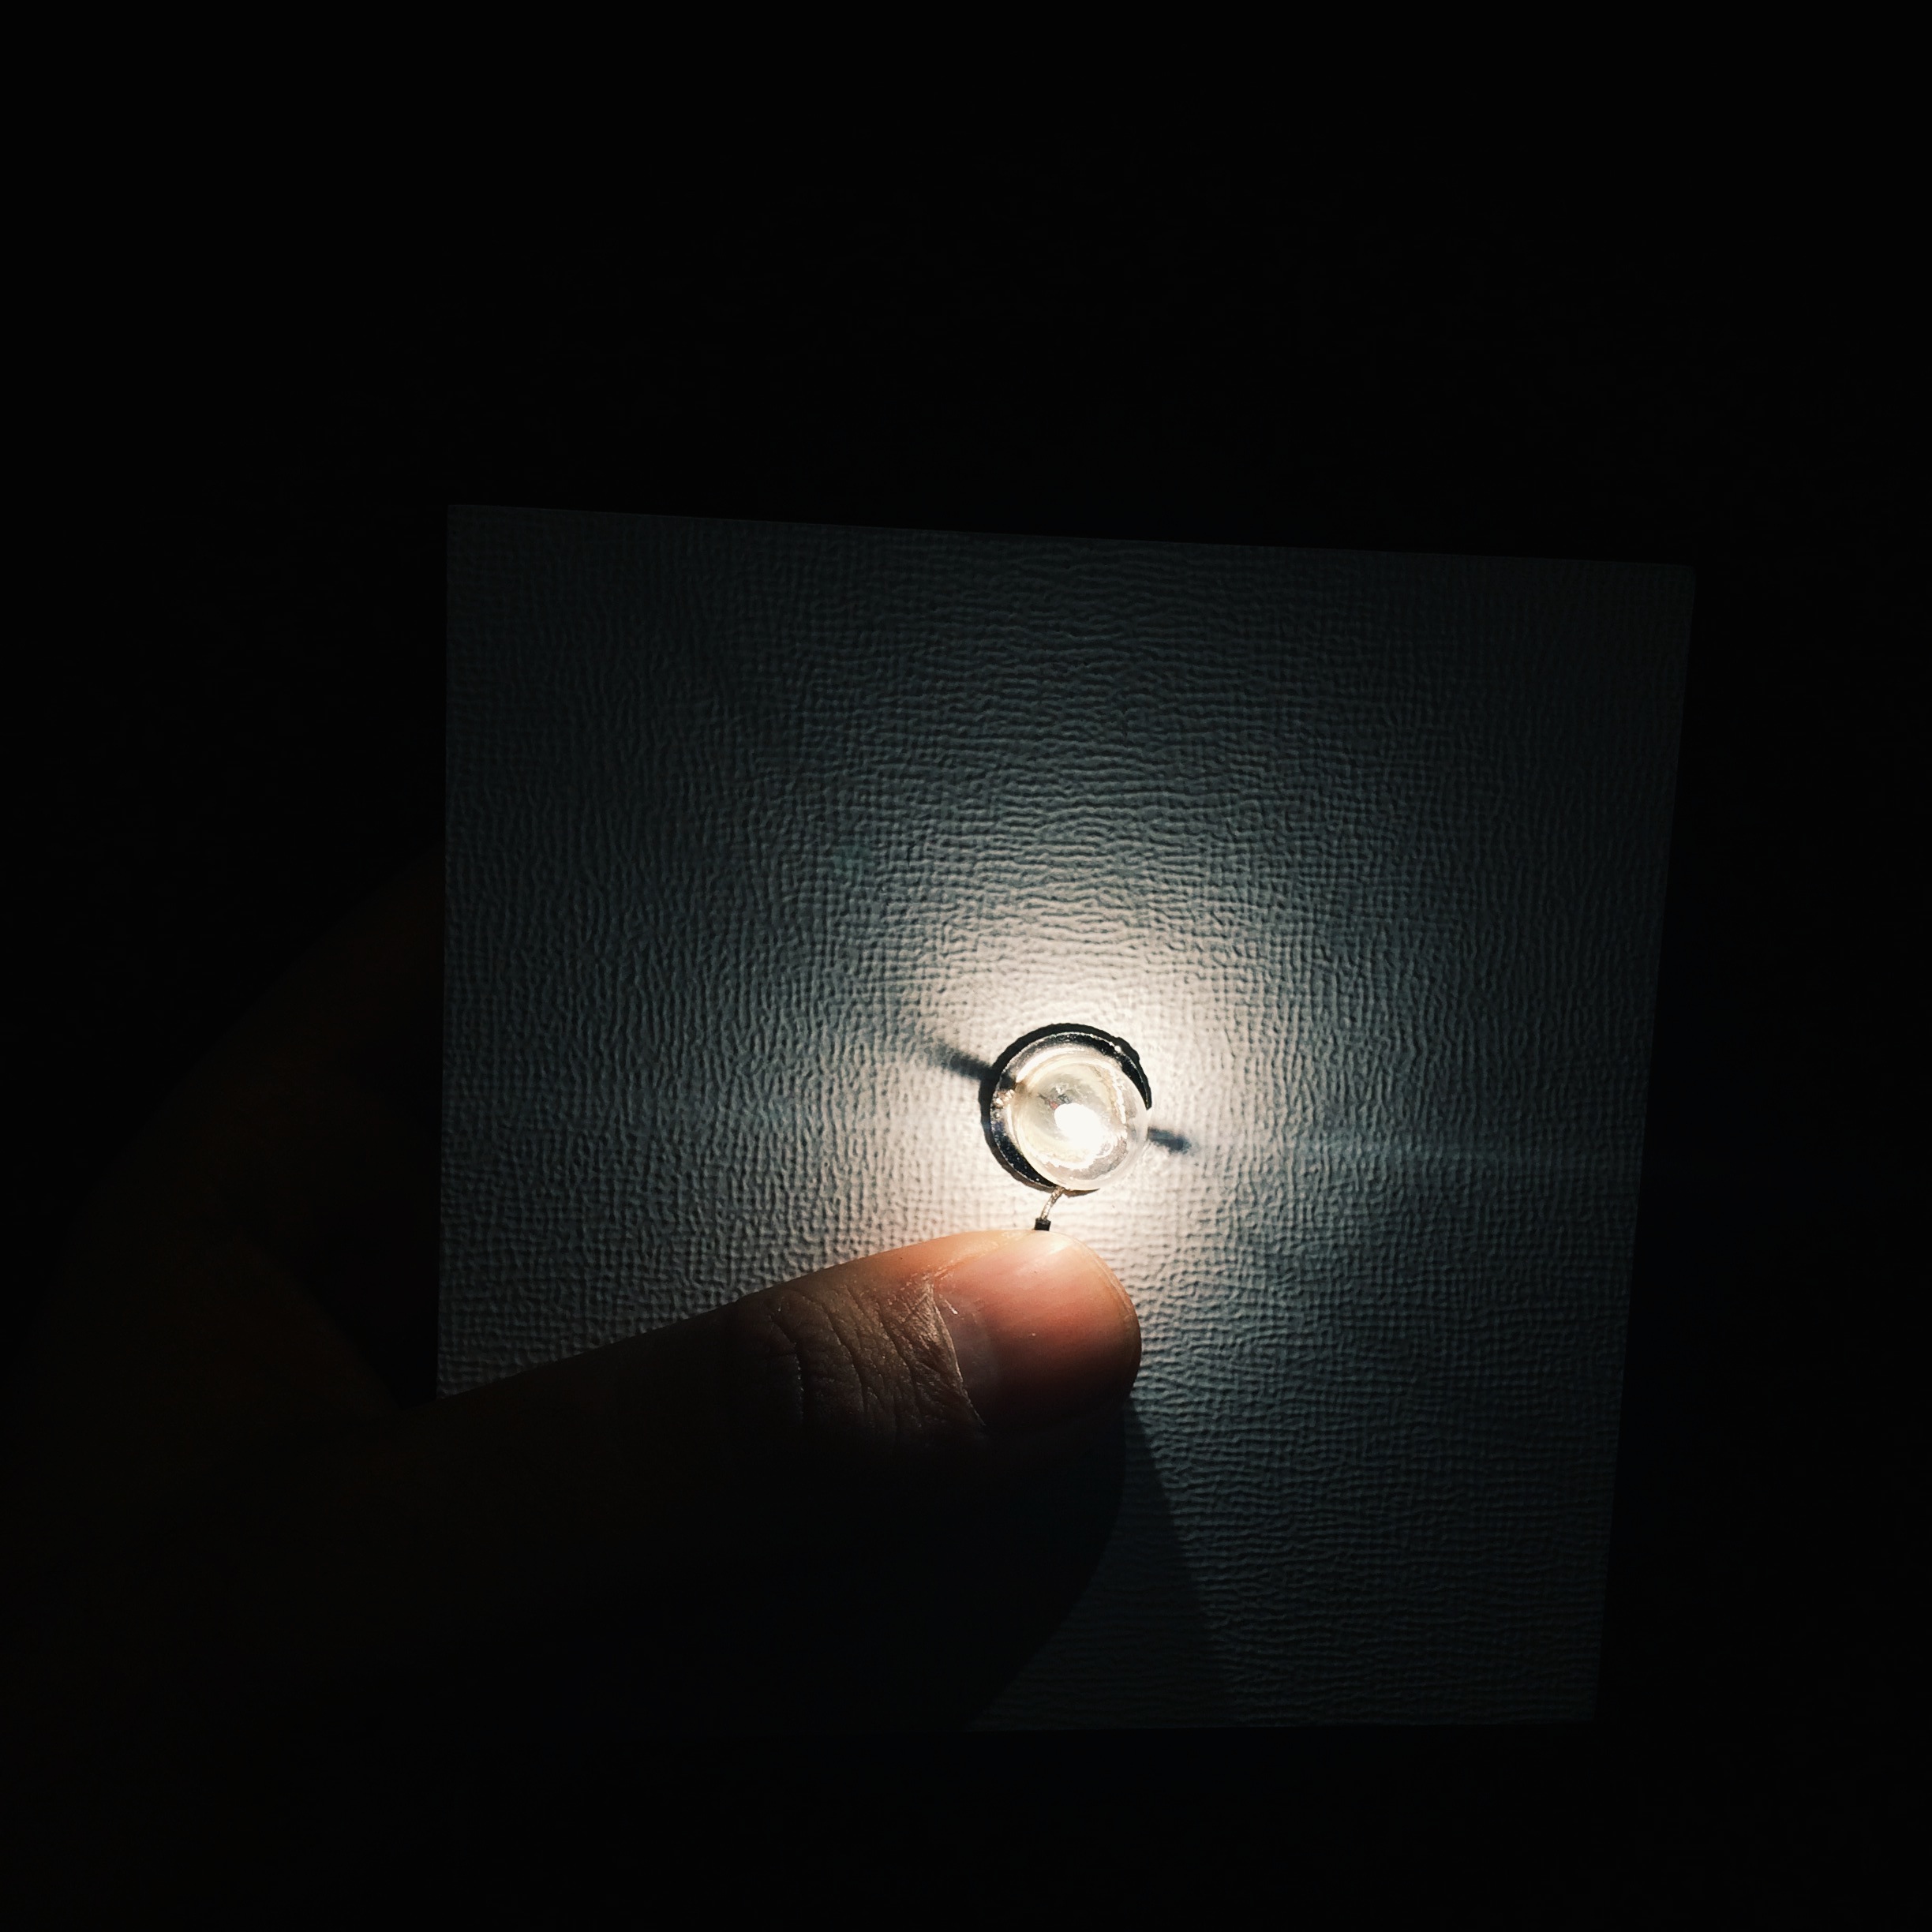


  • False Starts and Happy Endings: Making a pen holder

    False Starts and Happy Endings: Making a pen holder

    For my Intro to Fabrication class final, I was a bit lost. My first inclination is to do something that mimics the aesthetics of butterflies, but I wanted to do something functional instead. Making pretty things is cool, but making pretty things that have a function is even cooler.

    The first direction I explored is making a wooden phone case for my iPhone 5s.

    Case-Design-GuidelinesThe first thing I wanted to know about is the dimensions of said case. After a bit of googling, I found out that Apple has a publicly available document that has exact specifications of all its iDevices, as shown in the image above.

    After playing around with (found) 3D models, I ended up with a pretty basic sliced model of the iPhone case that I wanted to cut using cardboard to get a sense of.

    case-stacks

    After multiple failed runs, where the size was either too large or too small, the whole thing felt ugly and uninspired. I had to change direction, I felt.

    Processed with VSCOcam with f2 preset


    I started by playing around with basic shapes in Illustrator, as well as think about materials I want to work with. Acrylic is always my first choice, so no to that. Cardboard is great, but sort of rugged. I went to Staples and found the amazingness that is foam board. They come in all sort of beautiful colors, including a pleasant shade of muted gray as well as the blackest black possible.

    explore!

    The whole thing was an exercise in drawing modular, exchangeable shapes that are all based on the same basic shape. I felt better in this clean, simplified direction. By now I knew what I wanted to make: a penholder with an architectural appearance.

    After a bit more experimentation, I went ahead and laser-cut the shapes in my newly acquired foam board.

    Processed with VSCOcam with f2 preset

    The above was made using the gray foam board. I also used the black foam board for a more striking look.

    Processed with VSCOcam with f2 preset

    After trying different arrangements, I felt the below is best because it’s orderly, asymmetrical and proportional.

    Processed with VSCOcam with f2 preset


    After adding a bit of color, the below is the final assembled piece in all its functional (and nonfunctional) glory.

    Processed with VSCOcam with f2 preset

    Processed with VSCOcam with f2 preset

  • Slicing and Stacking

    Slicing and Stacking


    After a number of false starts, undelivered materials, and soul searching, I decided to use cardboard + vinyl as my material combination for this project. My self-defined challenge was to make it a 3D figure somehow out of those two materials.

    urn-3d

    I played around with 3d models to end up with a shape that is somewhere between a sphere and a cylinder. It seemed to fit the theme that I have recently been exploring of planes that are circular, but here with an additional dimension.

    I used a freely available piece of software called 123D Make that helped me transform the shape into slices that I could cut using a laser cutter.


    slices


    The circular pieces are made to stack. I wanted to make the whole thing a bit more interesting though.

    Processed with VSCOcam with f2 preset

    I decided to use transparent vinyl pieces with a basic pattern to be placed between some of the pieces, again, to play with color and light, as I did in a previous project.

    Processed with VSCOcam with f2 preset


    The below is one of the pieces after the first stage of the assembly + gluing.

    Processed with VSCOcam with f2 preset

    And after another iteration of stacking and gluing:

    Processed with VSCOcam with f2 preset


    And finally, after assembling the whole piece.

    Processed with VSCOcam with f2 preset

    Processed with VSCOcam with f2 preset

    Processed with VSCOcam with f2 preset


  • Making A (Fictional) Dashboard

    Making A (Fictional) Dashboard

    For this fabrication project, I decided to make an old dream come true by constructing some sort of a dashboard with buttons, knobs, and user interface details. The parameters of this project is a to build an enclosure with the needed components within and without. Since I am not sure what function I am looking for at the moment, I will design the inside of the enclosure as one that fits an arduino board + wires.

    “MOOD BOARD”

    To begin with, I started with collecting images that I like of real and fictional dashboards. I was after the retro look for some reason; it is much more aesthetically interesting than the usual hi-tech dashboards.

    moodboard

    More specifically, I found the clean, minimalist visual style of the below Intellivision II design the most attractive. Especially with all the sharp lines and the minimal color.

    moodboard1

    SKETCHING

    This project required an intensive sketching phase as there are many considerations for shape, measurements, and fixtures.

    Processed with VSCOcam with c2 preset

    The first goal at this stage were to find out what kind of “components” I was looking for, first in terms of shapes, then in terms of actual manifestations. For instance, I started with thinking that I want a keypad-like thing, which translated into a matrix of square LED-buttons that are sold in Sparkfun. Another component is a round UI element, which perfectly stands for a readily available knob. For some instances, I will probably have a filler component (in paper? acrylics? Don’t know yet), as with the idea of having an LCD-like component.

    Another important aspect is defining the shape of the enclosure, which is rectangular. In addition, the dimensions of each component chosen were used to come up with the dimensions of the enclosure. A good exercise was sketching the “net” design for the model as if it was made out of contagious paper pieces, to get a sense of it (and possibly prototype it). The net design can be seen on the lower part of the left page in the photo above.

    I did my best with the “fixtures” at this stage. I have no concrete idea about their dimensions as of yet, so I had to make do.

    COMPONENTS

    Next was the ordering of the components as was decided in the above step. I ordering the following components from SparkFun:

    order

    PLATE DESIGN

    I then used Illustrator to design the main plate, as well as two sub panels that will make up the dashboard and the surface of the enclosure. At this stage I have no concrete idea about the material, but regardless of that, this exercise helps tremendously in having the arrangement of the components on the surface to be rational and sound. A great resource for this stage was SparkFun’s product pages which had drawings of the components with measurements.

    panel-for-blog1

    panel-for-blog2

    PROGRESS

    Processed with VSCOcam with f2 preset

    The furthest I could reach in this project this week was to have both panels cut (one for the “LCD-like component” plus three switch buttons, and another for the 4×4 LED button matrix). I also have in place my enclosure (which is, again, a maple wooden canvas—it’s quickly becoming my favorite material), and a panel made of black-painted masonite (scratch) board.

    I don’t have any fixtures in place, but hope to get a few by the weekend.

  • Making A Coral-inspired Object

    Making A Coral-inspired Object

    As I have been heavily researching coral reefs as part of my Temporary Expert research project, I decided to make an object that incorporates the aesthetics of coral somehow.

    The parameter of the project in the context of the Intro to Fabrication class is to use the laser cutter. Design for a laser cutter is ideally vector-based, and heavy with either itching or cutouts. I decided to go with the latter, and to use acrylics as they provide enough color choices to allow for an interesting design.

    The idea I felt most attracted towards is to play with the overlay of coral-inspired patterns. To showcase that, the best approach is to have two or more parts, each with a different cutout design (or the same design but with a different scale and/or orientation), that are within one another. This allows for a mismatch of patterns that, I hope, will result in an interesting look.

    I decided that the design will be made of two cubes of different sizes, with one placed within another.

    Processed with VSCOcam with f2 preset

    In terms of the pattern design, as I previously mentioned, I wanted it to be coral-inspired. I collected suitable vector files, and ended up with choosing to work with the following group of images as a source.

    vectorstock_1361503

    Before proceeding with the acrylic process, I wanted to make sure of the interstingness of the concept of the pattern overlay. I have a vinyl cutter handy at home, so I decided to cut a paper-based design for verification.

    Processed with VSCOcam with b6 preset

    Processed with VSCOcam with m5 preset

    After a period of experimentation with various coral-like patterns, including a detour into stags (see image above), I opted to go with a less intricate pattern with holes of varying shapes and sizes. This is because they allow for far more interesting interaction of shapes.

    Screen Shot 2014-09-24 at 9.42.15 PM

    I’ve also opted to go with a circular design instead of the initial box design. Part of it is the time restrictions, another is the amount of acrylics I have for this project.

    The below are some of the pieces I cut to be used for the final design. They include colorful, transparent paper circles I cut using the vinyl cutter to be placed between the acrylic circles for visual effect.
    Processed with VSCOcam with f3 preset

    I ended up with two pieces, one where the predominant color is white, and another with yellow. The white one, before gluing, is on the top of this post.

    Processed with VSCOcam with f2 preset

  • Incandescence [Inspiring Object]

    Incandescence [Inspiring Object]

    A field trip was in order, and the destination was Lightning Plus, a lighting-related boutique that sells lamps, LEDs, bulbs, fixtures, and pretty much everything related to electronic light.

    I was to pick an inspiring object.

    I am very attracted to the shape of the original, incandescent light bulb. It is a timeless system of chemistry and physics: the wire filament enclosed within produces light when it is heated, and a gas is often contained within the glass shell of the bulb to protect the filament from breaking.

    The particular model above was made to evoke the nostalgic, steampunkish original appearance, specifically invoked by the spiral filament. The one below is a smaller, contemporary bulb and is just as charming.

    Processed with VSCOcam with g3 preset

  • Fabricating a “Flashlight”

    Fabricating a “Flashlight”

    My first project as part of the Intro to Fabrication course is to make an operating flashlight.

    My first step was to figure out what constitutes, electronically, a flashlight.

    Processed with VSCOcam with b2 preset

    Simply put, the simplest flashlight I can make is, a bulb or an LED, either two serially connected AA batteries, or  a single D battery (depending on the voltage requirement of the bulb), a switch mechanism, and the connecting wires.

    From there, I had to get the parts I needed. A shopping list was put together as seen in the right side of the image above. After a trip to Radio Shack and Home Depot, I distilled the needed components for the circuit portion of the flashlight as in the following photo.

    Processed with VSCOcam with m6 preset

    I chose to go with a bulb (in this case a 2.2V bulb) instead of an LED because I felt that it will be easier to handle, tape, etc., and because to me it is aesthetically much more pleasing.

    Processed with VSCOcam with f2 preset

    My next step was to “assemble” the circuit, which in my case meant to use electric tape generously to get to a stage where I can see some sort of lighting.

    Processed with VSCOcam with c2 preset

    It worked. I had to note that the bottom battery has to be sufficiently supported below to ensure that the wire touching it is in contact with the surface.

    My next steps were to design the enclosing body.

    However, Ben kindly directed me below to use some sort of a battery holder. I happened to have one in hand, and the “circuit” has been remade to accommodate it.

    battery-holder

    For the enclosure, I started by experimenting with my new found ability of drilling holes into wood. I just wanted to get a feel for it.

    hole

    Then I proceeded to measure the two holes I need to drill to: hold the bulb, and allow one of the wires to selectively switch the light on and off.

    I decided to use maple wood pieces sold as canvas boards in art supply stores. I opted to go with them because of their availability in different sizes (I am not yet confident enough to cut large wood pieces into smaller ones), as well as their smooth, occasionally painted finishing.

    artboards

    I used standard 3/8 and 1/8 drill bits to drill holes in a particular wood piece that was glued to smaller wood pieces at each edge to form a hollow cube.

    enclosure1

    I glued the battery holder on another piece of wood that had the same dimensions as the faces of the cube piece.

    batterys+wood

    I then taped the red wire generously to ensure that it touches the base of the bulb.

    assembly

    The below assembled flashlight (now more of a rustic table lamp, really. But it does fulfill the basic criteria for a flashlight, one can argue. It is portable, and is battery powered).

    Processed with VSCOcam with m6 preset

    The switch mechanism is very basic (non-existent really), but it does light up. so I’m grateful.

    Processed with VSCOcam with g3 preset